이 버전에는 잘못된 편집 사항이 있을 수 있습니다. 최신 확인된 스냅샷으로 전환하십시오.
필요한 것
-
이 단계는 번역되지 않았습니다. 번역을 도와주십시오
-
Turn over the device so that the bottom is facing up. Make sure the hinged side is facing you.
-
-
이 단계는 번역되지 않았습니다. 번역을 도와주십시오
-
Move the right switch towards the right until it clicks in place. You should then see the color red reveal from where the switch was originally.
-
-
이 단계는 번역되지 않았습니다. 번역을 도와주십시오
-
Take your free hand and place it on the battery. Gently slide it away from its slot.
-
-
-
이 단계는 번역되지 않았습니다. 번역을 도와주십시오
-
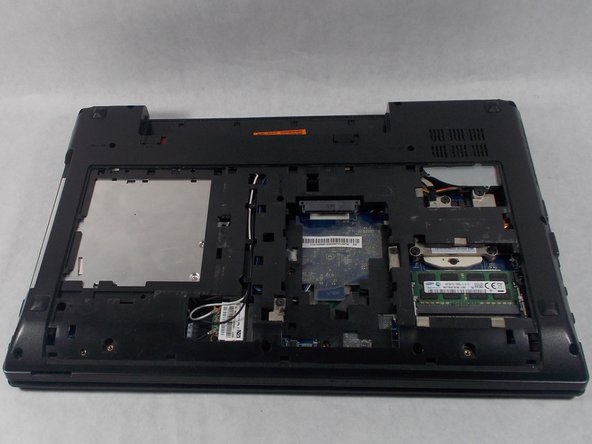
Rotate the laptop so that now the hinge is facing away from you.
-
Remove the two 2.5 x 4.0 mm Phillips #0 screws from the underside of the laptop.
-
Slide the bottom panel towards you until it stops, and then carefully lift it off.
-
-
이 단계는 번역되지 않았습니다. 번역을 도와주십시오
-
Remove the three 2.0 x 6.0 mm Phillips #0 screws located on the underside of the device.
-
-
이 단계는 번역되지 않았습니다. 번역을 도와주십시오
-
Turn the laptop right side up and open the lid.
-
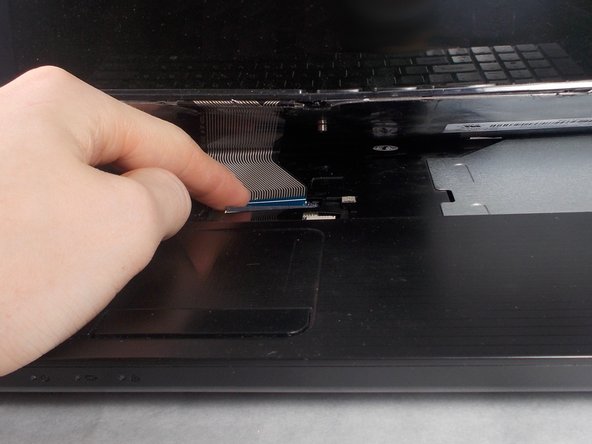
Using the spudger and your fingers, get in between the keyboard's edge and lift it up.
-
Carefully lift the keyboard ribbon cable out of the socket it is in.
-
-
이 단계는 번역되지 않았습니다. 번역을 도와주십시오
-
Remove the 2.5 x 6.0 mm Phillips #0 from the center of the device.
-
Close the laptop and place it face down once again.
-
-
이 단계는 번역되지 않았습니다. 번역을 도와주십시오
-
If a hard disk drive is installed, remove the two 2.5 x 4.0 mm Phillips #0 screws.
-
Slide the hard disk drive out of its socket.
-
-
이 단계는 번역되지 않았습니다. 번역을 도와주십시오
-
Remove the eleven 2.5 x 6.0 mm Phillips #0 screws.
-
Remove the three 2.0 x 3.0 mm flat head screws.
-
Remove the 2.5 x 4.0 mm Phillips #0 screw.
-
-
이 단계는 번역되지 않았습니다. 번역을 도와주십시오
-
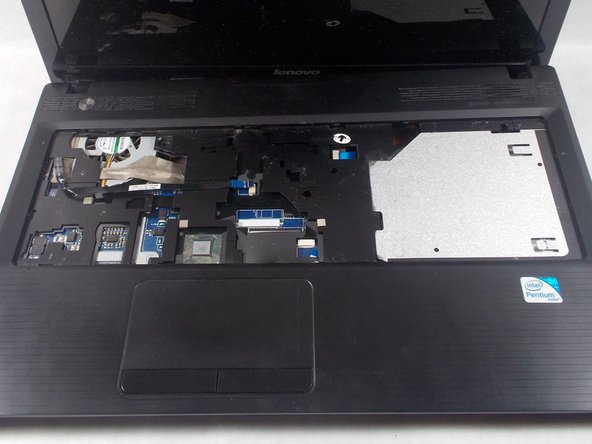
Turn the laptop right side up and open the lid.
-
Disconnect the two ribbon cables from the center.
-
Lift the keyboard bezel (with trackpad) straight up and out.
-


팀

UMass Dartmouth, Team S5-G2, Peak Spring 2018 UMass Dartmouth, Team S5-G2, Peak Spring 2018 회원
UMASSD-PEAK-S18S5G2
2 회원들
안내서 5개 작성하였습니다