소개
Use this guide to replace the charging port in the Lenovo IdeaPad S340-15 IWL laptop.
Failure to charge may indicate a faulty or obscured charge port. Make sure to look at the troubleshooting guide before continuing with replacement as inadequate power settings, broken or obstructed charging ports, or a defective charger may be the culprit and are easy and affordable fixes.
Make sure to keep any food or liquid away from the computer during the replacement process as the computer’s internal components will be exposed. If the battery appears swollen, follow the appropriate steps to handle and dispose of it properly.
필요한 것
-
-
Power off the laptop and place it face-down on a non-scratching surface.
-
Using a Torx T5 screwdriver head, remove all ten 6 mm screws holding the back panel in place.
-
-
-
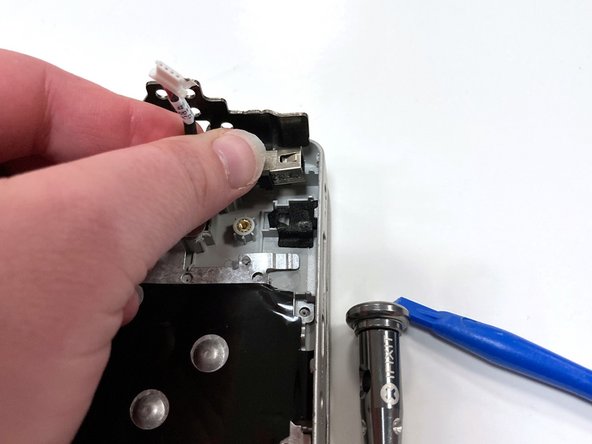
Disconnect the battery cable by gently pulling it straight out of the connector.
-
-


To reassemble your device, follow these instructions in reverse order.
To reassemble your device, follow these instructions in reverse order.
다른 2명이 해당 안내서를 완성하였습니다.


댓글 2개
Perhaps take this with a grain of salt since I’m not a laptop repair expert, I have only fixed my own laptop and phone when their screens have broken (but I was successful, if that makes a difference).
I just performed a charging port replacement on my Lenovo IdeaPad S340-15IWL today, and referred to these instructions a little. However, I believe these instructions can be greatly shortened, which saves time and eliminates unnecessary risk (assuming I’m actually correct about this). I found that the only steps I had to take to replace my charging port (and its cord) were to open up the back of the laptop (your steps 1 & 2), unplug the battery (rather than remove it entirely), flip up the hinge overtop of the charging port (step 21), unplug the charging port (step 23), and take out the charging port and its cord (step 25). I didn’t do any of the other steps, and so far my laptop is still alive and it charges! Knock on wood. I hid the extra cord underneath the motherboard w/o removing the motherboard. But, great photos!!!
I followed the latest version of the guide and was able to replace the charging cable without much trouble. As adonahoe pointed out, only 6 steps are needed to replace the cable, and the 6 steps in their comment / the updated guide seem to work just fine. The steps to replace the power cable in a Flex 4-1580 Laptop (Type 80VE) are very similar to those for the laptop listed in this guide.