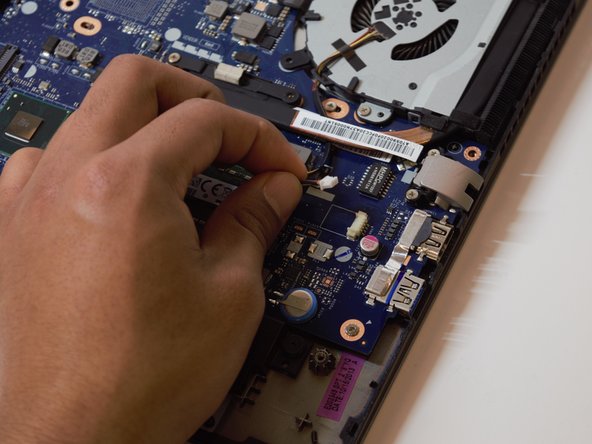
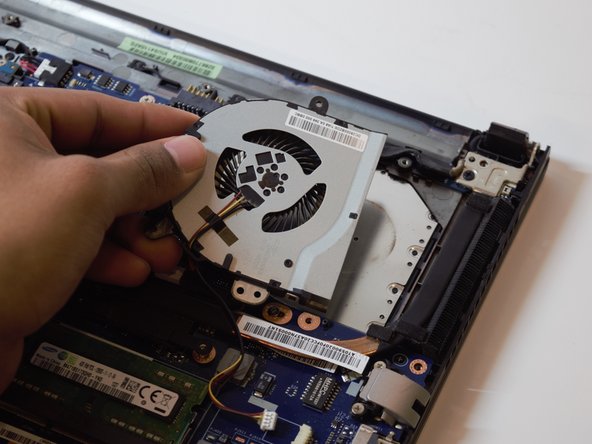
주요 콘텐츠로 건너뛰기

Lenovo IdeaPad S400 Touch Fan Replacement

필요한 것

  1. Lenovo IdeaPad S400 Touch Fan Replacement, Battery: 1 단계, 이미지 1/3 Lenovo IdeaPad S400 Touch Fan Replacement, Battery: 1 단계, 이미지 2/3 Lenovo IdeaPad S400 Touch Fan Replacement, Battery: 1 단계, 이미지 3/3
    • Turn your computer over so the back is face up.

    • Use your forefinger to unlock the two tabs located on the back. Slide the tabs until you see the red showing.

    • The battery cover will then pop up allowing you access to the battery.

  2. Lenovo IdeaPad S400 Touch Fan Replacement, Fan: 2 단계, 이미지 1/3 Lenovo IdeaPad S400 Touch Fan Replacement, Fan: 2 단계, 이미지 2/3 Lenovo IdeaPad S400 Touch Fan Replacement, Fan: 2 단계, 이미지 3/3
    • Remove the five 6mm Phillips #0 screws from the back panel.

    • Pull back the rubber tabs from the corners of the laptop backing to expose the screws.

    • The two tabs next to the battery flip toward the battery. The two remaining tabs flip down, away from the battery.

    • Remove the four 4mm Phillips #0 screws that are underneath the rubber tabs.

    • Remove the three 6mm Phillips #0 screws from under the battery.

  3. Lenovo IdeaPad S400 Touch Fan Replacement: 3 단계, 이미지 1/1
    • Slide the back panel away to remove it.

    • Don't be afraid to apply force when removing the back panel.

  4. Lenovo IdeaPad S400 Touch Fan Replacement: 4 단계, 이미지 1/1
    • Remove the two 5mm Phillips #0 screws holding the fan down.

  5. Lenovo IdeaPad S400 Touch Fan Replacement: 5 단계, 이미지 1/2 Lenovo IdeaPad S400 Touch Fan Replacement: 5 단계, 이미지 2/2
    • Unplug the fan's power supply cord.

  6. Lenovo IdeaPad S400 Touch Fan Replacement: 6 단계, 이미지 1/1
    • Pull the fan out.

결론

To reassemble your device, follow these instructions in reverse order.

다른 한 분이 해당 안내서를 완성하였습니다.

Max Hoyle

회원 가입일: 02/12/19

529 평판

안내서 5개 작성하였습니다

댓글 0개

댓글 쓰기

조회 통계:

24 시간 전: 0

7일 전: 0

30일 전: 2

전체 시간: 425