주요 콘텐츠로 건너뛰기

Lenovo IdeaPad U350 Keyboard Replacement

필요한 것

  1. Lenovo IdeaPad U350 Keyboard Replacement, Battery: 1 단계, 이미지 1/1
    • Locate the battery by turning the laptop over.

  2. Lenovo IdeaPad U350 Keyboard Replacement: 2 단계, 이미지 1/3 Lenovo IdeaPad U350 Keyboard Replacement: 2 단계, 이미지 2/3 Lenovo IdeaPad U350 Keyboard Replacement: 2 단계, 이미지 3/3
    • Locate the lock switch and slide toward the outside edge of the laptop until it clicks into place and the battery unit pops up.

    • Remove the battery unit from the laptop and set it aside.

  3. Lenovo IdeaPad U350 Keyboard Replacement, Keyboard: 3 단계, 이미지 1/1
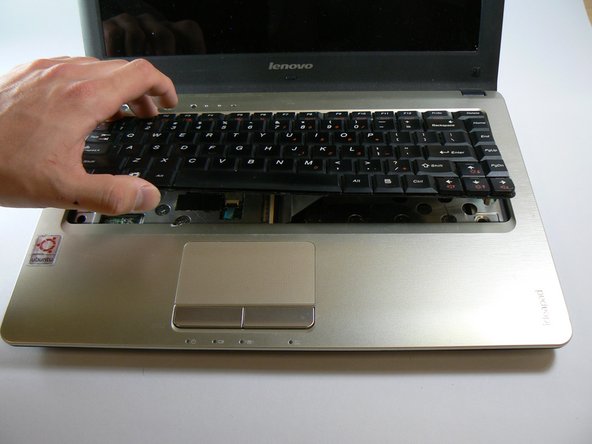
    • Unscrew the three screws on the bottom of the laptop that have small keyboard logos next to them using a PH1 screwdriver. These screws are 5.8mm long.

  4. Lenovo IdeaPad U350 Keyboard Replacement: 4 단계, 이미지 1/2 Lenovo IdeaPad U350 Keyboard Replacement: 4 단계, 이미지 2/2
    • Flip the computer over and open the screen.

    • Use a spudger to carefully press in the clip that is found here while prying the keyboard upward from the same side.

    • This clip is very stiff and also made of thin, brittle plastic. This means that it is easy to break off, which is what we did during our disassembly.

  5. Lenovo IdeaPad U350 Keyboard Replacement: 5 단계, 이미지 1/1
    • Slightly lift the bottom of the keyboard towards the screen to locate the keyboard's ribbon cable.

    • Use the tip of the spudger to lift the black retaining flap on the ZIF connector.

    • You should now be able to lift out the keyboard easily.

결론

To reassemble your device, follow these instructions in reverse order.

다른 한 분이 해당 안내서를 완성하였습니다.

Jason Sweeney

회원 가입일: 09/22/14

825 평판

안내서 2개 작성하였습니다

USF Tampa, Team 1-4, Hickman Fall 2014 USF Tampa, Team 1-4, Hickman Fall 2014 회원

USFT-HICKMAN-F14S1G4

3 회원들

안내서 5개 작성하였습니다

댓글 0개

댓글 쓰기

조회 통계:

24 시간 전: 0

7일 전: 0

30일 전: 0

전체 시간: 1,720