필요한 것
-
-
Power off your computer before you begin.
-
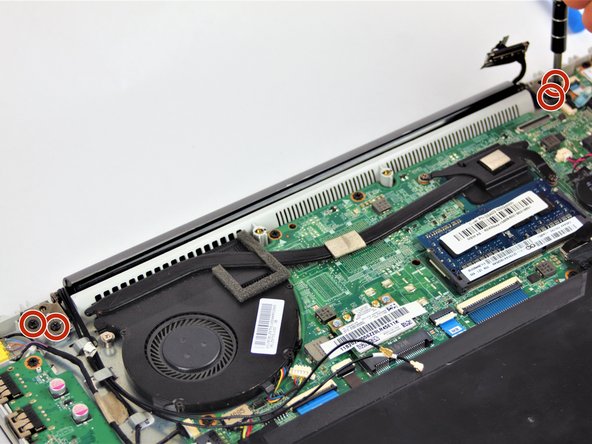
Find and remove the 10 Phillips style body screws on the bottom of the laptop case.
-
-
-
-
Use fingers to remove the bundled cable connector for the front facing camera.
It's actually the smaller connector that's closer to the fan that needs to be removed
-
-
-
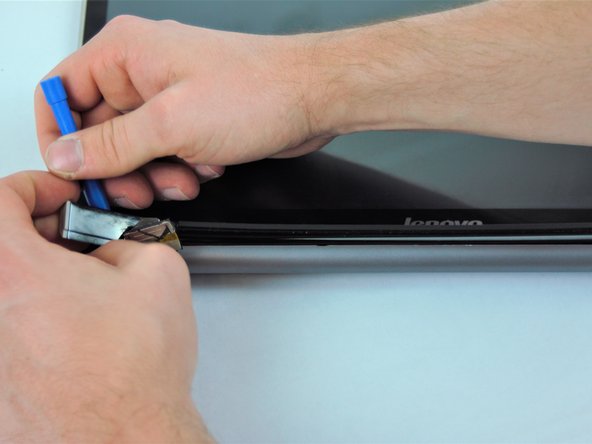
Using the plastic opening tool and the plastic spudger, work your way around the screen to release it from the case.
SUGGESTION: slide down the lcd screen towards the screw holes. You will be free to remove the screen after sliding it down 4-5 mm.
If you don’t slide the screen you’ll probably crack it while trying to remove.
www.htfitalia.it
-


To reassemble your device, follow these instructions in reverse order.
To reassemble your device, follow these instructions in reverse order.
다른 4명이 해당 안내서를 완성하였습니다.
팀

USF Tampa, Team S2-G6, Nance Spring 2017 USF Tampa, Team S2-G6, Nance Spring 2017 회원
USFT-NANCE-S17S2G6
3 회원들
안내서 15개 작성하였습니다
댓글 2개
I found this guide very helpful and was able to remove an old cover with a damaged hinge attachment and replace it with a new one.
When I started the laptop back up and tested it, however, the computer couldn’t find the camera. I followed the advice for troubleshooting the camera, including ‘Scan for hardware changes,’ but it the camera still doesn’t show up in Device Manager.
I hasten to say yes, I DID plug the new camera into the connector on the computer.
Interestingly enough, when I plug the old camera into the connector, the computer finds the camera and it works just fine!
Has anyone else run into this problem? If so, is there a fix for it?
If you get a new cover, it probably will not have the camera and microphone array assembly, though it probably will have the cable for it. The camera assembly is at the top of the cover and is held on with a light adhesive. You will have to unplug it and carefully pry it up, then install it the same way in the new cover.