주요 콘텐츠로 건너뛰기

Lenovo IdeaPad U430 Touch Trackpad Replacement

필요한 것

  1. Lenovo IdeaPad U430 Touch Trackpad Replacement, Bottom Cover: 1 단계, 이미지 1/1
    • Power off your computer before you begin.

    • Find and remove the 10 Phillips style body screws on the bottom of the laptop case.

    • Remove 2 screws, 1 located on the left hinge cover and one located on the right hinge cover.

  2. Lenovo IdeaPad U430 Touch Trackpad Replacement: 3 단계, 이미지 1/2 Lenovo IdeaPad U430 Touch Trackpad Replacement: 3 단계, 이미지 2/2
    • Starting from the front, use a plastic opening tool to separate the bottom of the case from the body of the laptop.

  3. Lenovo IdeaPad U430 Touch Trackpad Replacement, Battery: 4 단계, 이미지 1/2 Lenovo IdeaPad U430 Touch Trackpad Replacement, Battery: 4 단계, 이미지 2/2
    • Remove the five 2.8 mm #1 Phillips head screws that hold down the battery pack.

  4. Lenovo IdeaPad U430 Touch Trackpad Replacement: 5 단계, 이미지 1/2 Lenovo IdeaPad U430 Touch Trackpad Replacement: 5 단계, 이미지 2/2
    • Using a combination of plastic opening tool and spudger, press in on the clips on the sides of the battery connector and push the connector out

    • When you get the connector out far enough, grab behind the connector tabs with tweezers and wiggle the connector the rest of the way out.

    • The battery connector is very tight fitting, you may need to use a metal spudger in order to get the connector out far enough.

  5. Lenovo IdeaPad U430 Touch Trackpad Replacement: 6 단계, 이미지 1/2 Lenovo IdeaPad U430 Touch Trackpad Replacement: 6 단계, 이미지 2/2
    • Once the battery is disconnected, lift up on the front of the battery and remove it from the laptop body.

  6. Lenovo IdeaPad U430 Touch Trackpad Replacement, Trackpad: 7 단계, 이미지 1/2 Lenovo IdeaPad U430 Touch Trackpad Replacement, Trackpad: 7 단계, 이미지 2/2
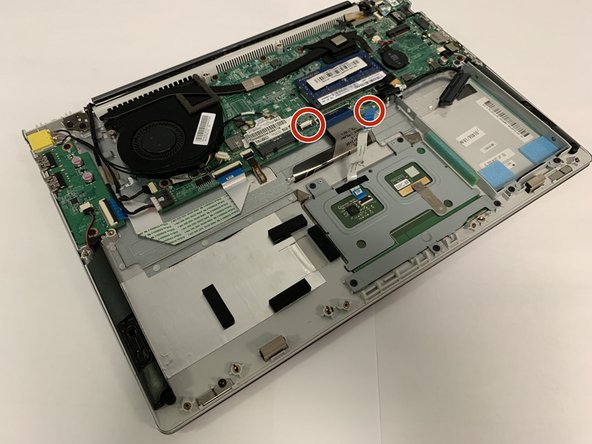
    • Remove the two 2.8 mm screws attached to the trackpad using the Phillips #1 screwdriver.

    • Detach the zif ribbon labeled "TP" and "MB" at the "MB" end.

  7. Lenovo IdeaPad U430 Touch Trackpad Replacement: 8 단계, 이미지 1/1
    • Grasping one of the screw brackets, gently lift the trackpad out of its frame.

결론

To reassemble your device, follow these instructions in reverse order.

Chris Dennis

회원 가입일: 02/20/20

190 평판

안내서 2개 작성하였습니다

댓글 0개

댓글 쓰기

조회 통계:

24 시간 전: 2

7일 전: 3

30일 전: 5

전체 시간: 292