주요 콘텐츠로 건너뛰기

Lenovo IdeaPad Y400 Motherboard Replacement

필요한 것

  1. Lenovo IdeaPad Y400 Motherboard Replacement, Battery: 1 단계, 이미지 1/3 Lenovo IdeaPad Y400 Motherboard Replacement, Battery: 1 단계, 이미지 2/3 Lenovo IdeaPad Y400 Motherboard Replacement, Battery: 1 단계, 이미지 3/3
    • Make sure the laptop is upside down, then turn the laptop so that the battery is facing you. Now that the battery is facing you, there will be two locks, one on the left and one on the right.

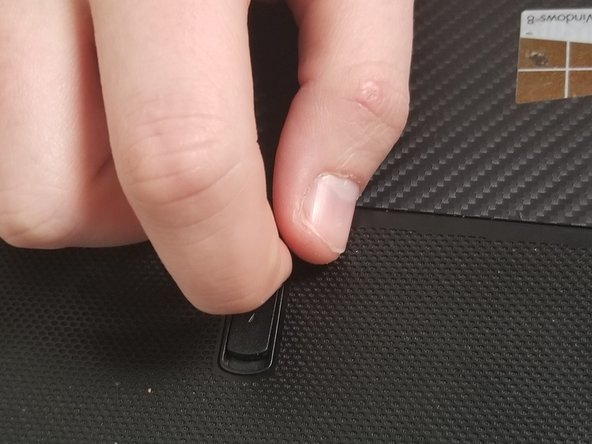
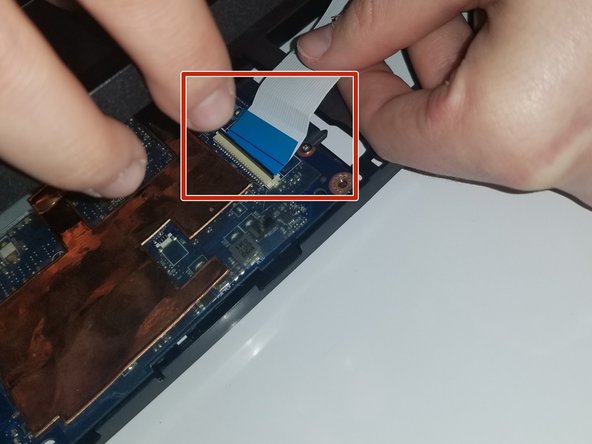
    • Slide the lock to the right until you can hear a "click". Once you hear this click, you should be able to see the color red.

  2. Lenovo IdeaPad Y400 Motherboard Replacement: 2 단계, 이미지 1/2 Lenovo IdeaPad Y400 Motherboard Replacement: 2 단계, 이미지 2/2
    • Unlike the first lock, the left lock does not stay in place. You will need to hold it in place as you take the battery out.

    • Slide the second (left) lock to the left and hold it there.

  3. Lenovo IdeaPad Y400 Motherboard Replacement: 3 단계, 이미지 1/1
    • Gently pull the battery out.

  4. Lenovo IdeaPad Y400 Motherboard Replacement, Back Panel: 4 단계, 이미지 1/1
    • Remove the eight 9mm screws with a Phillips #0 screwdriver.

  5. Lenovo IdeaPad Y400 Motherboard Replacement: 5 단계, 이미지 1/3 Lenovo IdeaPad Y400 Motherboard Replacement: 5 단계, 이미지 2/3 Lenovo IdeaPad Y400 Motherboard Replacement: 5 단계, 이미지 3/3
    • Use the plastic opening tool to remove the back panel from the device.

    • Do not force the back off, as you may break the clips keeping it down.

  6. Lenovo IdeaPad Y400 Motherboard Replacement, Optical Drive: 6 단계, 이미지 1/2 Lenovo IdeaPad Y400 Motherboard Replacement, Optical Drive: 6 단계, 이미지 2/2
    • Move the lock down until you see red and hear a slight click.

  7. Lenovo IdeaPad Y400 Motherboard Replacement: 7 단계, 이미지 1/3 Lenovo IdeaPad Y400 Motherboard Replacement: 7 단계, 이미지 2/3 Lenovo IdeaPad Y400 Motherboard Replacement: 7 단계, 이미지 3/3
    • Hold this lock down while removing the optical drive.

  8. Lenovo IdeaPad Y400 Motherboard Replacement, Motherboard: 8 단계, 이미지 1/1
    • Unscrew the screws using a Phillips #0 screwdriver.

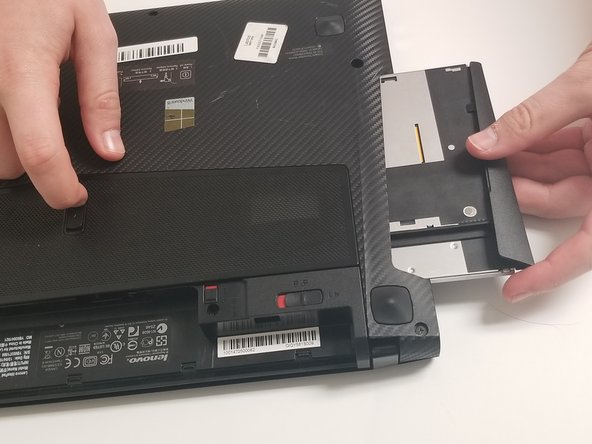
    • Unplug the wireless adapter to fully remove the motherboard.

    • If you don't want to break any of the parts you might want to take out the RAM, SSD, and the Hard Drive.

    • Screw sizes will be 4mm and 9mm

  9. Lenovo IdeaPad Y400 Motherboard Replacement: 9 단계, 이미지 1/3 Lenovo IdeaPad Y400 Motherboard Replacement: 9 단계, 이미지 2/3 Lenovo IdeaPad Y400 Motherboard Replacement: 9 단계, 이미지 3/3
    • Use the plastic opening tool to take off the front panel.

    • Unplug the blue wire to remove the front panel.

  10. Lenovo IdeaPad Y400 Motherboard Replacement: 10 단계, 이미지 1/1
    • Fully remove the front panel.

    • Unscrew the 9mm and 4mm screws (there is one of each screw).

  11. Lenovo IdeaPad Y400 Motherboard Replacement: 11 단계, 이미지 1/2 Lenovo IdeaPad Y400 Motherboard Replacement: 11 단계, 이미지 2/2
    • After unscrewing the screws, remove the motherboard.

결론

To reassemble your device, follow these instructions in reverse order.

다른 한 분이 해당 안내서를 완성하였습니다.

Rachel Simmons

회원 가입일: 09/26/18

603 평판

안내서 6개 작성하였습니다

댓글 0개

댓글 쓰기

조회 통계:

24 시간 전: 0

7일 전: 0

30일 전: 5

전체 시간: 757