주요 콘텐츠로 건너뛰기

Lenovo IdeaPad Y410p Hard Drive Replacement

필요한 것

  1. Lenovo IdeaPad Y410p Hard Drive Replacement, Battery: 1 단계, 이미지 1/1
    • Turn off your laptop before starting.

    • Flip the laptop over so the model stickers are facing up.

  2. Lenovo IdeaPad Y410p Hard Drive Replacement: 2 단계, 이미지 1/2 Lenovo IdeaPad Y410p Hard Drive Replacement: 2 단계, 이미지 2/2
    • Slide the left battery lock to the unlock position and release.

    • Slide the right battery lock to the unlock positon and hold it in place.

  3. Lenovo IdeaPad Y410p Hard Drive Replacement: 3 단계, 이미지 1/2 Lenovo IdeaPad Y410p Hard Drive Replacement: 3 단계, 이미지 2/2
    • While holding the right battery lock in the unlock position, slide the battery carefully out of the laptop and set it aside.

  4. Lenovo IdeaPad Y410p Hard Drive Replacement, Hard Drive: 4 단계, 이미지 1/3 Lenovo IdeaPad Y410p Hard Drive Replacement, Hard Drive: 4 단계, 이미지 2/3 Lenovo IdeaPad Y410p Hard Drive Replacement, Hard Drive: 4 단계, 이미지 3/3
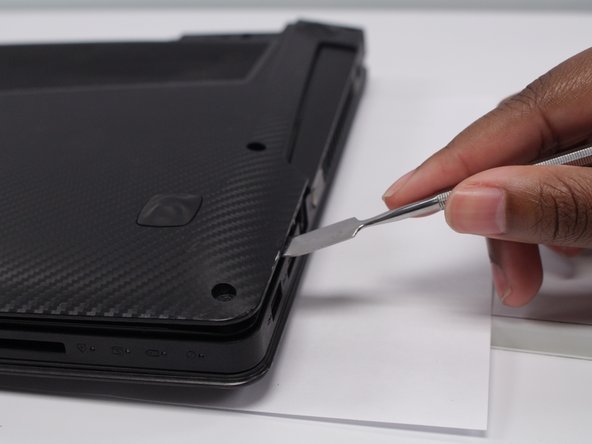
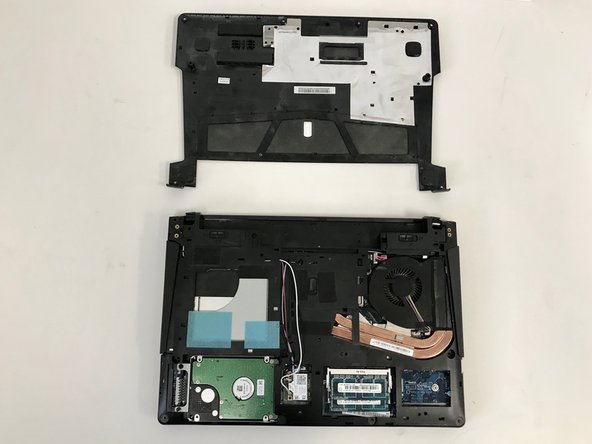
    • Using the Phillips #0 screwdriver, remove the eight 8mm screws that fasten the bottom cover.

    • Lift bottom cover off using a metal spudger and set it aside.

  5. Lenovo IdeaPad Y410p Hard Drive Replacement: 5 단계, 이미지 1/3 Lenovo IdeaPad Y410p Hard Drive Replacement: 5 단계, 이미지 2/3 Lenovo IdeaPad Y410p Hard Drive Replacement: 5 단계, 이미지 3/3
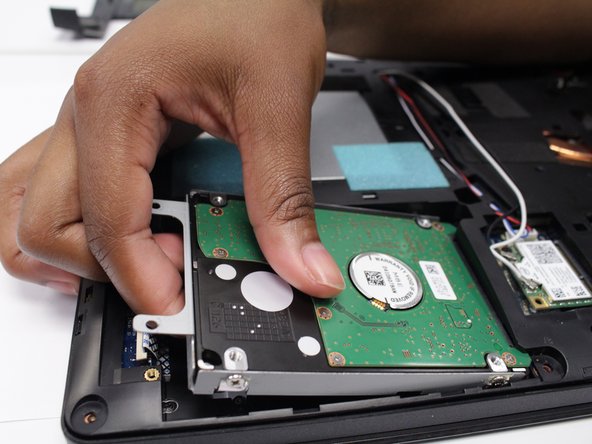
    • If you intend to reuse this hard drive, be careful removing it as hard impacts may damage the device.

    • Using the Phillips #0 screwdriver, remove the two 3mm screws at the end of the hard drive bracket.

    • Slide the hard drive out of its seat.

결론

To reassemble your device, follow these instructions in reverse order.

Nick Torres

회원 가입일: 09/18/18

580 평판

안내서 5개 작성하였습니다

University of North Texas, Team S3-G6, Raign Fall 2018 University of North Texas, Team S3-G6, Raign Fall 2018 회원

UNT-RAIGN-F18S3G6

4 회원들

안내서 5개 작성하였습니다

댓글 0개

댓글 쓰기

조회 통계:

24 시간 전: 0

7일 전: 1

30일 전: 9

전체 시간: 702