주요 콘텐츠로 건너뛰기

Lenovo IdeaPad Yoga 13 Wi-Fi Card Replacement

보관된 가이드
해당 안내서는 단지 역사적인 목적으로 보관됩니다. 최신 버전 안내서를 사용하여 수리 하십시오.

필요한 것

  1. Lenovo IdeaPad Yoga 13 Wi-Fi Card Replacement, Wi-Fi Card: 1 단계, 이미지 1/1
    • Remove the ten screws on the back panel of the laptop using the T4 Torx screwdriver.

    • Remove the back panel from the device.

  2. Lenovo IdeaPad Yoga 13 Wi-Fi Card Replacement: 2 단계, 이미지 1/2 Lenovo IdeaPad Yoga 13 Wi-Fi Card Replacement: 2 단계, 이미지 2/2
    • Use blue the opening tool to gently further separate the keyboard bezel.

    • Carefully apply pressure to the keyboard. It should easily pop out.

  3. Lenovo IdeaPad Yoga 13 Wi-Fi Card Replacement: 3 단계, 이미지 1/1
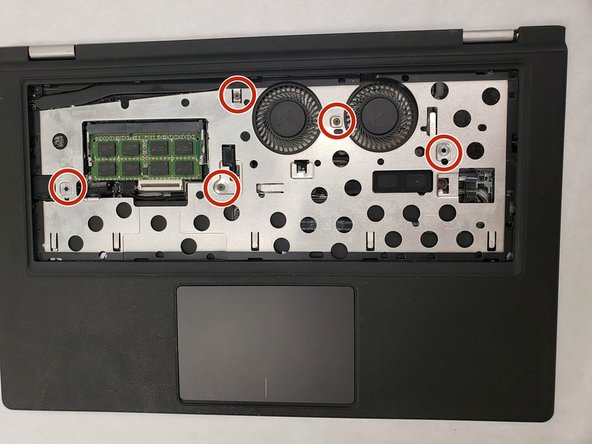
    • To remove the keyboard bezel (black cover containing the mouse pad) remove the five screws using the Phillips #0 screwdriver.

  4. Lenovo IdeaPad Yoga 13 Wi-Fi Card Replacement: 4 단계, 이미지 1/2 Lenovo IdeaPad Yoga 13 Wi-Fi Card Replacement: 4 단계, 이미지 2/2
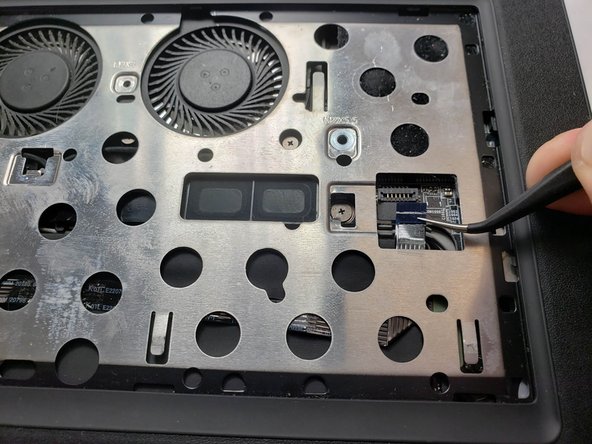
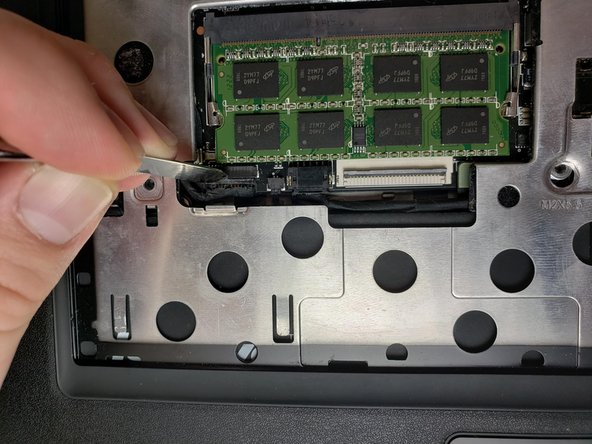
    • Unplug the connections from motherboard, including the mouse and keyboard connections.

  5. Lenovo IdeaPad Yoga 13 Wi-Fi Card Replacement: 5 단계, 이미지 1/1
    • Remove the outer bezel to reveal the entire internal layout of the computer.

  6. Lenovo IdeaPad Yoga 13 Wi-Fi Card Replacement: 6 단계, 이미지 1/2 Lenovo IdeaPad Yoga 13 Wi-Fi Card Replacement: 6 단계, 이미지 2/2
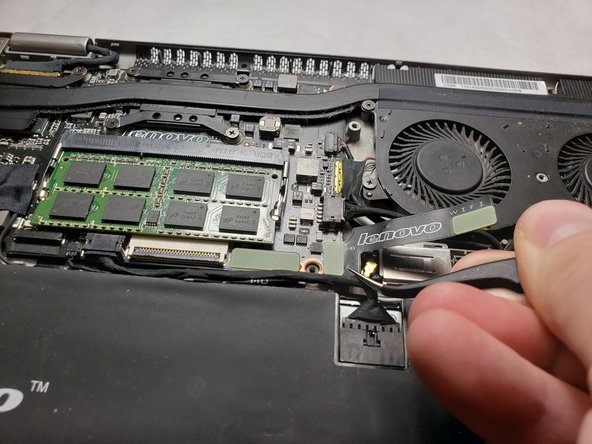
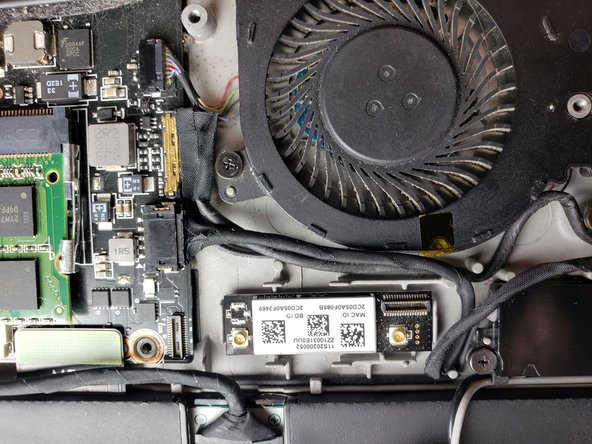
    • Remove the ribbon cable covering the card by disconnecting the two connection points on either side.

  7. Lenovo IdeaPad Yoga 13 Wi-Fi Card Replacement: 7 단계, 이미지 1/3 Lenovo IdeaPad Yoga 13 Wi-Fi Card Replacement: 7 단계, 이미지 2/3 Lenovo IdeaPad Yoga 13 Wi-Fi Card Replacement: 7 단계, 이미지 3/3
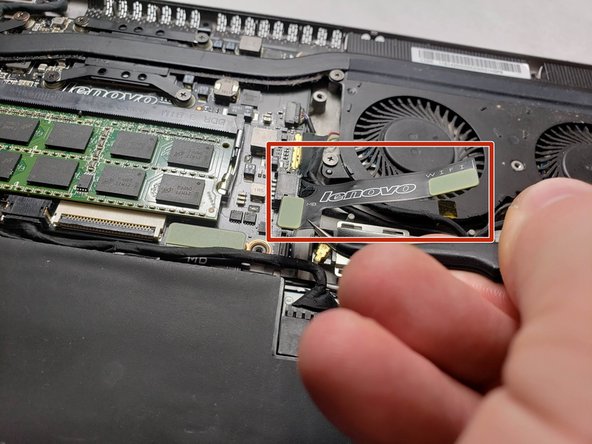
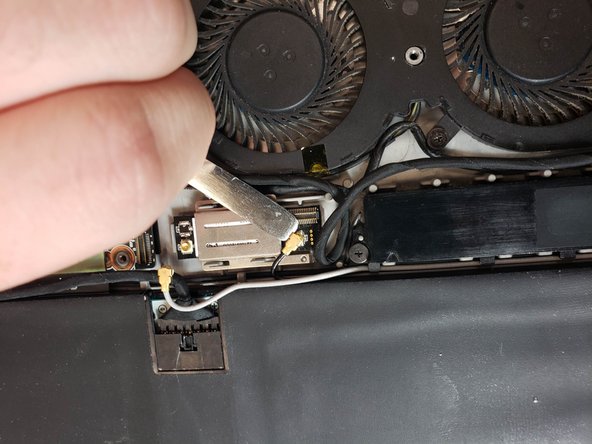
    • Disconnect the white and black antenna cables.

  8. Lenovo IdeaPad Yoga 13 Wi-Fi Card Replacement: 8 단계, 이미지 1/1
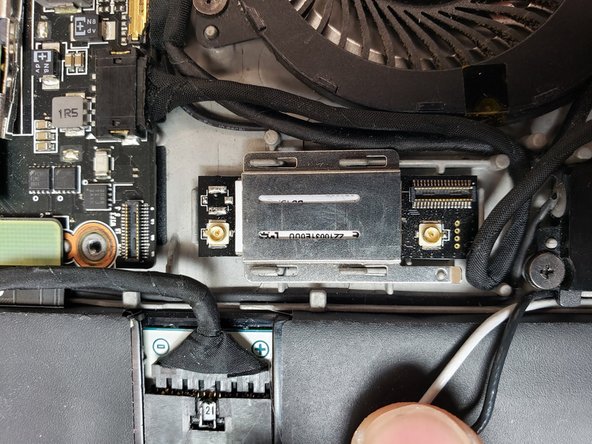
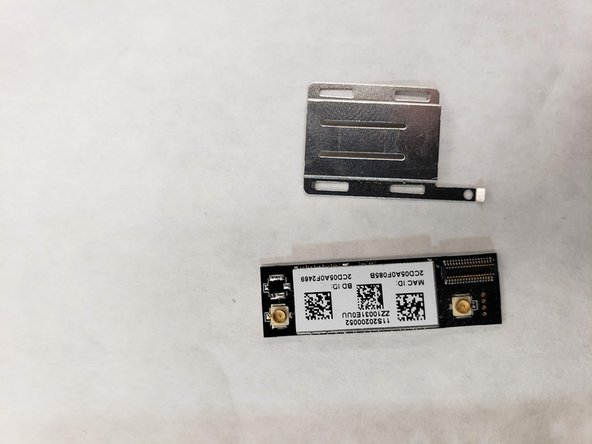
    • Lift up the bottom right lever on the WiFi card metal bracket.

    • Slide the bracket to the left to disconnect it from the 4 plastic legs holding it down.

  9. Lenovo IdeaPad Yoga 13 Wi-Fi Card Replacement: 9 단계, 이미지 1/2 Lenovo IdeaPad Yoga 13 Wi-Fi Card Replacement: 9 단계, 이미지 2/2
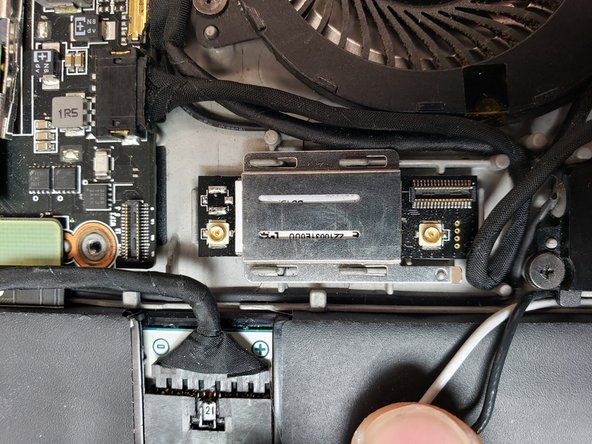
    • Lift and remove the card.

결론

To reassemble your device, follow these instructions in reverse order.

Hashim Adel Jaber

회원 가입일: 04/01/19

169 평판

안내서 1개 작성함

IUPUI, Team S1-G2, Harley Spring 2019 IUPUI, Team S1-G2, Harley Spring 2019 회원

IUPUI-HARLEY-S19S1G2

3 회원들

안내서 2개 작성하였습니다

댓글 0개

댓글 쓰기

조회 통계:

24 시간 전: 0

7일 전: 1

30일 전: 1

전체 시간: 47