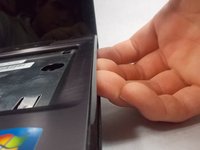
주요 콘텐츠로 건너뛰기

Lenovo IdeaPad Z570 Charging Port Replacement

필요한 것

  1. Lenovo IdeaPad Z570 Charging Port Replacement, Battery: 1 단계, 이미지 1개 중 1개
    • Place the laptop face down with the battery facing away from you

  2. Lenovo IdeaPad Z570 Charging Port Replacement: 2 단계, 이미지 1개 중 1개
    • Flip the right switch right-bound

  3. Lenovo IdeaPad Z570 Charging Port Replacement: 3 단계, 이미지 1개 중 1개
    • Hold the left switch.

  4. Lenovo IdeaPad Z570 Charging Port Replacement: 4 단계, 이미지 2개 중 1개 Lenovo IdeaPad Z570 Charging Port Replacement: 4 단계, 이미지 2개 중 2개
    • Push the battery forward lightly to remove it while holding the left switch.

  5. Lenovo IdeaPad Z570 Charging Port Replacement, Disc Drive: 5 단계, 이미지 1개 중 1개
    • Place the laptop face down with the battery slot facing away from you.

  6. Lenovo IdeaPad Z570 Charging Port Replacement: 6 단계, 이미지 2개 중 1개 Lenovo IdeaPad Z570 Charging Port Replacement: 6 단계, 이미지 2개 중 2개
    • Loosen all seven 3mm screws from the back panel using a Phillips #0 screwdriver.

    • These screws cannot be removed from the device.

    • Remove the back panel from the device.

  7. Lenovo IdeaPad Z570 Charging Port Replacement: 7 단계, 이미지 2개 중 1개 Lenovo IdeaPad Z570 Charging Port Replacement: 7 단계, 이미지 2개 중 2개
    • Remove the 3 mm Phillips #0 screw located on the left hand side that holds the disc drive in place.

  8. Lenovo IdeaPad Z570 Charging Port Replacement: 8 단계, 이미지 2개 중 1개 Lenovo IdeaPad Z570 Charging Port Replacement: 8 단계, 이미지 2개 중 2개
    • Gently remove the disc drive from the left hand side of the laptop.

  9. Lenovo IdeaPad Z570 Charging Port Replacement, Keyboard: 9 단계, 이미지 3개 중 1개 Lenovo IdeaPad Z570 Charging Port Replacement, Keyboard: 9 단계, 이미지 3개 중 2개 Lenovo IdeaPad Z570 Charging Port Replacement, Keyboard: 9 단계, 이미지 3개 중 3개
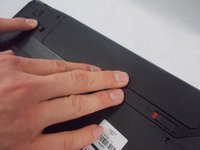
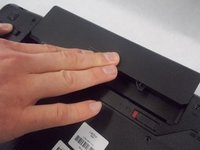
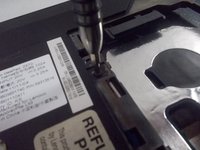
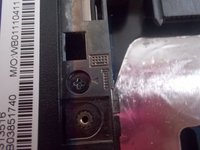
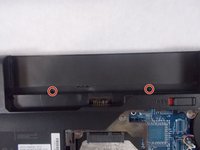
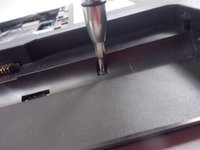
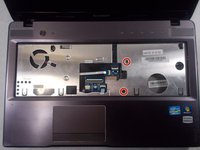
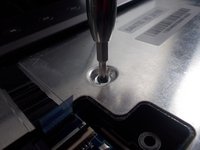
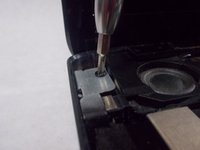
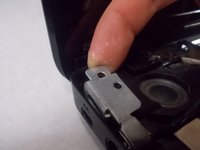
    • Remove the three 12mm screws found near these symbols with a Phillips #0 screwdriver.

  10. Lenovo IdeaPad Z570 Charging Port Replacement: 10 단계, 이미지 1개 중 1개
    • Orient the laptop at a 90 degree angle with the keyboard being vertical and the screen horizontal to the surface you are working on.

  11. Lenovo IdeaPad Z570 Charging Port Replacement: 11 단계, 이미지 2개 중 1개 Lenovo IdeaPad Z570 Charging Port Replacement: 11 단계, 이미지 2개 중 2개
    • Pry the keyboard off staring from the corner where the “esc”” key is located using an opening tool.

    • Now orient the laptop in the standard position and take off the keyboard.

  12. Lenovo IdeaPad Z570 Charging Port Replacement: 12 단계, 이미지 3개 중 1개 Lenovo IdeaPad Z570 Charging Port Replacement: 12 단계, 이미지 3개 중 2개 Lenovo IdeaPad Z570 Charging Port Replacement: 12 단계, 이미지 3개 중 3개
    • At the terminal block, flip the black switch on the terminal up.

  13. Lenovo IdeaPad Z570 Charging Port Replacement: 13 단계, 이미지 2개 중 1개 Lenovo IdeaPad Z570 Charging Port Replacement: 13 단계, 이미지 2개 중 2개
    • Pull the keyboard out from the terminal block.

  14. Lenovo IdeaPad Z570 Charging Port Replacement, Charging Port: 14 단계, 이미지 1개 중 1개
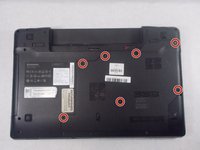
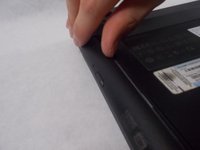
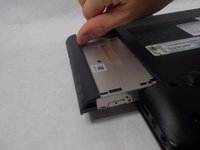
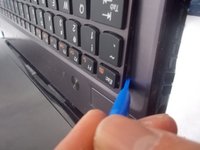
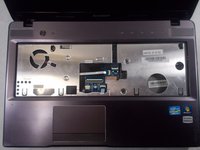
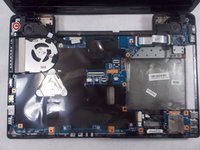
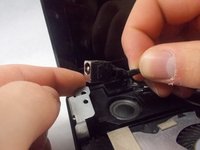
    • Place the laptop on the backside with the battery facing away from you.

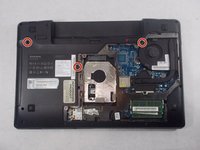
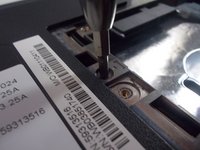
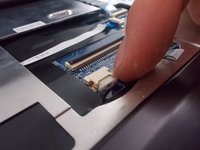
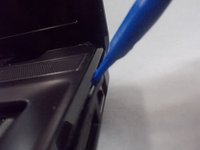
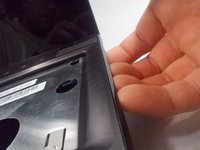
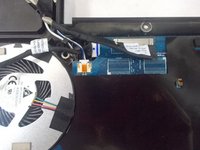
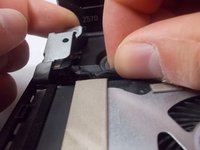
    • Remove the eleven 7 mm screws located around the edge of the backside of the laptop using the Phillips #0 screwdriver.

  15. Lenovo IdeaPad Z570 Charging Port Replacement: 15 단계, 이미지 2개 중 1개 Lenovo IdeaPad Z570 Charging Port Replacement: 15 단계, 이미지 2개 중 2개
    • Remove the two 3 mm screws located in the battery slot using the Phillips #0 screwdriver.

    • Orientate the laptop back to its original position.

  16. Lenovo IdeaPad Z570 Charging Port Replacement: 16 단계, 이미지 3개 중 1개 Lenovo IdeaPad Z570 Charging Port Replacement: 16 단계, 이미지 3개 중 2개 Lenovo IdeaPad Z570 Charging Port Replacement: 16 단계, 이미지 3개 중 3개
    • There are three connection strips similar to the one in guide three.

    • Remove the three connection strips in the same manner as the keyboard replacement guide.

  17. Lenovo IdeaPad Z570 Charging Port Replacement: 17 단계, 이미지 2개 중 1개 Lenovo IdeaPad Z570 Charging Port Replacement: 17 단계, 이미지 2개 중 2개
    • Remove the two 7mm screws found on the right side of the silver plating on the laptop using the Phillips #0 screwdriver.

  18. Lenovo IdeaPad Z570 Charging Port Replacement: 18 단계, 이미지 3개 중 1개 Lenovo IdeaPad Z570 Charging Port Replacement: 18 단계, 이미지 3개 중 2개 Lenovo IdeaPad Z570 Charging Port Replacement: 18 단계, 이미지 3개 중 3개
    • Wedge the opening tool between the ethernet jack and the speaker to pry of the front plate of the laptop.

  19. Lenovo IdeaPad Z570 Charging Port Replacement: 19 단계, 이미지 2개 중 1개 Lenovo IdeaPad Z570 Charging Port Replacement: 19 단계, 이미지 2개 중 2개
    • Remove the one 7 mm screw located at the top left corner of the laptop near the charging port using the Phillips #0 screwdriver.

  20. Lenovo IdeaPad Z570 Charging Port Replacement: 20 단계, 이미지 2개 중 1개 Lenovo IdeaPad Z570 Charging Port Replacement: 20 단계, 이미지 2개 중 2개
    • There are two connection terminals on the upper right hand corner of the fan.

    • Remove the connection terminal marked with a blue stripe.

  21. Lenovo IdeaPad Z570 Charging Port Replacement: 21 단계, 이미지 3개 중 1개 Lenovo IdeaPad Z570 Charging Port Replacement: 21 단계, 이미지 3개 중 2개 Lenovo IdeaPad Z570 Charging Port Replacement: 21 단계, 이미지 3개 중 3개
    • Lift the metal plate enough to wedge your index finger and thumb to grip the charger port.

    • Remove the charging port from the device.

결론

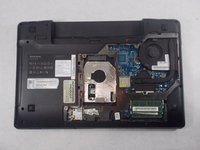
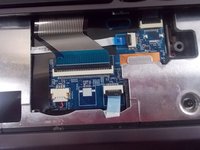
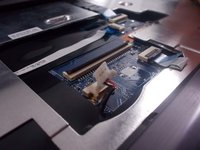
To reassemble your device, follow these instructions in reverse order.

작성자

3다른 기여자 명과 함께

Mya DeSantos

회원 가입일: 03/18/19

318 평판

안내서 2개를 작성함

UMass Dartmouth, Team S1-G6, Botvin Spring 2019 UMass Dartmouth, Team S1-G6, Botvin Spring 2019 회원

UMASSD-BOTVIN-S19S1G6

4 회원들

안내서 5개를 작성함

댓글 0개

댓글 쓰기

조회 통계:

지난 24시간: 1

지난 7일: 3

지난 30일: 19

전체 시간: 1,793