주요 콘텐츠로 건너뛰기

Lenovo IdeaTab A2109 System Board Replacement

필요한 것

  1. Lenovo IdeaTab A2109 System Board Replacement, Battery: 1 단계, 이미지 1/1
    • Look at the back of the tablet and locate the speakers on top of the rear cover.

    • There is a smaller indentation in the plastic cover that runs across the top of the device.

    • Wedge the plastic opening tool, under the middle of the cover as shown, then push up and the cover will pop off.

  2. Lenovo IdeaTab A2109 System Board Replacement: 2 단계, 이미지 1/2 Lenovo IdeaTab A2109 System Board Replacement: 2 단계, 이미지 2/2
    • Remove SD card if present.

    • Remove two black 3mm Phillips #00 screws.

  3. Lenovo IdeaTab A2109 System Board Replacement: 3 단계, 이미지 1/2 Lenovo IdeaTab A2109 System Board Replacement: 3 단계, 이미지 2/2
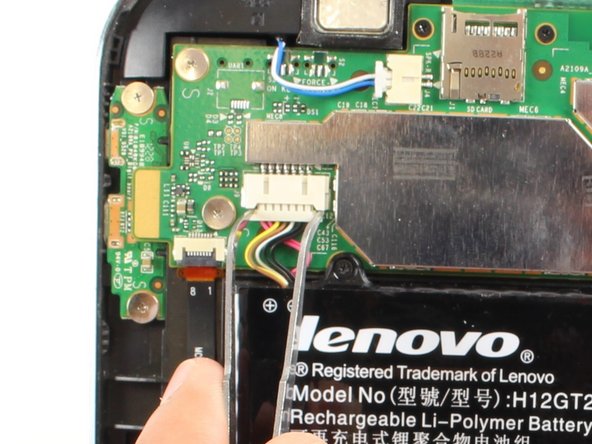
    • Disconnect battery power connector by pinching the connector with tweezers, and sliding it out of the housing.

  4. Lenovo IdeaTab A2109 System Board Replacement: 4 단계, 이미지 1/2 Lenovo IdeaTab A2109 System Board Replacement: 4 단계, 이미지 2/2
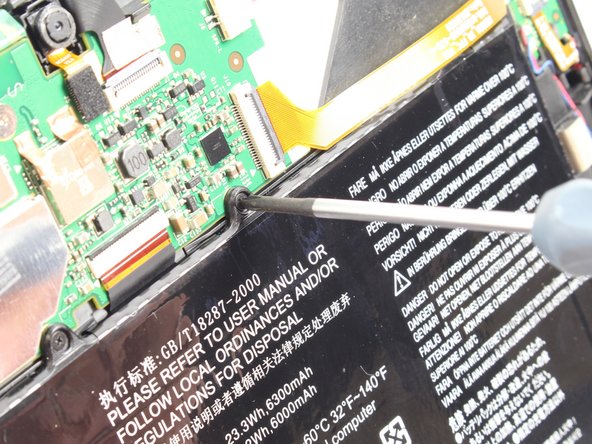
    • Remove seven black 3mm Phillips #00 screws.

    • The top right corner screw is underneath a yellow ribbon. Lift the ribbon up without disconnecting it and unscrew the screw.

  5. Lenovo IdeaTab A2109 System Board Replacement: 5 단계, 이미지 1/2 Lenovo IdeaTab A2109 System Board Replacement: 5 단계, 이미지 2/2
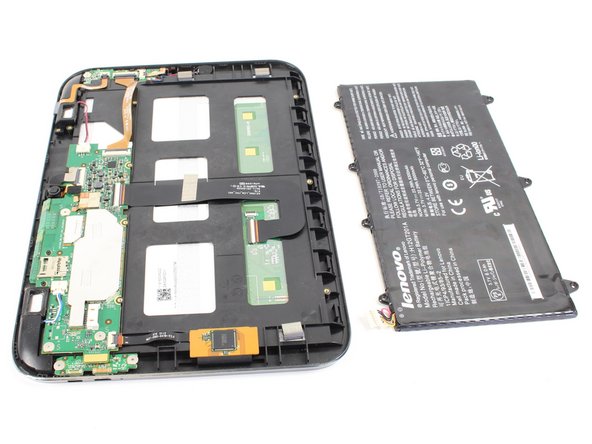
    • Now you can take the battery out in order to either replace it or continue disassembling the device.

  6. Lenovo IdeaTab A2109 System Board Replacement, System Board: 6 단계, 이미지 1/3 Lenovo IdeaTab A2109 System Board Replacement, System Board: 6 단계, 이미지 2/3 Lenovo IdeaTab A2109 System Board Replacement, System Board: 6 단계, 이미지 3/3
    • Remove two black 3mm Phillips #00 screws.

    • Remove three silver 1.8 mm Phillips #00 screws.

  7. Lenovo IdeaTab A2109 System Board Replacement: 7 단계, 이미지 1/3 Lenovo IdeaTab A2109 System Board Replacement: 7 단계, 이미지 2/3 Lenovo IdeaTab A2109 System Board Replacement: 7 단계, 이미지 3/3
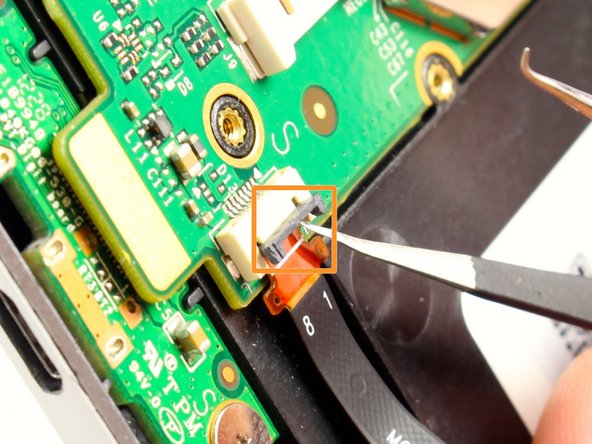
    • Use tweezers to flip up the small black plastic locks on all four connections.

    • Carefully remove each of the exposed ribbons.

  8. Lenovo IdeaTab A2109 System Board Replacement: 8 단계, 이미지 1/2 Lenovo IdeaTab A2109 System Board Replacement: 8 단계, 이미지 2/2
    • Disconnect the two speaker connectors by pinching them with tweezers and sliding them out from the system board housing.

  9. Lenovo IdeaTab A2109 System Board Replacement: 9 단계, 이미지 1/2 Lenovo IdeaTab A2109 System Board Replacement: 9 단계, 이미지 2/2
    • Use tweezers or your finger nail to disconnect the camera attachment by flipping up the black rectangular connector.

  10. Lenovo IdeaTab A2109 System Board Replacement: 10 단계, 이미지 1/3 Lenovo IdeaTab A2109 System Board Replacement: 10 단계, 이미지 2/3 Lenovo IdeaTab A2109 System Board Replacement: 10 단계, 이미지 3/3
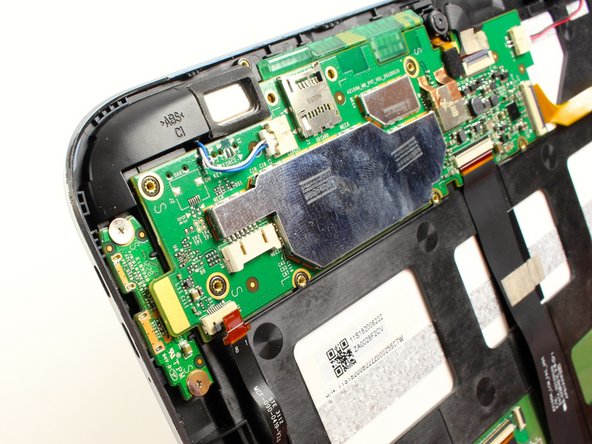
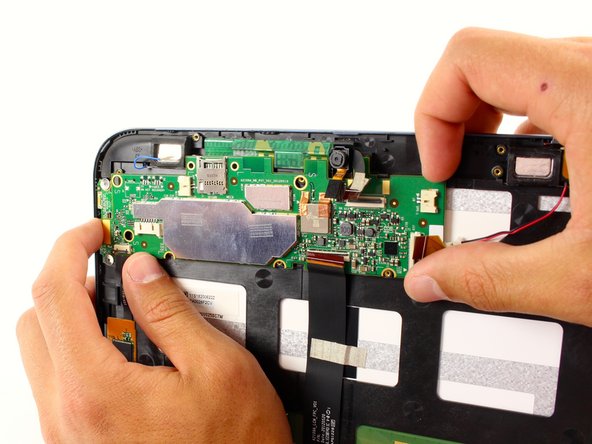
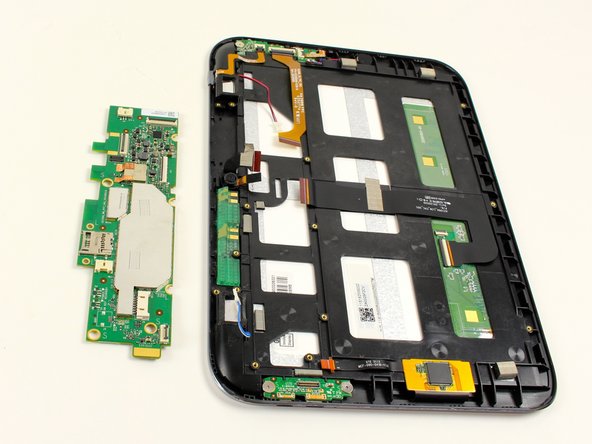
    • Disconnect the HDMI connection with the system board

    • Use a plastic opening tool to pry up the system board, and you will hear a pop as it comes free.

    • Slide out the system board from its housing tab on the upper right corner.

    • Pull the board slowly away from the tab, and it will pop out.

결론

To reassemble your device, follow these instructions in reverse order.

다른 4명이 해당 안내서를 완성하였습니다.

Kyle

회원 가입일: 04/22/14

581 평판

안내서 2개 작성하였습니다

Cal Poly, Team 7-19, Regan Spring 2014 Cal Poly, Team 7-19, Regan Spring 2014 회원

CPSU-REGAN-S14S7G19

4 회원들

안내서 15개 작성하였습니다

댓글 0개

댓글 쓰기

조회 통계:

24 시간 전: 0

7일 전: 1

30일 전: 1

전체 시간: 1,584