주요 콘텐츠로 건너뛰기

Lenovo IdeaTab S2109A-F Speaker Replacement

필요한 것

  1. Lenovo IdeaTab S2109A-F Speaker Replacement, Battery: 1 단계, 이미지 1/2 Lenovo IdeaTab S2109A-F Speaker Replacement, Battery: 1 단계, 이미지 2/2
    • Turn the tablet off before beginning this guide. It is dangerous to touch internal components while the tablet is on.

    • Place the tablet on its screen and use the opening tool to remove the back cover.

    • With the tool, place slight pressure on the tablet to pry the back panel off.

  2. Lenovo IdeaTab S2109A-F Speaker Replacement: 2 단계, 이미지 1/2 Lenovo IdeaTab S2109A-F Speaker Replacement: 2 단계, 이미지 2/2
    • Grab the battery and gently lift upwards. This will show a red and black coiled wire.

    • Pull the battery gently until the cord has no slack.

  3. Lenovo IdeaTab S2109A-F Speaker Replacement: 3 단계, 이미지 1/1
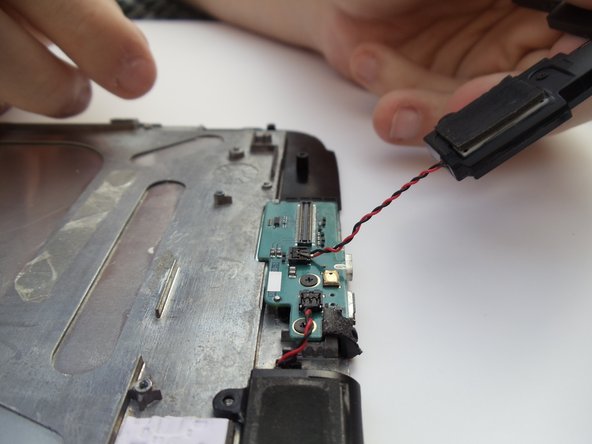
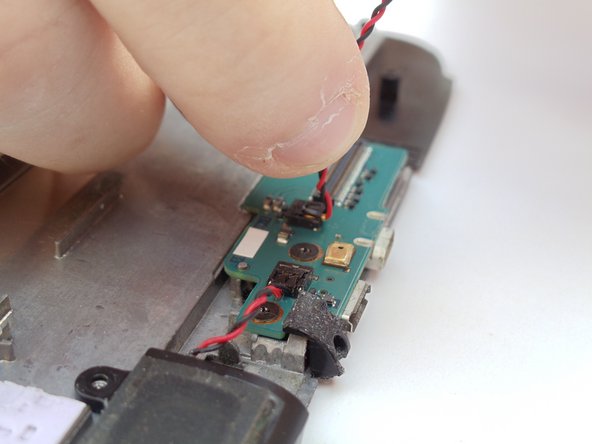
    • Carefully hold the battery in one hand while your other hand's index finger and thumb grab the two wires nearest to their connection point.

    • Use your fingers to give a firm tug to the black and red wires, but do not yank them hard enough to damage the tablet.

    • Remove the battery from the device.

  4. Lenovo IdeaTab S2109A-F Speaker Replacement, Speaker: 4 단계, 이미지 1/2 Lenovo IdeaTab S2109A-F Speaker Replacement, Speaker: 4 단계, 이미지 2/2
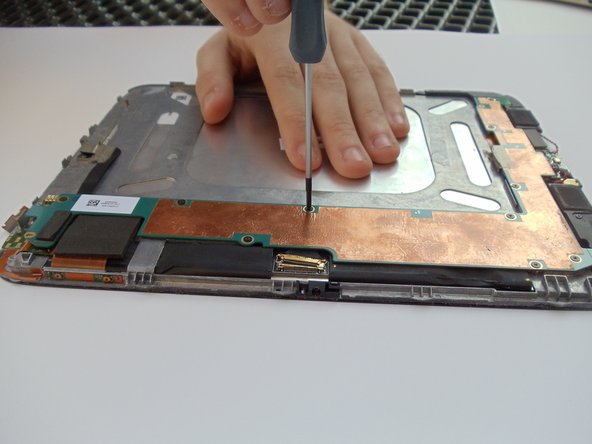
    • Remove the ten 2 mm black screws from the edges of the system board with a Phillips #00 screwdriver.

  5. Lenovo IdeaTab S2109A-F Speaker Replacement: 5 단계, 이미지 1/1
    • Disconnect the gold connector by lifting the latch with the plastic opening tool.

  6. Lenovo IdeaTab S2109A-F Speaker Replacement: 6 단계, 이미지 1/2 Lenovo IdeaTab S2109A-F Speaker Replacement: 6 단계, 이미지 2/2
    • Pull up on the L-shaped board.

    • The bottom and top connection points should disconnect.

  7. Lenovo IdeaTab S2109A-F Speaker Replacement: 7 단계, 이미지 1/2 Lenovo IdeaTab S2109A-F Speaker Replacement: 7 단계, 이미지 2/2
    • Remove the seven 2 mm black screws connecting the speakers using the Phillips #00 screwdriver.

  8. Lenovo IdeaTab S2109A-F Speaker Replacement: 8 단계, 이미지 1/3 Lenovo IdeaTab S2109A-F Speaker Replacement: 8 단계, 이미지 2/3 Lenovo IdeaTab S2109A-F Speaker Replacement: 8 단계, 이미지 3/3
    • Lift the disconnected speakers from their resting position.

    • Grab the red and black cable with your index finger and thumb.

  9. Lenovo IdeaTab S2109A-F Speaker Replacement: 9 단계, 이미지 1/1
    • Pull up on the connection to disconnect the speakers.

결론

To reassemble your device, follow these instructions in reverse order.

Caelen

회원 가입일: 01/16/15

228 평판

안내서 2개 작성하였습니다

USF Tampa, Team 17-3, Watkins Winter 2015 USF Tampa, Team 17-3, Watkins Winter 2015 회원

USFT-WATKINS-W15S17G3

4 회원들

안내서 10개 작성하였습니다

댓글 0개

댓글 쓰기

조회 통계:

24 시간 전: 0

7일 전: 2

30일 전: 2

전체 시간: 432