소개
This laptop allows you to use any 2.5” Hard Drive (HDD) or Solid State Drive (SSD) with a SATA3 connection.
필요한 것
-
-
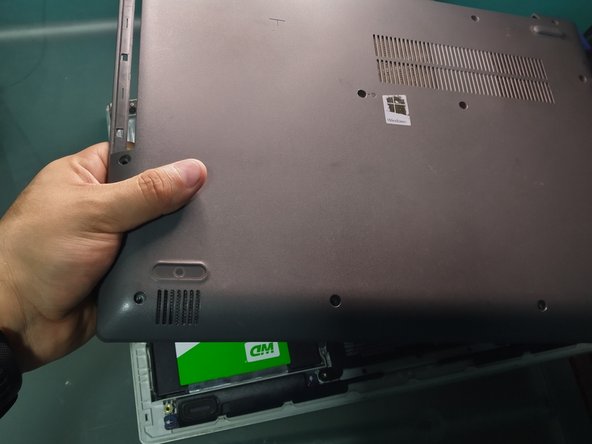
Flip the computer.
-
Using a Phillips screwdriver, remove the screw that has an icon like the one in the picture.
-
Slide the unit out from the side, until it is completely out.
-
Put it aside.
-
-
-
-
Unscrew the remaining 12 screws. Make sure you keep them in order.
-
Using a plastic spudger, loosen the clips located under the disk drive.
-
Keep on doing this down the edge, until the base starts to come loose.
-
Remove the casing and set it aside.
-
-
-
Locate the disk drive.
-
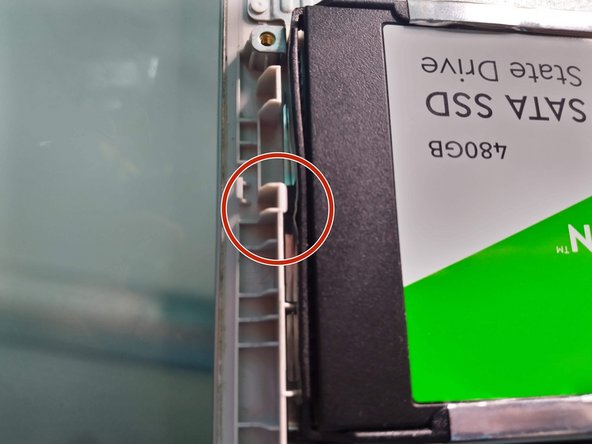
Using the spudger, loosen the pin holding the disk drive in place.
-
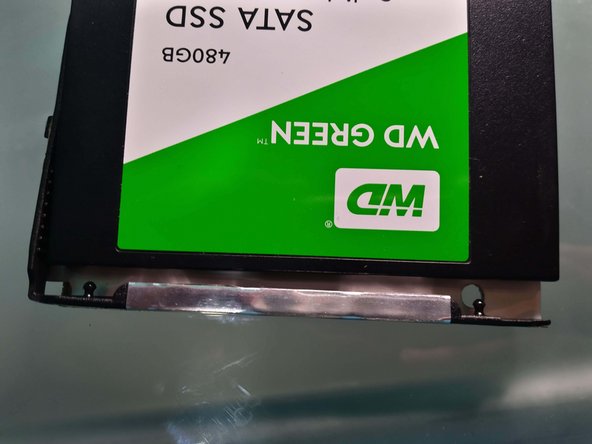
Remove the existing unit pulling gently and diagonally, as seen in the picture.
-


Now, reassemble the laptop by following steps 1, 2, 3 and 4 in reverse and Congrats! You just installed your new hard drive.
Remember: you will have to reinstall any Operating System to make use of your laptop. Have an USB Thumb drive with a Windows, Linux or any other OS of your choice at hand.
Now, reassemble the laptop by following steps 1, 2, 3 and 4 in reverse and Congrats! You just installed your new hard drive.
Remember: you will have to reinstall any Operating System to make use of your laptop. Have an USB Thumb drive with a Windows, Linux or any other OS of your choice at hand.
다른 3명이 해당 안내서를 완성하였습니다.
다음 번역가들에게 특별히 감사 드립니다:
100%


이 번역자 분들은 저희가 세상을 수리하는데 동참해 주시는 분입니다! 기여하시겠습니까?
번역 시작하기 ›
