주요 콘텐츠로 건너뛰기

Lenovo Ideapad 320-15ABR Screen Replacement

필요한 것

  1. Lenovo Ideapad 320-15ABR Screen Replacement, Screen: 1 단계, 이미지 1/3 Lenovo Ideapad 320-15ABR Screen Replacement, Screen: 1 단계, 이미지 2/3 Lenovo Ideapad 320-15ABR Screen Replacement, Screen: 1 단계, 이미지 3/3
    • Begin by prying off the black cover surrounding the screen by wedging the the iFixit opening tool underneath it. Work your way down until you reach the hinge cover.

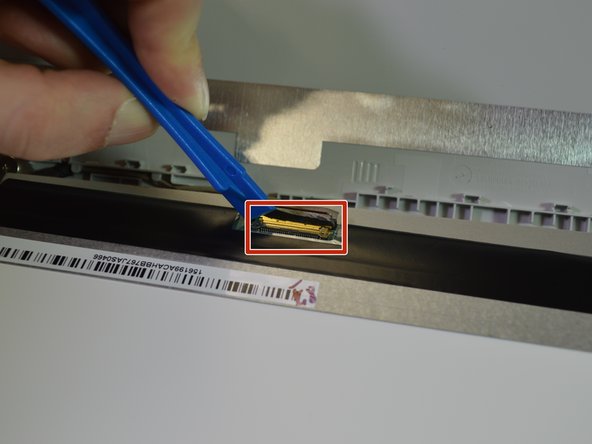
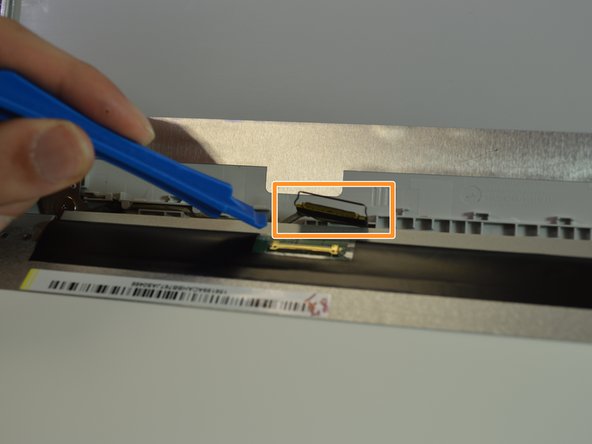
    • Insert iFixit opening tool in to the hinge cover as pictured and begin slowly prying it off.

    • This will require some force, but take care not to break the hinge cover.

    • Remove the black cover.

  2. Lenovo Ideapad 320-15ABR Screen Replacement: 2 단계, 이미지 1/3 Lenovo Ideapad 320-15ABR Screen Replacement: 2 단계, 이미지 2/3 Lenovo Ideapad 320-15ABR Screen Replacement: 2 단계, 이미지 3/3
    • Using the Phillips #1 screwdriver, remove the four 3mm screws securing the screen, and put them on the magnetic mat so you will not misplace them.

    • Gently lift the screen out and place it facing down on the keyboard.

  3. Lenovo Ideapad 320-15ABR Screen Replacement: 3 단계, 이미지 1/3 Lenovo Ideapad 320-15ABR Screen Replacement: 3 단계, 이미지 2/3 Lenovo Ideapad 320-15ABR Screen Replacement: 3 단계, 이미지 3/3
    • Carefully flip the hinge securing the connector up with the opening tool.

    • Slowly work the plug out of the connector.

    • Do not pull by the the cable, as the cable is fragile.

    • Insert the plug from the replacement screen in to the connector. Make sure the connection is secure before flipping the hinge back down.

결론

To reassemble your device, follow these instructions in reverse order.

다른 3명이 해당 안내서를 완성하였습니다.

rheinheimer.n

회원 가입일: 10/29/18

133 평판

안내서 1개 작성함

댓글 한 개

How to replace hinge for this model

Deepak Singh - 답글

댓글 쓰기

조회 통계:

24 시간 전: 0

7일 전: 4

30일 전: 15

전체 시간: 4,503