주요 콘텐츠로 건너뛰기

Lenovo Ideapad Flex 4-1570 Cooling Fan Replacement

필요한 것

  1. Lenovo Ideapad Flex 4-1570 Cooling Fan Replacement, Back Panel: 1 단계, 이미지 1/1
    • Shut down and unplug your laptop before you begin.

  2. Lenovo Ideapad Flex 4-1570 Cooling Fan Replacement: 2 단계, 이미지 1/1
    • Remove the nine 6 mm screws using a T5 Torx Screwdriver.

    • Remove the two 10 mm screws using a T5 Torx Screwdriver.

  3. Lenovo Ideapad Flex 4-1570 Cooling Fan Replacement: 3 단계, 이미지 1/1
    • Use a plastic opening tool to carefully pry off the back cover.

    • Remove the back cover.

  4. Lenovo Ideapad Flex 4-1570 Cooling Fan Replacement, Cooling Fan: 4 단계, 이미지 1/2 Lenovo Ideapad Flex 4-1570 Cooling Fan Replacement, Cooling Fan: 4 단계, 이미지 2/2
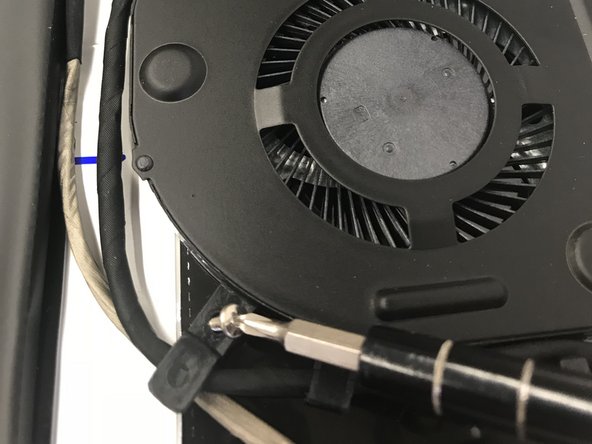
    • Remove the three 5mm screws using the T5 Torx Screwdriver.

  5. Lenovo Ideapad Flex 4-1570 Cooling Fan Replacement: 5 단계, 이미지 1/2 Lenovo Ideapad Flex 4-1570 Cooling Fan Replacement: 5 단계, 이미지 2/2
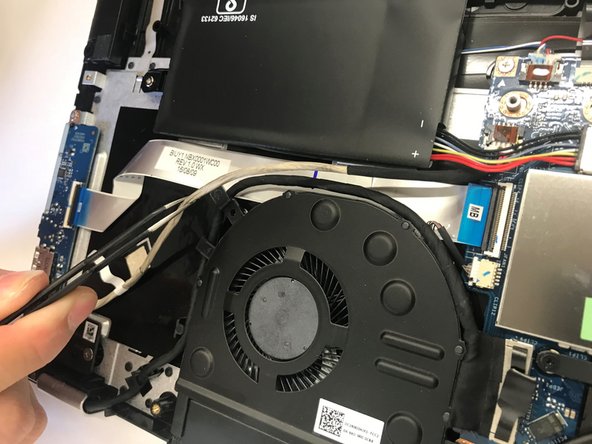
    • Pull black wire and gray wire away from cooling fan clips using the tweezers.

  6. Lenovo Ideapad Flex 4-1570 Cooling Fan Replacement: 6 단계, 이미지 1/3 Lenovo Ideapad Flex 4-1570 Cooling Fan Replacement: 6 단계, 이미지 2/3 Lenovo Ideapad Flex 4-1570 Cooling Fan Replacement: 6 단계, 이미지 3/3
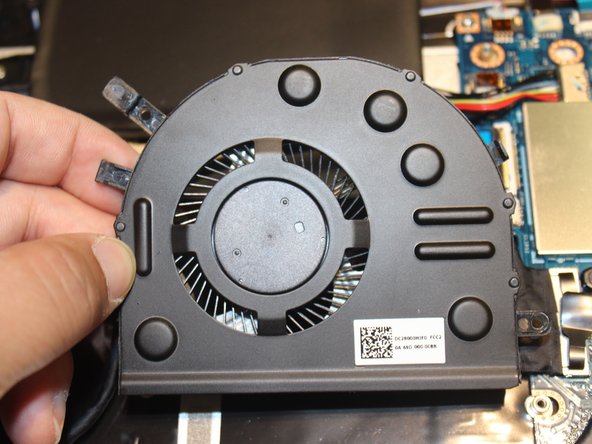
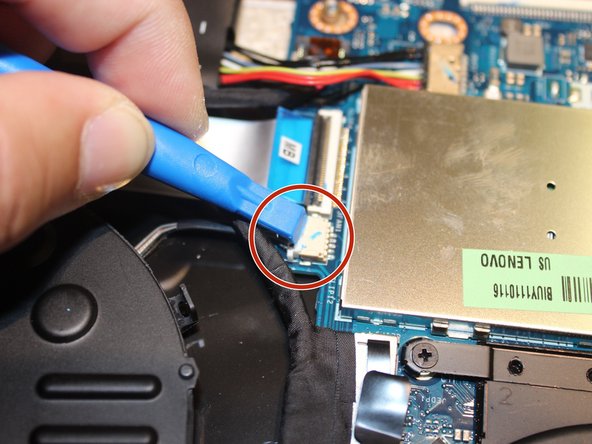
    • Pull out the cooling fan from where it is attached and pull it up until you see where the wire is attached to the motherboard. Using the iFixit Opening Tools, detach the connector.

결론

To reassemble your device, follow these instructions in reverse order.

다른 한 분이 해당 안내서를 완성하였습니다.

Isaiah Vang

회원 가입일: 10/04/18

669 평판

안내서 6개 작성하였습니다

UW Stout, Team S6-G6, Ogden Fall 2018 UW Stout, Team S6-G6, Ogden Fall 2018 회원

UWSTOUT-OGDEN-F18S6G6

4 회원들

안내서 16개 작성하였습니다

댓글 0개

댓글 쓰기

조회 통계:

24 시간 전: 0

7일 전: 0

30일 전: 2

전체 시간: 353