주요 콘텐츠로 건너뛰기

Lenovo Ideapad Yoga 2 11 Battery Replacement

필요한 것

  1. Lenovo Ideapad Yoga 2 11 Battery Replacement, Back Panel: 1 단계, 이미지 1/1
    • Begin by turning your closed laptop so that you are looking at the bottom panel.

  2. Lenovo Ideapad Yoga 2 11 Battery Replacement: 2 단계, 이미지 1/2 Lenovo Ideapad Yoga 2 11 Battery Replacement: 2 단계, 이미지 2/2
    • Locate the 10 screws (6mm) around the border of the panel.

    • Using the Torx T5 Screwdriver, remove the screws.

  3. Lenovo Ideapad Yoga 2 11 Battery Replacement: 3 단계, 이미지 1/1
    • Now that the screws are removed, gently lift the back panel upwards to detach it from the rest of your laptop.

  4. Lenovo Ideapad Yoga 2 11 Battery Replacement, Battery: 4 단계, 이미지 1/2 Lenovo Ideapad Yoga 2 11 Battery Replacement, Battery: 4 단계, 이미지 2/2
    • Locate the battery in the bottom right corner.

    • Using a Phillips #000, remove the 6 screws (3.5mm) on the border of the battery and the 7th screw (6.5mm) that is in the center of the battery.

  5. Lenovo Ideapad Yoga 2 11 Battery Replacement: 5 단계, 이미지 1/3 Lenovo Ideapad Yoga 2 11 Battery Replacement: 5 단계, 이미지 2/3 Lenovo Ideapad Yoga 2 11 Battery Replacement: 5 단계, 이미지 3/3
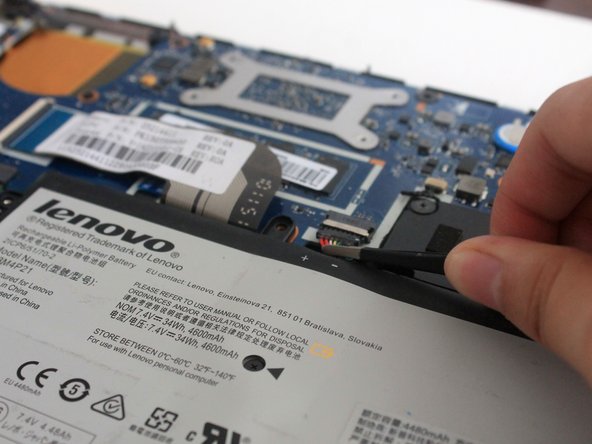
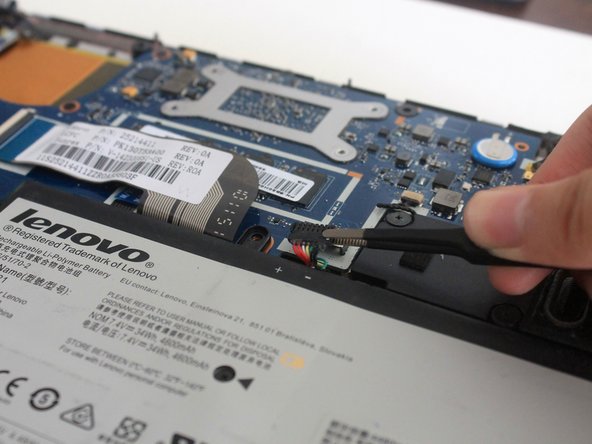
    • Locate the cable connecting to the battery. It is located at the top-center of the battery.

    • Use a pair of tweezers and place it so that the tweezer is around the cables. Gently pull the cables towards the battery to disconnect the cable.

  6. Lenovo Ideapad Yoga 2 11 Battery Replacement: 6 단계, 이미지 1/2 Lenovo Ideapad Yoga 2 11 Battery Replacement: 6 단계, 이미지 2/2
    • There may be tape around the edge of the battery to secure some wires. Use a pair of tweezers to remove the tape so that the wires are no longer attached to the battery.

  7. Lenovo Ideapad Yoga 2 11 Battery Replacement: 7 단계, 이미지 1/2 Lenovo Ideapad Yoga 2 11 Battery Replacement: 7 단계, 이미지 2/2
    • After you have unscrewed the screws, unplugged the cable, and removed the tape and wires, you can remove the battery from your laptop.

    There is a copper strip attached to battery- underneath that will not allow removal

    Danielle John - 답글

결론

To reassemble your device, follow these instructions in reverse order.

다른 2명이 해당 안내서를 완성하였습니다.

Andria Chen

회원 가입일: 10/17/17

624 평판

안내서 5개 작성하였습니다

UC Santa Barbara, Team S1-G5, Weedon Fall 2017 UC Santa Barbara, Team S1-G5, Weedon Fall 2017 회원

UCSB-WEEDON-F17S1G5

5 회원들

안내서 5개 작성하였습니다

댓글 한 개

Excellent instructions makes it easy even for novice

bhimanagouda patil - 답글

댓글 쓰기

조회 통계:

24 시간 전: 0

7일 전: 2

30일 전: 8

전체 시간: 1,808