주요 콘텐츠로 건너뛰기

Lenovo Ideatab A1107 Front Camera Replacement

필요한 것

  1. Lenovo Ideatab A1107 Front Camera Replacement, Back Cover: 1 단계, 이미지 1/2 Lenovo Ideatab A1107 Front Camera Replacement, Back Cover: 1 단계, 이미지 2/2
    • Insert a plastic opener in-between the black back panel and the silver body of the tablet.

    • Use the plastic opener to pry the back panel off by moving the plastic opener around the outside edge of the device.

  2. Lenovo Ideatab A1107 Front Camera Replacement: 2 단계, 이미지 1/2 Lenovo Ideatab A1107 Front Camera Replacement: 2 단계, 이미지 2/2
    • Use a Phillips #000 screwdriver to remove the seventeen 4mm screws.

  3. Lenovo Ideatab A1107 Front Camera Replacement: 3 단계, 이미지 1/1
    • Lift up and remove the interior casing to expose the inner components.

    • Do not be alarmed if the volume button and lock button fall off when removing the interior casing.

  4. Lenovo Ideatab A1107 Front Camera Replacement, Battery: 4 단계, 이미지 1/1
    • Use tweezers to remove the tape covering the battery's wiring.

  5. Lenovo Ideatab A1107 Front Camera Replacement: 5 단계, 이미지 1/2 Lenovo Ideatab A1107 Front Camera Replacement: 5 단계, 이미지 2/2
    • Do not puncture the lithium-ion battery. Ruptured batteries can catch fire or explode.

    • Do not use metal tools to remove the battery wire. They present the risk of electrocution.

    • Use a plastic spudger tool to push the battery's wire harness and disconnect it from the device.

  6. Lenovo Ideatab A1107 Front Camera Replacement: 6 단계, 이미지 1/1
    • Do not puncture the lithium-ion battery. Ruptured batteries can catch fire or explode.

    • Wedge a plastic opening tool in between the battery and the internal components of the device.

    • Use the plastic opener tool to remove the battery from its casing.

  7. Lenovo Ideatab A1107 Front Camera Replacement, Screen: 7 단계, 이미지 1/1
    • Using you hands, lift off the digitizer.

  8. Lenovo Ideatab A1107 Front Camera Replacement: 8 단계, 이미지 1/2 Lenovo Ideatab A1107 Front Camera Replacement: 8 단계, 이미지 2/2
    • Remove the three screws that are 2.0 mm in length and have a 5.25 mm head width with a Phillips #00 screwdriver.

  9. Lenovo Ideatab A1107 Front Camera Replacement: 9 단계, 이미지 1/2 Lenovo Ideatab A1107 Front Camera Replacement: 9 단계, 이미지 2/2
    • Use a spudger to remove the plastic piece securing the zero insertion force (ZIF) cable connector.

    • Use tweezers to grasp the ribbon cable, then pull the cable to disconnect it from the device.

  10. Lenovo Ideatab A1107 Front Camera Replacement: 10 단계, 이미지 1/1
    • Locate the black electrical tape strip on the side of the device.

    • Gently remove the tape from the device using the tweezers.

  11. Lenovo Ideatab A1107 Front Camera Replacement: 11 단계, 이미지 1/3 Lenovo Ideatab A1107 Front Camera Replacement: 11 단계, 이미지 2/3 Lenovo Ideatab A1107 Front Camera Replacement: 11 단계, 이미지 3/3
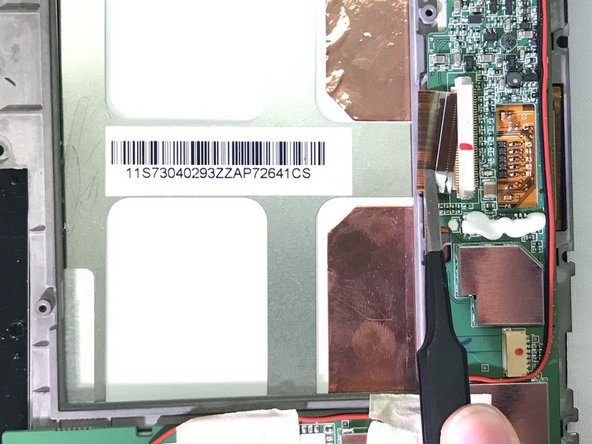
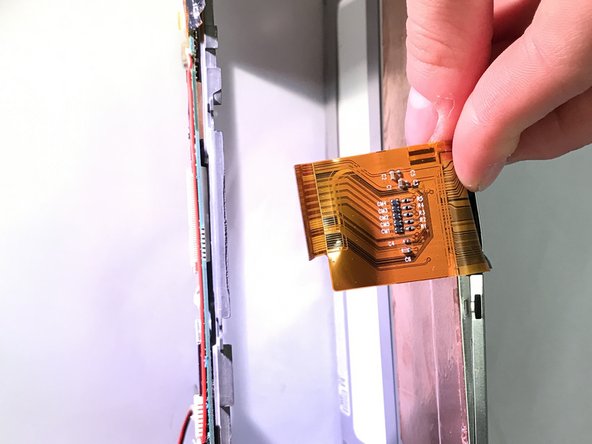
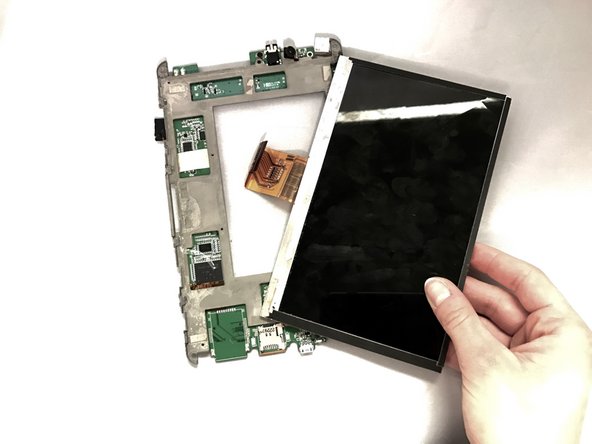
    • After removing the electric tape, gently lift up the green control panel.

    • Taking the tweezers, remove the ribbon cable from the control panel.

    • Once the ribbon cable is removed from the panel, the display should separate with ease.

  12. Lenovo Ideatab A1107 Front Camera Replacement, Front Camera: 12 단계, 이미지 1/2 Lenovo Ideatab A1107 Front Camera Replacement, Front Camera: 12 단계, 이미지 2/2
    • Using the tweezers, pull and remove the front camera component.

결론

To reassemble your device, follow these instructions in reverse order.

다른 한 분이 해당 안내서를 완성하였습니다.

Katherine Enders

회원 가입일: 01/18/17

445 평판

안내서 4개 작성하였습니다

댓글 0개

댓글 쓰기

조회 통계:

24 시간 전: 0

7일 전: 2

30일 전: 2

전체 시간: 153