주요 콘텐츠로 건너뛰기

Lenovo Ideatab S6000 Front Camera Replacement

필요한 것

  1. Lenovo Ideatab S6000 Front Camera Replacement, Front Camera: 1 단계, 이미지 1/1
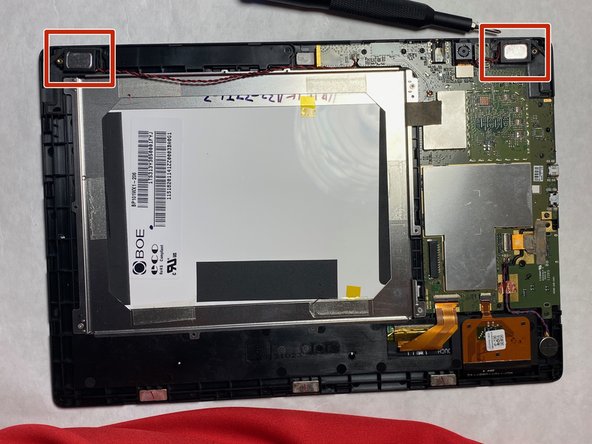
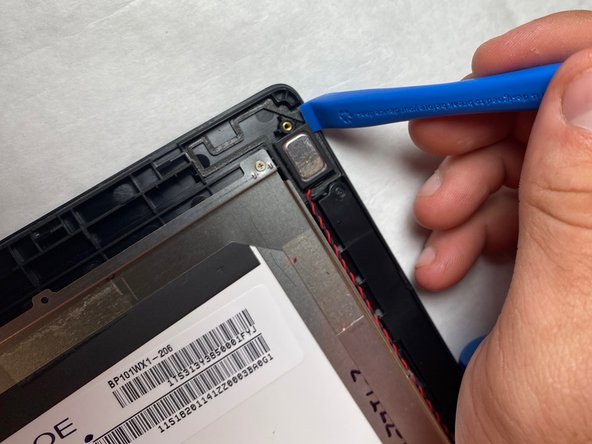
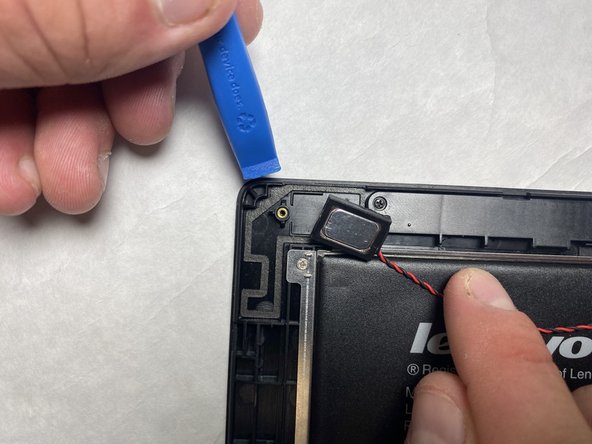
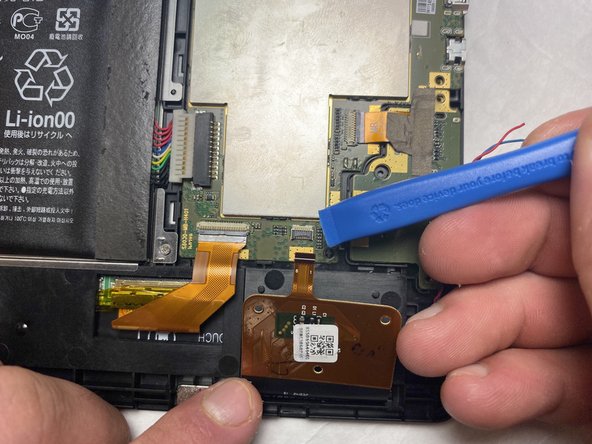
    • Remove the speaker screens by working them loose with a plastic opening tool. You may need to first loosen them with tweezers or a spudger.

    • These screens are held in place by glue that is hard to remove. Please take your time to ensure that that this step is done correctly.

  2. Lenovo Ideatab S6000 Front Camera Replacement: 2 단계, 이미지 1/1
    • Remove the screws from both of the spots that were covered with a Phillips #000 screwdriver.

  3. Lenovo Ideatab S6000 Front Camera Replacement: 3 단계, 이미지 1/1
    • Go all around the casing, prying the screen away from the backing with the spudger.

    • It will make a popping sound each time one of the lock tabs is disconnected.

    • Take your time as you move all around the device when prying the backing off.

    • Do not use a metal tool for this.

  4. Lenovo Ideatab S6000 Front Camera Replacement: 4 단계, 이미지 1/2 Lenovo Ideatab S6000 Front Camera Replacement: 4 단계, 이미지 2/2
    • Using either the plastic opening tool or your fingers, gently pull on both sides of the plug to release it.

  5. Lenovo Ideatab S6000 Front Camera Replacement: 5 단계, 이미지 1/1
    • Remove the battery by grabbing the tab shown and pulling up.

    • The battery is held to the device by adhesive. Pull the battery up from the tab and it will lift out with a bit of effort

  6. Lenovo Ideatab S6000 Front Camera Replacement: 6 단계, 이미지 1/3 Lenovo Ideatab S6000 Front Camera Replacement: 6 단계, 이미지 2/3 Lenovo Ideatab S6000 Front Camera Replacement: 6 단계, 이미지 3/3
    • Use an opening tool to pry the speakers out of the tablet.

    • The speakers are connected to the tablet by glue and require a lot of prying to remove.

  7. Lenovo Ideatab S6000 Front Camera Replacement: 7 단계, 이미지 1/1
    • Use the plastic opening tool to gently pry up the vibration motor.

  8. Lenovo Ideatab S6000 Front Camera Replacement: 8 단계, 이미지 1/1
    • Remove the 3.2mm screws using a Phillips #000 screwdriver.

  9. Lenovo Ideatab S6000 Front Camera Replacement: 9 단계, 이미지 1/2 Lenovo Ideatab S6000 Front Camera Replacement: 9 단계, 이미지 2/2
    • Flip up the black tab on each connector.

    • Pull the ribbon cables out using a plastic opening tool.

  10. Lenovo Ideatab S6000 Front Camera Replacement: 10 단계, 이미지 1/1
    • Remove the piece of tape by pulling up with your fingers.

  11. Lenovo Ideatab S6000 Front Camera Replacement: 11 단계, 이미지 1/2 Lenovo Ideatab S6000 Front Camera Replacement: 11 단계, 이미지 2/2
    • Pull up on motherboard gently with fingers and remove.

  12. Lenovo Ideatab S6000 Front Camera Replacement: 12 단계, 이미지 1/2 Lenovo Ideatab S6000 Front Camera Replacement: 12 단계, 이미지 2/2
    • Gently remove the front camera by pulling the ribbon connector out with a plastic opening tool.

결론

To reassemble your device, follow these instructions in reverse order.

다른 한 분이 해당 안내서를 완성하였습니다.

Dalton Sholders

회원 가입일: 11/07/19

469 평판

안내서 2개 작성하였습니다

IUPUI, Team S3-G5, Harley Fall 2019 IUPUI, Team S3-G5, Harley Fall 2019 회원

IUPUI-HARLEY-F19S3G5

3 회원들

안내서 2개 작성하였습니다

댓글 0개

댓글 쓰기

조회 통계:

24 시간 전: 0

7일 전: 0

30일 전: 0

전체 시간: 150