주요 콘텐츠로 건너뛰기

Lenovo Legion Y530-15ICH Hard Drive Replacement

필요한 것

  1. Lenovo Legion Y530-15ICH Hard Drive Replacement, External screws: 1 단계, 이미지 1개 중 1개
    • Shut down the computer and disconnect the power supply.

    • Using a PH1 screwdriver or bit, remove eleven screws securing the back cover.

    • Five 7mm screws

    • Two 6mm screws

    • Four 4mm screws

  2. Lenovo Legion Y530-15ICH Hard Drive Replacement, Rear enclosure: 2 단계, 이미지 2개 중 1개 Lenovo Legion Y530-15ICH Hard Drive Replacement, Rear enclosure: 2 단계, 이미지 2개 중 2개
    • Carefully pry the back cover off the computer using an opening pick.

    • Start at one of the rear corners of the laptop and work your way around the chassis, gently pulling up on the cover until it detaches.

    • Do not pull hard on the cover or attempt to open without picks, as I did, cracking the side of the rear cover.

  3. Lenovo Legion Y530-15ICH Hard Drive Replacement: 3 단계, 이미지 2개 중 1개 Lenovo Legion Y530-15ICH Hard Drive Replacement: 3 단계, 이미지 2개 중 2개
    • Remove four screws from the HDD case, mostly releasing it from the laptop.

    • Four 4mm screws

    • You might see a yellow piece of tape here. Peel it off carefully, right to left in this orientation, so that the blue plastic of the ribbon cable beneath is unmoved when it's gone.

  4. Lenovo Legion Y530-15ICH Hard Drive Replacement: 4 단계, 이미지 2개 중 1개 Lenovo Legion Y530-15ICH Hard Drive Replacement: 4 단계, 이미지 2개 중 2개
    • Use your prying tool or a spudger to flip up the FFC bail, the tiny black clamp shown here.

    • If the cable doesn't move freely after the bail is up, make sure it's pushed all the way back, and lightly tug the cable away from its clamp.

    • Pull only parallel to the board, and only after the bail is up.

  5. Lenovo Legion Y530-15ICH Hard Drive Replacement: 5 단계, 이미지 1개 중 1개
    • Once the screws are gone and the ribbon cable is safely disconnected, remove the hard drive with the casing from the rest of the computer.

    • Remove four screws from the casing, releasing the hard drive.

    • Four 3.5mm screws

  6. Lenovo Legion Y530-15ICH Hard Drive Replacement: 6 단계, 이미지 1개 중 1개
    • Remove the hard drive from the casing.

  7. Lenovo Legion Y530-15ICH Hard Drive Replacement: 7 단계, 이미지 2개 중 1개 Lenovo Legion Y530-15ICH Hard Drive Replacement: 7 단계, 이미지 2개 중 2개
    • This piece connects your hard drive to the computer. Remove it carefully, wiggling back and forth. Replace it on your new hard drive.

결론

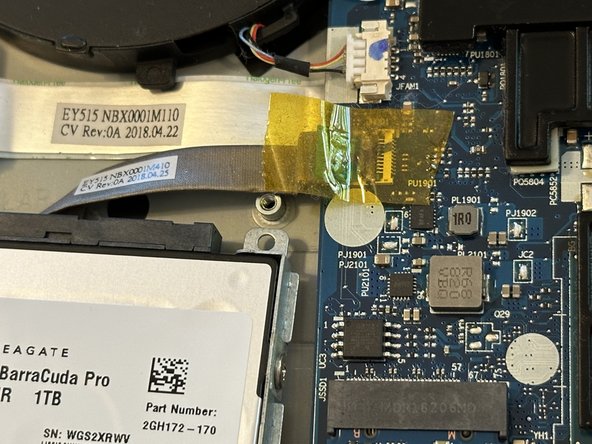
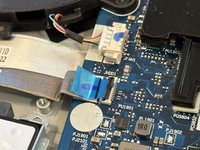
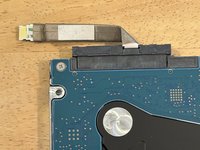
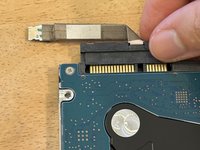
Once the ribbon cable piece has been attached to the new hard drive, just follow these steps in the reverse order.

작성자

1다른 기여자 명과 함께

Isak

회원 가입일: 08/30/24

261 평판

안내서 1개를 작성함

0가이드 댓글

댓글 쓰기

조회 통계:

지난 24시간: 4

지난 7일: 12

지난 30일: 58

전체 시간: 869