소개
The random access memory (RAM) module in your device acts as the temporary storage units while the computer is running. The RAM allows the computer to access and load applications faster as well as the operating system. If your computer is acting slow if your applications won’t load, you may need to replace the RAM.
This guide will help users to upgrade their RAM in their Lenovo Legion-15ICH. Replacing the RAM is recommended if the device is running slower than usual.
필요한 것
-
-
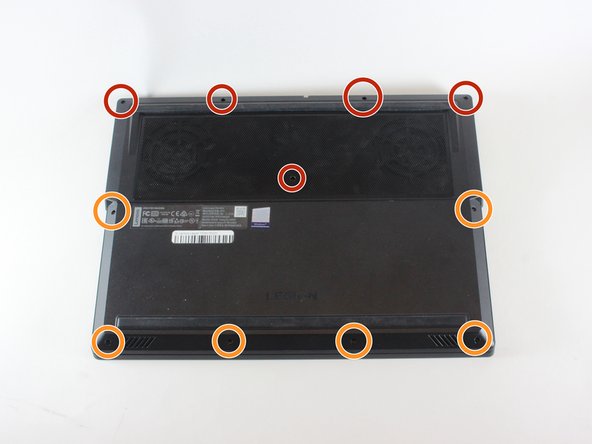
Use a PZ00 screwdriver bit to remove the eleven screws securing the back cover.
-
Five 7 mm screws
-
Six 4 mm screws
-
-


To reassemble your device, follow these instructions in reverse order.
To reassemble your device, follow these instructions in reverse order.
다른 4명이 해당 안내서를 완성하였습니다.

팀

Cal Poly, Team S7-G1, Regan Winter 2020 Cal Poly, Team S7-G1, Regan Winter 2020 회원
CPSU-REGAN-W20S7G1
4 회원들
안내서 12개 작성하였습니다