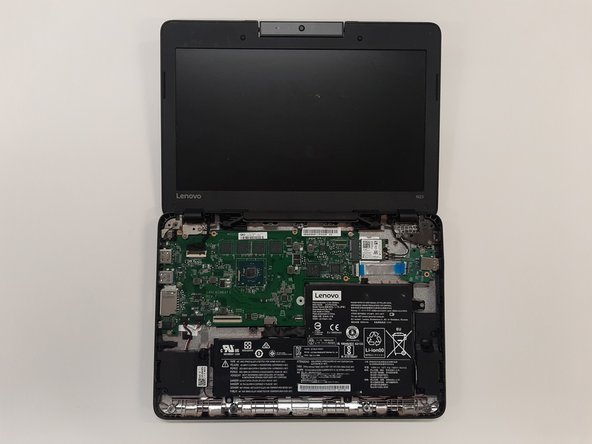
주요 콘텐츠로 건너뛰기

Lenovo N23 Chromebook Motherboard Replacement

필요한 것

  1. Lenovo N23 Chromebook Motherboard Replacement, Battery: 1 단계, 이미지 1/2 Lenovo N23 Chromebook Motherboard Replacement, Battery: 1 단계, 이미지 2/2
    • Before starting, make sure that the laptop is powered off and completely unplugged from the charger.

    • Remove the eight 6.0 mm screws holding the back into place using a Phillips #0 screwdriver.

  2. Lenovo N23 Chromebook Motherboard Replacement: 2 단계, 이미지 1/1
    • Flip the device over.

    • Slide a plastic opening tool between the back cover and keyboard.

    • Carefully pry upwards until you hear a click.

    • Following the seam, slide the opening tool all the way around the front cover, prying upwards occasionally until the keyboard and trackpad are loose from the back cover.

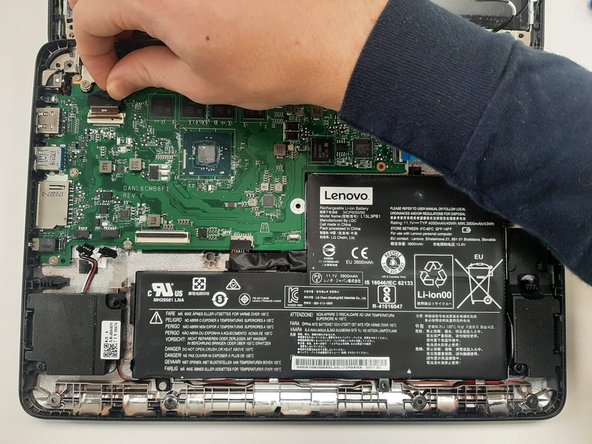
    • Lift the keyboard panel up to reveal the internals.

    • Don't lift the keyboard panel too violently, as there is still a cable attachment to the motherboard.

  3. Lenovo N23 Chromebook Motherboard Replacement: 3 단계, 이미지 1/3 Lenovo N23 Chromebook Motherboard Replacement: 3 단계, 이미지 2/3 Lenovo N23 Chromebook Motherboard Replacement: 3 단계, 이미지 3/3
    • You can now access the internals of the computer.

    • Disconnect the two ribbon cables that connect from the motherboard to the front cover.

    • Using the iFixit opening tool, flip up the black tab holding keyboard ribbon cable and then pull the cable out.

    • Using the opening tool, flip the white tab holding the mouse ribbon cable and then pull the cable out.

  4. Lenovo N23 Chromebook Motherboard Replacement: 4 단계, 이미지 1/2 Lenovo N23 Chromebook Motherboard Replacement: 4 단계, 이미지 2/2
    • Lift the keyboard panel from the case and fully remove it from the device.

  5. Lenovo N23 Chromebook Motherboard Replacement: 5 단계, 이미지 1/1
    • Using the Phillips #0 screwdriver, remove the two 3 mm screws holding the battery in place.

  6. Lenovo N23 Chromebook Motherboard Replacement: 6 단계, 이미지 1/3 Lenovo N23 Chromebook Motherboard Replacement: 6 단계, 이미지 2/3 Lenovo N23 Chromebook Motherboard Replacement: 6 단계, 이미지 3/3
    • Disconnect the battery cable using a plastic opening tool by pulling on the black plastic lip.

    • Lift the battery out of the laptop.

  7. Lenovo N23 Chromebook Motherboard Replacement, Wifi Card: 7 단계, 이미지 1/3 Lenovo N23 Chromebook Motherboard Replacement, Wifi Card: 7 단계, 이미지 2/3 Lenovo N23 Chromebook Motherboard Replacement, Wifi Card: 7 단계, 이미지 3/3
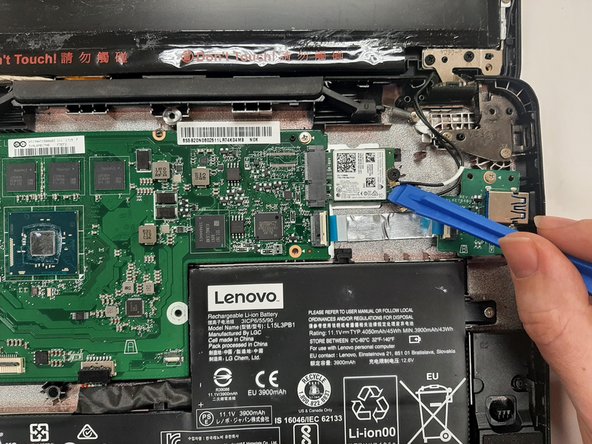
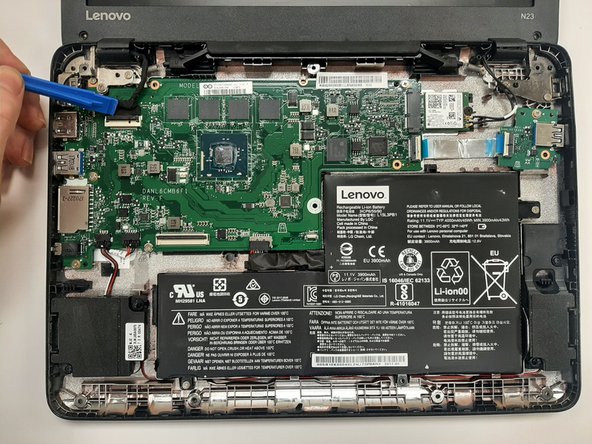
    • Use a plastic opening tool to disconnect the two coaxial cables from the Wi-Fi card.

    • Tuck the two wires out of the way.

  8. Lenovo N23 Chromebook Motherboard Replacement: 8 단계, 이미지 1/3 Lenovo N23 Chromebook Motherboard Replacement: 8 단계, 이미지 2/3 Lenovo N23 Chromebook Motherboard Replacement: 8 단계, 이미지 3/3
    • Remove the single 3.0 mm Phillips #1 screw holding the Wi-Fi card using a Phillips #1 screwdriver.

    • Using your hands, carefully pull the Wi-Fi card sideways out of the port on the motherboard.

  9. Lenovo N23 Chromebook Motherboard Replacement, Motherboard: 9 단계, 이미지 1/3 Lenovo N23 Chromebook Motherboard Replacement, Motherboard: 9 단계, 이미지 2/3 Lenovo N23 Chromebook Motherboard Replacement, Motherboard: 9 단계, 이미지 3/3
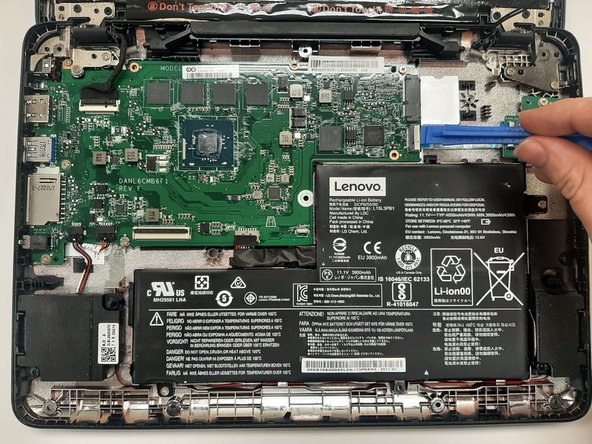
    • Remove the USB ribbon cable by lifting up on the white tab using a plastic opening tool and then pulling the cable out.

  10. Lenovo N23 Chromebook Motherboard Replacement: 10 단계, 이미지 1/2 Lenovo N23 Chromebook Motherboard Replacement: 10 단계, 이미지 2/2
    • Disconnect the two black connectors on the bottom left side of the motherboard by pulling back on the lip with a plastic opening tool.

  11. Lenovo N23 Chromebook Motherboard Replacement: 11 단계, 이미지 1/3 Lenovo N23 Chromebook Motherboard Replacement: 11 단계, 이미지 2/3 Lenovo N23 Chromebook Motherboard Replacement: 11 단계, 이미지 3/3
    • Disconnect the video cable by lifting upwards on the black tab using a plastic opening tool and pulling the cable out.

  12. Lenovo N23 Chromebook Motherboard Replacement: 12 단계, 이미지 1/3 Lenovo N23 Chromebook Motherboard Replacement: 12 단계, 이미지 2/3 Lenovo N23 Chromebook Motherboard Replacement: 12 단계, 이미지 3/3
    • Remove the five 3.0 mm screws that hold the motherboard in place with a Phillips #0 screwdriver.

    • Lift the motherboard carefully out of the laptop, being sure to not let it get caught on any cables.

결론

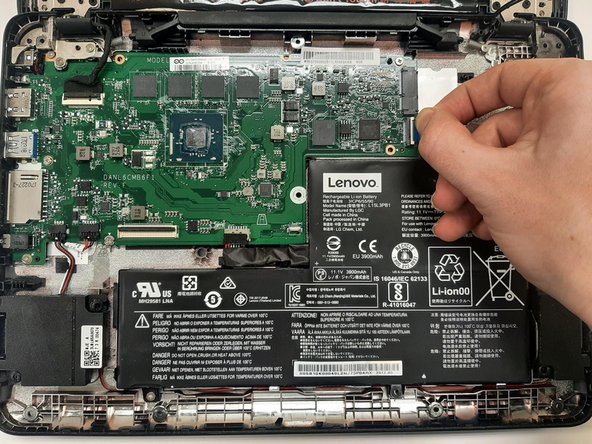
To reassemble your device, follow these instructions in reverse order.

다른 한 분이 해당 안내서를 완성하였습니다.

Josh Keating

회원 가입일: 02/19/21

155 평판

안내서 1개 작성함

University of Alabama, Team S3-G1, Bedsole Spring 2021 University of Alabama, Team S3-G1, Bedsole Spring 2021 회원

UA-BEDSOLE-S21S3G1

3 회원들

안내서 4개 작성하였습니다

댓글 0개

댓글 쓰기

조회 통계:

24 시간 전: 0

7일 전: 4

30일 전: 28

전체 시간: 1,027