주요 콘텐츠로 건너뛰기

Lenovo N23 Chromebook Wi-Fi Card Replacement

필요한 것

  1. Lenovo N23 Chromebook Wi-Fi Card Replacement, Battery: 1 단계, 이미지 1/2 Lenovo N23 Chromebook Wi-Fi Card Replacement, Battery: 1 단계, 이미지 2/2
    • Before starting, make sure that the laptop is powered off and completely unplugged from the charger.

    • Remove the eight 6.0 mm screws holding the back into place using a Phillips #0 screwdriver.

  2. Lenovo N23 Chromebook Wi-Fi Card Replacement: 2 단계, 이미지 1/1
    • Flip the device over.

    • Slide a plastic opening tool between the back cover and keyboard.

    • Carefully pry upwards until you hear a click.

    • Following the seam, slide the opening tool all the way around the front cover, prying upwards occasionally until the keyboard and trackpad are loose from the back cover.

    • Lift the keyboard panel up to reveal the internals.

    • Don't lift the keyboard panel too violently, as there is still a cable attachment to the motherboard.

  3. Lenovo N23 Chromebook Wi-Fi Card Replacement: 3 단계, 이미지 1/3 Lenovo N23 Chromebook Wi-Fi Card Replacement: 3 단계, 이미지 2/3 Lenovo N23 Chromebook Wi-Fi Card Replacement: 3 단계, 이미지 3/3
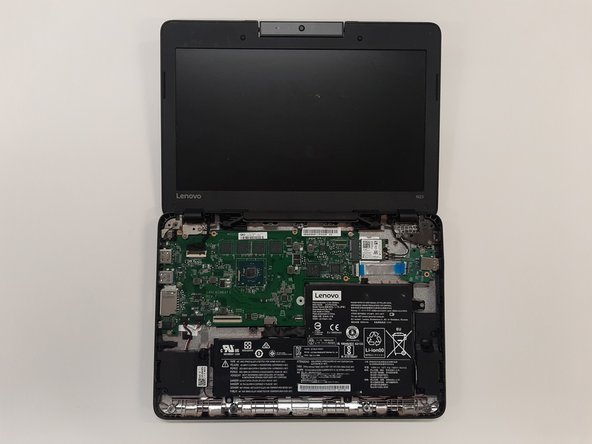
    • You can now access the internals of the computer.

    • Disconnect the two ribbon cables that connect from the motherboard to the front cover.

    • Using the iFixit opening tool, flip up the black tab holding keyboard ribbon cable and then pull the cable out.

    • Using the opening tool, flip the white tab holding the mouse ribbon cable and then pull the cable out.

  4. Lenovo N23 Chromebook Wi-Fi Card Replacement: 4 단계, 이미지 1/2 Lenovo N23 Chromebook Wi-Fi Card Replacement: 4 단계, 이미지 2/2
    • Lift the keyboard panel from the case and fully remove it from the device.

  5. Lenovo N23 Chromebook Wi-Fi Card Replacement: 5 단계, 이미지 1/1
    • Using the Phillips #0 screwdriver, remove the two 3 mm screws holding the battery in place.

  6. Lenovo N23 Chromebook Wi-Fi Card Replacement: 6 단계, 이미지 1/3 Lenovo N23 Chromebook Wi-Fi Card Replacement: 6 단계, 이미지 2/3 Lenovo N23 Chromebook Wi-Fi Card Replacement: 6 단계, 이미지 3/3
    • Disconnect the battery cable using a plastic opening tool by pulling on the black plastic lip.

    • Lift the battery out of the laptop.

  7. Lenovo N23 Chromebook Wi-Fi Card Replacement, Wifi Card: 7 단계, 이미지 1/3 Lenovo N23 Chromebook Wi-Fi Card Replacement, Wifi Card: 7 단계, 이미지 2/3 Lenovo N23 Chromebook Wi-Fi Card Replacement, Wifi Card: 7 단계, 이미지 3/3
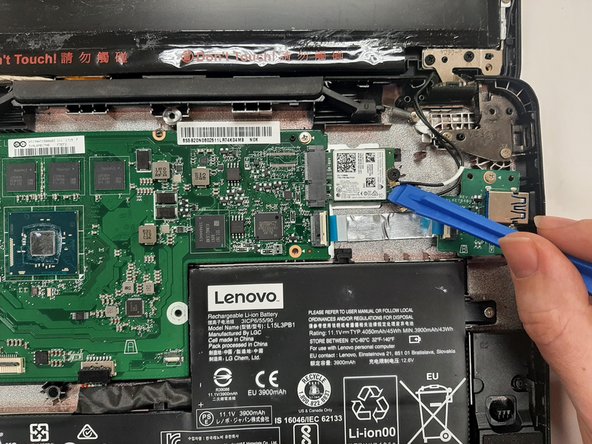
    • Use a plastic opening tool to disconnect the two coaxial cables from the Wi-Fi card.

    • Tuck the two wires out of the way.

  8. Lenovo N23 Chromebook Wi-Fi Card Replacement: 8 단계, 이미지 1/3 Lenovo N23 Chromebook Wi-Fi Card Replacement: 8 단계, 이미지 2/3 Lenovo N23 Chromebook Wi-Fi Card Replacement: 8 단계, 이미지 3/3
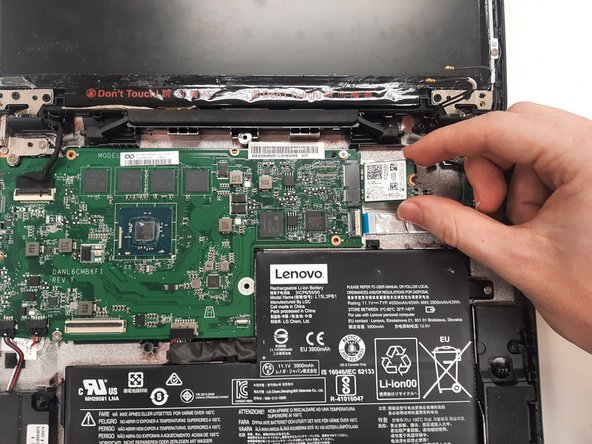
    • Remove the single 3.0 mm Phillips #1 screw holding the Wi-Fi card using a Phillips #1 screwdriver.

    • Using your hands, carefully pull the Wi-Fi card sideways out of the port on the motherboard.

결론

To reassemble your device, follow these instructions in reverse order.

Jarod Ostir

회원 가입일: 02/19/21

465 평판

안내서 3개 작성하였습니다

University of Alabama, Team S3-G1, Bedsole Spring 2021 University of Alabama, Team S3-G1, Bedsole Spring 2021 회원

UA-BEDSOLE-S21S3G1

3 회원들

안내서 4개 작성하였습니다

댓글 0개

댓글 쓰기

조회 통계:

24 시간 전: 0

7일 전: 2

30일 전: 13

전체 시간: 362