주요 콘텐츠로 건너뛰기

Lenovo Tab 2 A8 Rear-Facing Camera Replacement

필요한 것

  1. Lenovo Tab 2 A8 Rear-Facing Camera Replacement, Removing the Back Panel: 1 단계, 이미지 1/3 Lenovo Tab 2 A8 Rear-Facing Camera Replacement, Removing the Back Panel: 1 단계, 이미지 2/3 Lenovo Tab 2 A8 Rear-Facing Camera Replacement, Removing the Back Panel: 1 단계, 이미지 3/3
    • Place the tablet face down on a soft, stable surface that will protect the screen.

    • Next, Scrape off the seal over the screw in the back of the tablet with a Metal Spudger.

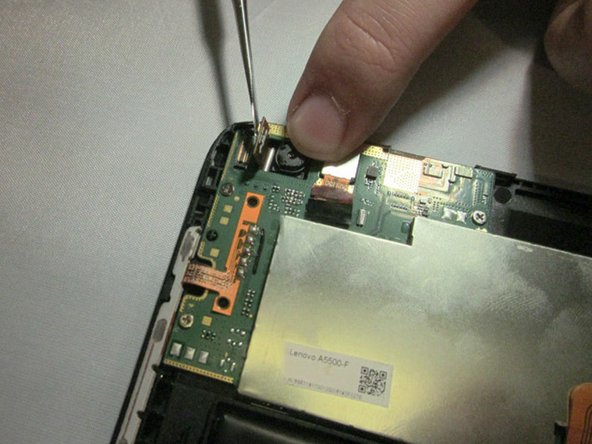
    • Use the Phillips #000 Screwdriver to remove the M1.4 × 2.5 screw.

    • If the seal covering the screw has already been removed, please proceed to the next step in the process.

    • As the screw is small, you may wish to extract it using a pair of tweezers.

  2. Lenovo Tab 2 A8 Rear-Facing Camera Replacement: 2 단계, 이미지 1/3 Lenovo Tab 2 A8 Rear-Facing Camera Replacement: 2 단계, 이미지 2/3 Lenovo Tab 2 A8 Rear-Facing Camera Replacement: 2 단계, 이미지 3/3
    • Starting on the side, work your way around the the tablet to pop off the back cover. You will want to utilize a metal Spudger for this.

    • Some force may be required initially to pry the back cover off.

    • Note that the button tabs for this device are loose inside the case and will fall out when opening.

  3. Lenovo Tab 2 A8 Rear-Facing Camera Replacement, Rear-Facing Camera: 3 단계, 이미지 1/2 Lenovo Tab 2 A8 Rear-Facing Camera Replacement, Rear-Facing Camera: 3 단계, 이미지 2/2
    • Using a spudger, pry upward on the camera connector to free it from the motherboard.

  4. Lenovo Tab 2 A8 Rear-Facing Camera Replacement: 4 단계, 이미지 1/1
    • Use tweezers to grasp the camera connector and lift the camera out of its socket.

결론

To reassemble your device, follow these instructions in reverse order.

다른 4명이 해당 안내서를 완성하였습니다.

Tim Gales

회원 가입일: 10/06/15

478 평판

안내서 3개 작성하였습니다

댓글 0개

댓글 쓰기

조회 통계:

24 시간 전: 1

7일 전: 2

30일 전: 2

전체 시간: 587