소개
A cracked or otherwise visibly broken screen will require a complete replacement of the LCD assembly. This guide will instruct you how to safely remove and replace the screen assembly on the Lenovo ThinkPad L460.
IMPORTANT:
Always ground yourself when working with sensitive electronics. Periodically touch a large metal object such as a table or chair while working or use an ESD wrist strap connected to a large metal object.
Before you begin, turn off your laptop and disconnect from the charger or any peripherals.
필요한 것
-
-
Shut down your Lenovo ThinkPad L460 completely.
-
Disconnect the AC power adapter.
-
Disconnect all connected cables and devices.
 FixBot에 문의하기
-
-
-
Use your two thumbs to push the two locking latches to the left and the right of the battery to the unlocked position.
-
While holding the latches open, slide the battery out of the connector to remove it.
-
-
-
-
Use a Phillips #1 screwdriver to loosen the 8 captive screws on the back cover of the laptop.
-
Remove the SIM tray from the side of the laptop.
-
-
-
Use an opening tool to gently pry along the edges of the cover, releasing all the plastic clips of the laptop.
-
Carefully pull up and remove the back cover from the laptop.
-
-
-
Use a Phillips #1 screwdriver to remove the four 6 mm screws and a Phillips #0 screwdriver to remove the two 5 mm screws from the hinges at the corners of the laptop.
-
-
-
Flip the black plastic cover up to reveal the Wi-Fi card.
-
Slide a thin, ESD-safe pry tool or angled tweezers under the metal neck of the coaxial cable connectors (as close to the head as possible) and lift straight up from the Wi-Fi card.
-
Use a spudger or a clean fingernail to flip up the locking flap on the display connector—this is the unlocked position.
-
Use tweezers or your fingers to gently pull the cable out of its socket.
-
-
-
Flip up the two hinged plates on the sides of the laptop.
-
Remove the LCD assembly from the laptop.
-


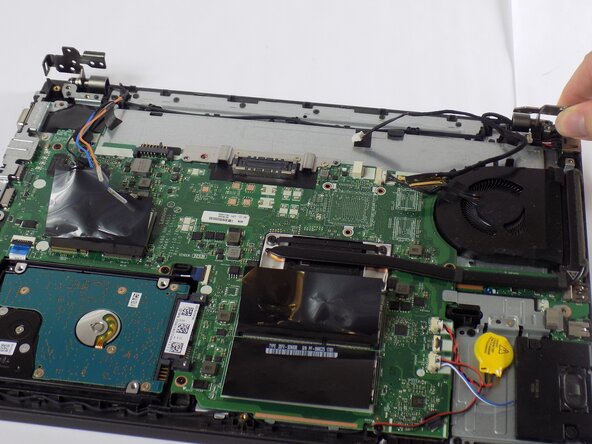
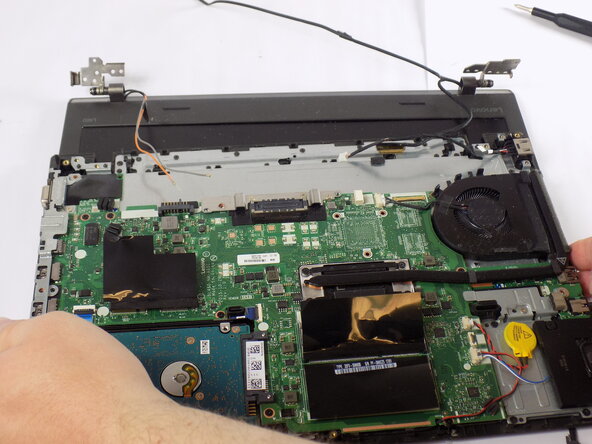


To reassemble your device, follow these instructions in reverse order. Take your e-waste to an R2 or e-Stewards certified recycler.

팀

UMass Dartmouth, Team 2-4, Bowman Fall 2025 UMass Dartmouth, Team 2-4, Bowman Fall 2025 회원
UMASSD-BOWMAN-F25S2G4
4 회원들
안내서 6개를 작성함
