주요 콘텐츠로 건너뛰기

Lenovo ThinkPad S431 Integrated Camera Replacement

필요한 것

  1. Lenovo ThinkPad S431 Integrated Camera  Replacement, Screen Assembly: 1 단계, 이미지 1/1
    • Place an opening tool under the screen cover, and pop it off.

    • Using a metal object to open fragile parts of your laptop could cause damage! Instead use the opening tool listed in the tools section above.

  2. Lenovo ThinkPad S431 Integrated Camera  Replacement: 2 단계, 이미지 1/2 Lenovo ThinkPad S431 Integrated Camera  Replacement: 2 단계, 이미지 2/2
    • Take off the 6 screws using the Philips head #1.

  3. Lenovo ThinkPad S431 Integrated Camera  Replacement: 3 단계, 이미지 1/1
    • Lift the screen out from the top.

  4. Lenovo ThinkPad S431 Integrated Camera  Replacement: 4 단계, 이미지 1/2 Lenovo ThinkPad S431 Integrated Camera  Replacement: 4 단계, 이미지 2/2
    • Remove the connector located at the bottom of the back of the screen.

  5. Lenovo ThinkPad S431 Integrated Camera  Replacement, Integrated Camera: 5 단계, 이미지 1/2 Lenovo ThinkPad S431 Integrated Camera  Replacement, Integrated Camera: 5 단계, 이미지 2/2
    • Unplug the connector. It is located on the top of the screen attached to the camera assembly.

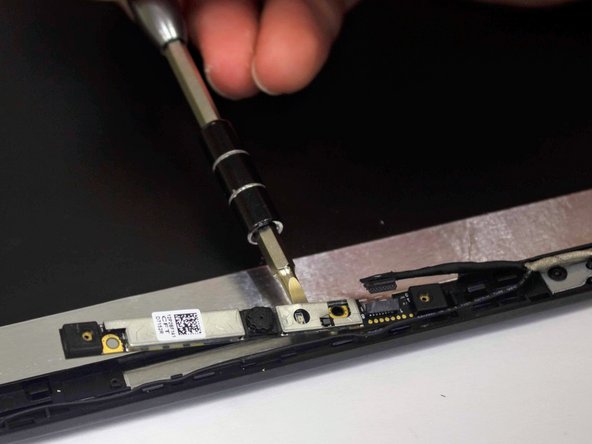
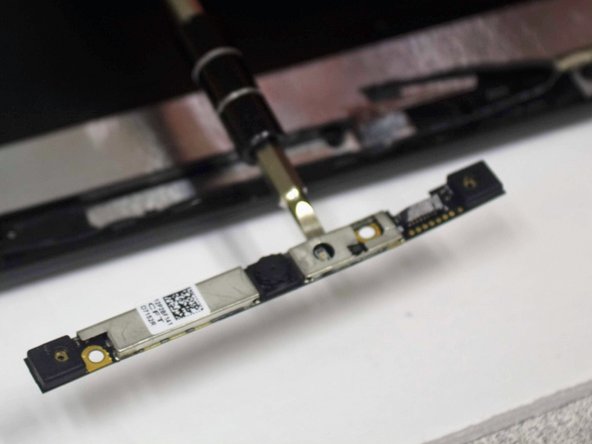
  6. Lenovo ThinkPad S431 Integrated Camera  Replacement: 6 단계, 이미지 1/3 Lenovo ThinkPad S431 Integrated Camera  Replacement: 6 단계, 이미지 2/3 Lenovo ThinkPad S431 Integrated Camera  Replacement: 6 단계, 이미지 3/3
    이 단계에 사용된 도구:
    Flathead 3/32" or 2.5 mm Screwdriver
    $5.49
    구매
결론

To reassemble your device, follow these instructions in reverse order.

다른 2명이 해당 안내서를 완성하였습니다.

Mohammed AlManai

회원 가입일: 04/05/18

648 평판

안내서 6개 작성하였습니다

댓글 0개

댓글 쓰기

조회 통계:

24 시간 전: 0

7일 전: 2

30일 전: 11

전체 시간: 2,240