주요 콘텐츠로 건너뛰기

Lenovo ThinkPad T480s LCD Panel Replacement

필요한 것

  1. Lenovo ThinkPad T480s LCD Panel Replacement, Bottom Cover: 1 단계, 이미지 1/2 Lenovo ThinkPad T480s LCD Panel Replacement, Bottom Cover: 1 단계, 이미지 2/2
    • Disable the battery, power down the device, and unplug the power adapter from your device before proceeding/beginning the guide.

    • Loosen the six captive screws with a Phillips #1 screwdriver.

  2. Lenovo ThinkPad T480s LCD Panel Replacement: 2 단계, 이미지 1/3 Lenovo ThinkPad T480s LCD Panel Replacement: 2 단계, 이미지 2/3 Lenovo ThinkPad T480s LCD Panel Replacement: 2 단계, 이미지 3/3
    • Remove the bottom cover with an opening tool.

    • Start from the top edge near the hinge and work your way along the edge until all of the clips are unsnapped.

  3. Lenovo ThinkPad T480s LCD Panel Replacement: 3 단계, 이미지 1/2 Lenovo ThinkPad T480s LCD Panel Replacement: 3 단계, 이미지 2/2
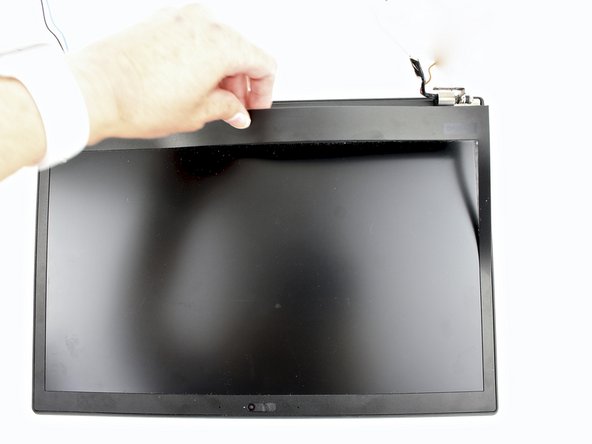
    • Lift the bottom cover off.

  4. Lenovo ThinkPad T480s LCD Panel Replacement, LCD Assembly: 4 단계, 이미지 1/3 Lenovo ThinkPad T480s LCD Panel Replacement, LCD Assembly: 4 단계, 이미지 2/3 Lenovo ThinkPad T480s LCD Panel Replacement, LCD Assembly: 4 단계, 이미지 3/3
    • Use the spudger to disconnect the coaxial cables from the Wi-Fi card and WWAN card.

    • When reassembling the Wi-Fi card, reattach the black wire closest to the screw and the gray wire on the other side of the black wire. With the WWAN card, reattach the blue wire on the left and the orange wire on the right.

    • There are also small color coded arrows on each card that match the corresponding wires, to make sure you connect to the correct spot.

  5. Lenovo ThinkPad T480s LCD Panel Replacement: 5 단계, 이미지 1/3 Lenovo ThinkPad T480s LCD Panel Replacement: 5 단계, 이미지 2/3 Lenovo ThinkPad T480s LCD Panel Replacement: 5 단계, 이미지 3/3
    • Use the spudger to disconnect the LCD cable from the motherboard.

  6. Lenovo ThinkPad T480s LCD Panel Replacement: 6 단계, 이미지 1/3 Lenovo ThinkPad T480s LCD Panel Replacement: 6 단계, 이미지 2/3 Lenovo ThinkPad T480s LCD Panel Replacement: 6 단계, 이미지 3/3
    • Disconnect the camera cable from the motherboard using a spudger.

  7. Lenovo ThinkPad T480s LCD Panel Replacement: 7 단계, 이미지 1/2 Lenovo ThinkPad T480s LCD Panel Replacement: 7 단계, 이미지 2/2
    • Remove all antenna cables from their routing.

  8. Lenovo ThinkPad T480s LCD Panel Replacement: 8 단계, 이미지 1/3 Lenovo ThinkPad T480s LCD Panel Replacement: 8 단계, 이미지 2/3 Lenovo ThinkPad T480s LCD Panel Replacement: 8 단계, 이미지 3/3
    • Using the Phillips #1 screwdriver, remove three 5 mm screws from the left hinge and three 5 mm screws from the right hinge.

  9. Lenovo ThinkPad T480s LCD Panel Replacement: 9 단계, 이미지 1/3 Lenovo ThinkPad T480s LCD Panel Replacement: 9 단계, 이미지 2/3 Lenovo ThinkPad T480s LCD Panel Replacement: 9 단계, 이미지 3/3
    • Carefully rotate the hinges upward and remove the bottom of the machine from the LCD unit.

  10. Lenovo ThinkPad T480s LCD Panel Replacement, LCD Bezel: 10 단계, 이미지 1/3 Lenovo ThinkPad T480s LCD Panel Replacement, LCD Bezel: 10 단계, 이미지 2/3 Lenovo ThinkPad T480s LCD Panel Replacement, LCD Bezel: 10 단계, 이미지 3/3
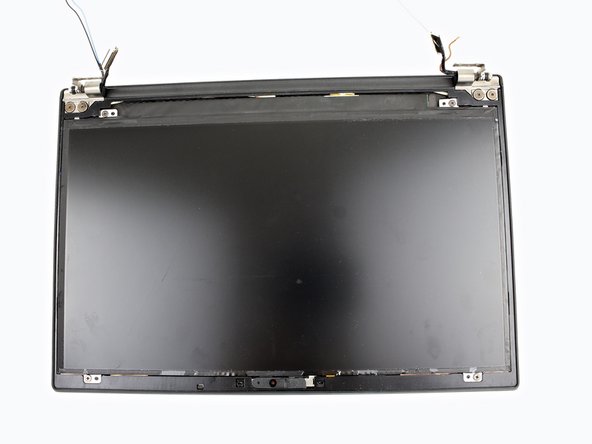
    • Using the spudger, pry the LCD bezel up from the edges starting near the hinges.

    • It is attached by adhesive so be careful not to break it. You may hear loud snaps when detaching the clips; this is normal.

  11. Lenovo ThinkPad T480s LCD Panel Replacement: 11 단계, 이미지 1/3 Lenovo ThinkPad T480s LCD Panel Replacement: 11 단계, 이미지 2/3 Lenovo ThinkPad T480s LCD Panel Replacement: 11 단계, 이미지 3/3
    • Use the spudger to remove the internal bezel.

    • Start at the corner by the hinge and lift the edge of the internal bezel up with the pointed end of the spudger.

    • Hold the internal bezel with your fingers and work your way around the perimeter of the screen carefully pulling the bezel up.

    • You will feel resistance and hear snapping as you remove the bezel because it is connected with clips. Be careful that you don't crack the bezel. The plastic is delicate in places.

  12. Lenovo ThinkPad T480s LCD Panel Replacement, LCD Panel: 12 단계, 이미지 1/2 Lenovo ThinkPad T480s LCD Panel Replacement, LCD Panel: 12 단계, 이미지 2/2
    • Remove four 2.9 mm screws from the LCD panel using the Phillips #1 screwdriver.

  13. Lenovo ThinkPad T480s LCD Panel Replacement: 13 단계, 이미지 1/3 Lenovo ThinkPad T480s LCD Panel Replacement: 13 단계, 이미지 2/3 Lenovo ThinkPad T480s LCD Panel Replacement: 13 단계, 이미지 3/3
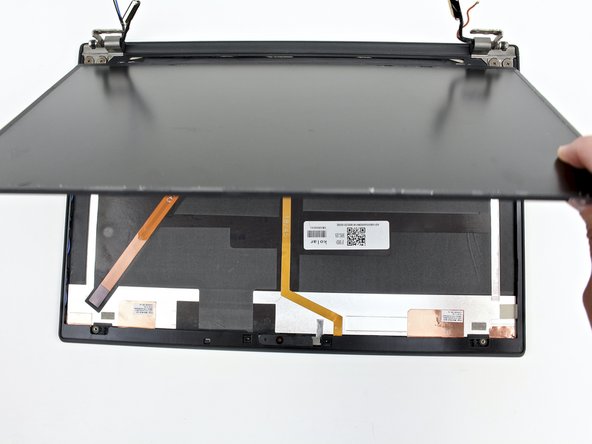
    • Gently lift the panel and flip it over.

    • The panel is still connected to the unit by the LCD cable so be careful not to rip the connector when flipping it over.

  14. Lenovo ThinkPad T480s LCD Panel Replacement: 14 단계, 이미지 1/2 Lenovo ThinkPad T480s LCD Panel Replacement: 14 단계, 이미지 2/2
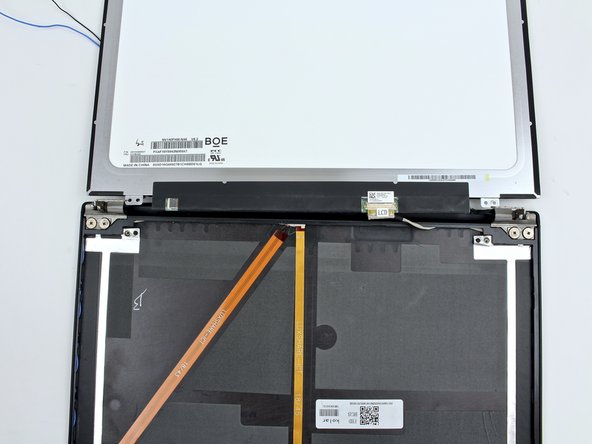
    • Peel back the tape covering the LCD cable connector.

    • Use the spudger to unlock the LCD cable.

  15. Lenovo ThinkPad T480s LCD Panel Replacement: 15 단계, 이미지 1/2 Lenovo ThinkPad T480s LCD Panel Replacement: 15 단계, 이미지 2/2
    • Remove the LCD cable from the socket.

  16. Lenovo ThinkPad T480s LCD Panel Replacement: 16 단계, 이미지 1/2 Lenovo ThinkPad T480s LCD Panel Replacement: 16 단계, 이미지 2/2
    • Remove the LCD panel from the system.

결론

To reassemble your device, follow these instructions in reverse order.

Take your e-waste to an R2 or e-Stewards certified recycler.

Repair didn’t go as planned? Try some basic troubleshooting, or ask our Answers community for help.

다른 3명이 해당 안내서를 완성하였습니다.

Sarah Westberg

회원 가입일: 03/11/19

23,245 평판

안내서 70개 작성하였습니다

iFixit iFixit 회원

Staff

135 회원들

안내서 17,207개 작성하였습니다

댓글 4개

Hello, just wondering about step 4.

The description does not match what the image is showing for the Wi-Fi card wiring. The image is showing the black wire being closest to the screw (bottom) and the grey wire being on the opposite side (top). The description describes the opposite which is correct. The correct wiring can be seen in step 3 when the lid has been opened.

Kromagnon - 답글

Hi Kromagnon, thanks for pointing this out! I believe when I opened up the device, (which was likely used ), the Wi-Fi card cables were inadvertently switched (as shown in Step 3). I wrote my instructions based on how they were initially connected, but when reassembling I put the cables back correctly and missed the fact that the instructions were inconsistent. Step 4 is now correct. Thanks again!

Sarah Westberg -

Why even remove the Wifi cables? Do they actually get in the way of the replacement? I have done this before and don't think that they do.

Nathan Morris - 답글

Hi Nathan, thanks for your question. It looks like the Wi-Fi cables are connected to the display assembly, so they will need to be disconnected from the Wi-Fi card prior to removing the display.

Sarah Westberg -

댓글 쓰기

조회 통계:

24 시간 전: 4

7일 전: 19

30일 전: 116

전체 시간: 5,667