소개
If your Lenovo ThinkPad X1 Carbon (2nd Gen) charger will not work, the screen randomly turns blue, or the laptop randomly freezes, use this guide to replace the motherboard.
The motherboard allows all of the components of your computer to communicate with each other.
Before using this guide, if the charger will not work, try using a few different outlets to charge your computer and check that your battery firmware is updated.
Also, try turning it completely off and on again.
Before you begin, make sure your computer is off.
필요한 것
-
-
Using a Phillips #0 screwdriver, remove the seven 7mm screws holding the back cover onto your computer.
-
-
-
Remove the battery by pulling it directly towards you.
Before installing the new battery, the attached cables connecting it to the board need to be bent or kinked in a similar manner to how the old battery’s cables were. I looked at the old battery’s cables for an idea of how to bend the new cables.
Also, I saw how the old battery had some very thin foam attached to the battery (as seen in the photos), and that the replacement iFixit battery didn’t have such foam. I couldn’t figure out a way to remove the foam from the old battery without destroying it, so I went ahead and installed the new battery without it.
-
-
-
-
Remove the fan by lifting it directly up.
Clean off using a cotton bud the old Thermal paste from the fan heatsink. When replacing the fan onto the new motherboard, you will need to apply a thin layer of Thermal Paste, which may or may not have come with the replacement motherboard. Apply the paste onto both metal plates on the motherboard.
-
-
-
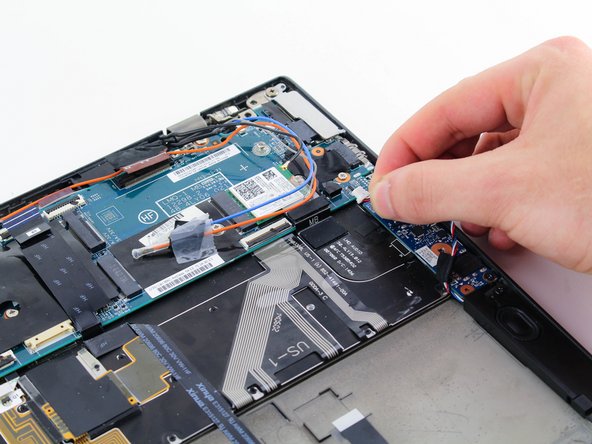
Use a Phillips #1 screwdriver to unscrew the 4mm screw holding down the Micro-SD card tray.
-
-
-
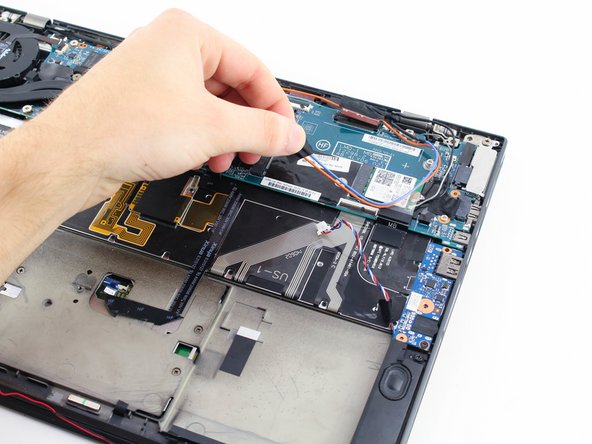
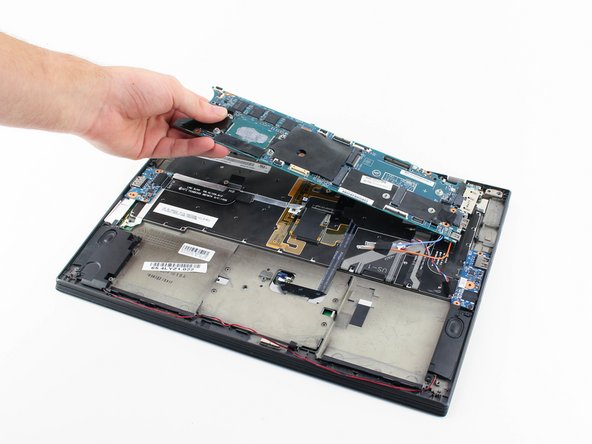
Carefully remove the motherboard by lifting it and pulling towards the left.
Need to also remove all 5 Motherboard Screws before lifting it off.
-


To reassemble your device, follow these instructions in reverse order.
To reassemble your device, follow these instructions in reverse order.
다른 4명이 해당 안내서를 완성하였습니다.

팀

Cal Poly, Team S18-G4, White Winter 2020 Cal Poly, Team S18-G4, White Winter 2020 회원
CPSU-WHITE-W20S18G4
4 회원들
안내서 7개 작성하였습니다
댓글 2개
All going as described, until the final step trying to pull the motherboard out, and there is something still holding it in place. With a bit of a wiggle and pull, there is something about near the screw hole that was holding the wifi card down preventing the card from lifting there. Any clues?
Answering my own question: Removing the motherboard requires that you first pop the SIM card / MicroSD card holder out of the socket, otherwise it won’t lift out. Submitted an update to the guide to save others falling into the same trap.