소개
If your laptop is having audio issues the speakers may need replaced. This guide will show the user how to remove the speakers in a Lenovo ThinkPad X1 Carbon (6th Gen) laptop.
Before using this guide check your computers sound settings and run the troubleshoot feature to check for any unwanted settings that may have been overlooked.
Before beginning, make sure to power off the device completely and do not have it connected to a power source. Also, it is always recommended to use a anti-static wrist band and mat when working on electronic devices to inhibit electrostatic discharged which could harm the laptop components.
필요한 것
-
-
Use a Phillips #0 screwdriver to unscrew the five screws that secure the back cover to the laptop.
-
-
-
-
Use the Phillips #0 screwdriver to remove the four 5 mm screws that secure the battery to the laptop frame.
-
-
-
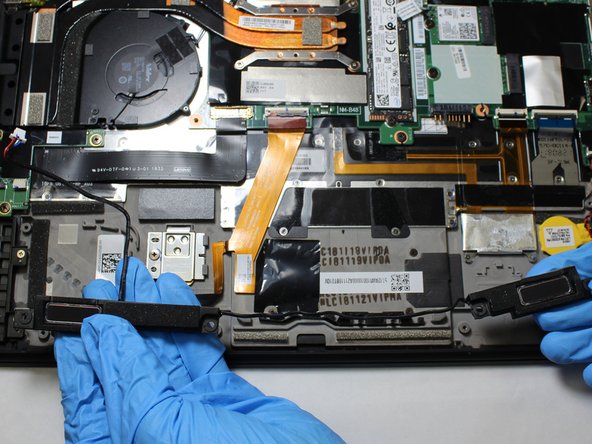
Gently grab the widest edges of the speaker cable and pull the cable out towards the speakers.
-
Use a Phillips #0 screwdriver to remove the four 5 mm screws.
-


To reassemble your device, follow these instructions in reverse order.
To reassemble your device, follow these instructions in reverse order.
팀

The Citadel Military College of South Carolina, Team S1-G2, Eggleston Fall 2020 The Citadel Military College of South Carolina, Team S1-G2, Eggleston Fall 2020 회원
CMCSC-EGGLESTON-F20S1G2
3 회원들
안내서 5개 작성하였습니다