주요 콘텐츠로 건너뛰기

Lenovo ThinkPad Yoga 11e (Gen 5) Speaker Replacement

필요한 것

  1. Lenovo ThinkPad Yoga 11e (Gen 5) Speaker Replacement, Speaker: 1 단계, 이미지 1/1
    • Start by putting on your anti static wrist strap and connecting it to a stationary and stable object, like a desk.

    • This safety strap serves as a precaution to prevent any electrical static you might have on your body from transferring to the laptop's internal components and damaging the hardware.bold text

    • Reminder to have this safety strap on you at all times during the process

  2. Lenovo ThinkPad Yoga 11e (Gen 5) Speaker Replacement: 2 단계, 이미지 1/3 Lenovo ThinkPad Yoga 11e (Gen 5) Speaker Replacement: 2 단계, 이미지 2/3 Lenovo ThinkPad Yoga 11e (Gen 5) Speaker Replacement: 2 단계, 이미지 3/3
    • Use a T5 Torx screwdriver to loosen and remove all eight bottom cover screws.

    • If you're having issues removing the back cover of the case, be sure to use the opening pick to pry the case open carefully.

  3. Lenovo ThinkPad Yoga 11e (Gen 5) Speaker Replacement: 3 단계, 이미지 1/3 Lenovo ThinkPad Yoga 11e (Gen 5) Speaker Replacement: 3 단계, 이미지 2/3 Lenovo ThinkPad Yoga 11e (Gen 5) Speaker Replacement: 3 단계, 이미지 3/3
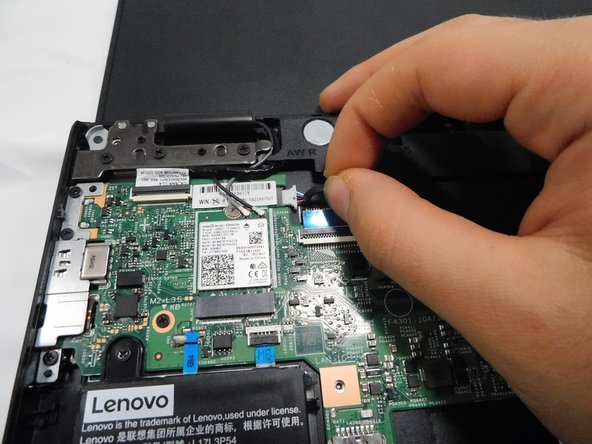
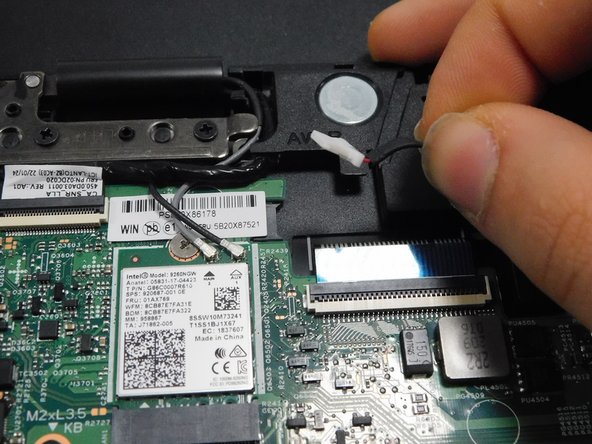
    • Unplug the speaker port from motherboard.

  4. Lenovo ThinkPad Yoga 11e (Gen 5) Speaker Replacement: 4 단계, 이미지 1/1
    • Remove the screws holding the speaker in place. There are 2 screws that need to be removed.

  5. Lenovo ThinkPad Yoga 11e (Gen 5) Speaker Replacement: 5 단계, 이미지 1/1
    • Take out the speaker from its port, it should not be very hard to pull it out.

결론

To reassemble your device, follow these instructions in reverse order.

Curtis Blue Akins iii

회원 가입일: 02/05/24

121 평판

안내서 1개 작성함

Gateway, Team 11-11, Gonzalez Spring 2024 Gateway, Team 11-11, Gonzalez Spring 2024 회원

GCC-GONZALEZ-S24S11G11

4 회원들

안내서 4개 작성하였습니다

댓글 0개

댓글 쓰기

조회 통계:

24 시간 전: 0

7일 전: 2

30일 전: 12

전체 시간: 32