주요 콘텐츠로 건너뛰기

Lenovo ThinkPad Yoga 14 20FY Fan Replacement

필요한 것

  1. Lenovo ThinkPad Yoga 14 20FY  Fan  Replacement, Back Cover: 1 단계, 이미지 1/2 Lenovo ThinkPad Yoga 14 20FY  Fan  Replacement, Back Cover: 1 단계, 이미지 2/2
    • Remove the indicated nine M2 x 6 mm nylon-coated screws using a Phillips head screwdriver.

    • The screws do not come all the way out. Do not force them out.

  2. Lenovo ThinkPad Yoga 14 20FY  Fan  Replacement: 2 단계, 이미지 1/2 Lenovo ThinkPad Yoga 14 20FY  Fan  Replacement: 2 단계, 이미지 2/2
    • After removing all of the screws, gently lift up on all covers to remove the back plate and reveal the interior of the device.

  3. Lenovo ThinkPad Yoga 14 20FY  Fan  Replacement, Fan: 3 단계, 이미지 1/2 Lenovo ThinkPad Yoga 14 20FY  Fan  Replacement, Fan: 3 단계, 이미지 2/2
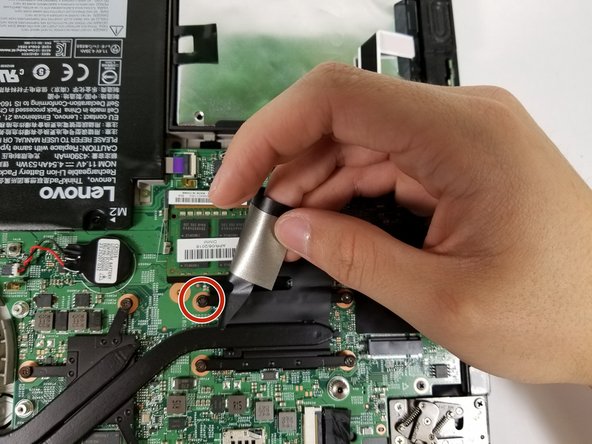
    • Remove all 7 screws.

    • One of the screws is behind a black piece of the plastic.

  4. Lenovo ThinkPad Yoga 14 20FY  Fan  Replacement: 4 단계, 이미지 1/2 Lenovo ThinkPad Yoga 14 20FY  Fan  Replacement: 4 단계, 이미지 2/2
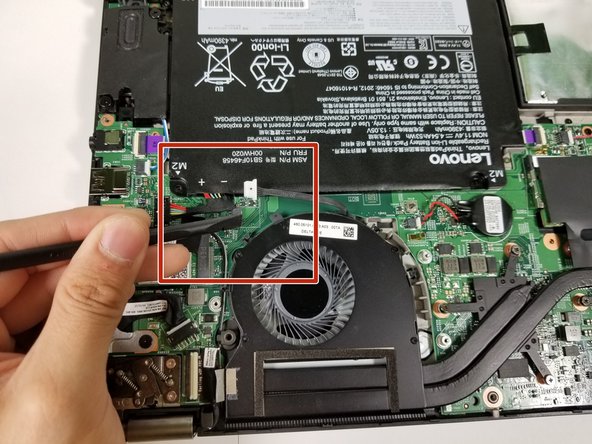
    • Use the flat end of the spudger to push the connector out of its socket .

    • Do not use the wire to pull the connector out!

  5. Lenovo ThinkPad Yoga 14 20FY  Fan  Replacement: 5 단계, 이미지 1/2 Lenovo ThinkPad Yoga 14 20FY  Fan  Replacement: 5 단계, 이미지 2/2
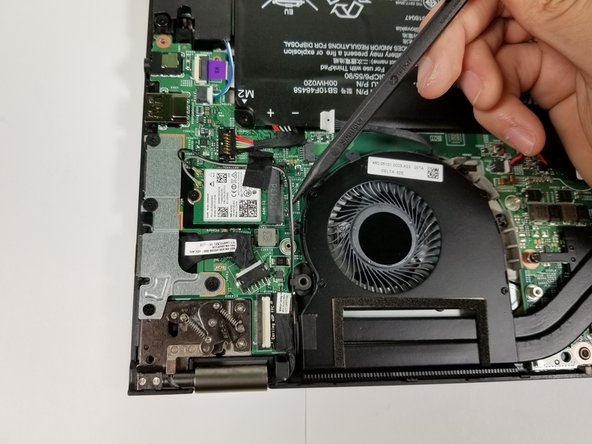
    • There is a wire looped around the fan. Use the spudger to pull the wires out of the loop.

  6. Lenovo ThinkPad Yoga 14 20FY  Fan  Replacement: 6 단계, 이미지 1/1
    • Gently peel back a piece of tape in the bottom left corner of the fan.

  7. Lenovo ThinkPad Yoga 14 20FY  Fan  Replacement: 7 단계, 이미지 1/1
    • Gently lift out the fan.

결론

To reassemble your device, follow these instructions in reverse order.

jose aguirre

회원 가입일: 04/19/17

264 평판

안내서 2개 작성하였습니다

Cal Poly, Team S14-G2, Banghart Spring 2017 Cal Poly, Team S14-G2, Banghart Spring 2017 회원

CPSU-BANGHART-S17S14G2

5 회원들

안내서 6개 작성하였습니다

댓글 0개

댓글 쓰기

조회 통계:

24 시간 전: 0

7일 전: 1

30일 전: 3

전체 시간: 1,425