주요 콘텐츠로 건너뛰기

Lenovo ThinkPad Yoga 14 20FY Hard Drive Replacement

필요한 것

  1. Lenovo ThinkPad Yoga 14 20FY Hard Drive  Replacement, Back Cover: 1 단계, 이미지 1/2 Lenovo ThinkPad Yoga 14 20FY Hard Drive  Replacement, Back Cover: 1 단계, 이미지 2/2
    • Remove the indicated nine M2 x 6 mm nylon-coated screws using a Phillips head screwdriver.

    • The screws do not come all the way out. Do not force them out.

  2. Lenovo ThinkPad Yoga 14 20FY Hard Drive  Replacement: 2 단계, 이미지 1/2 Lenovo ThinkPad Yoga 14 20FY Hard Drive  Replacement: 2 단계, 이미지 2/2
    • After removing all of the screws, gently lift up on all covers to remove the back plate and reveal the interior of the device.

  3. Lenovo ThinkPad Yoga 14 20FY Hard Drive  Replacement, Hard Drive: 3 단계, 이미지 1/2 Lenovo ThinkPad Yoga 14 20FY Hard Drive  Replacement, Hard Drive: 3 단계, 이미지 2/2
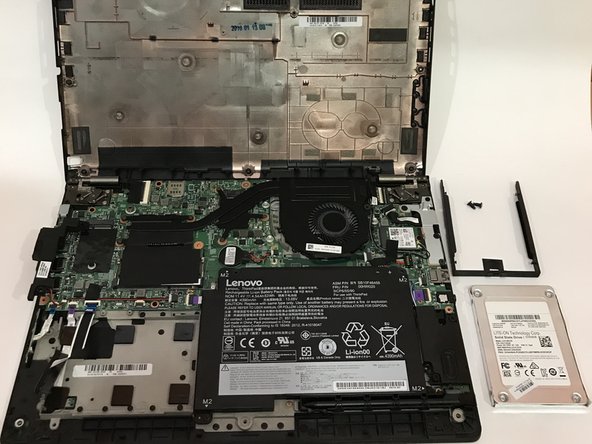
    • Once the back cover is exposed, remove the two screws holding the hard drive in place.

  4. Lenovo ThinkPad Yoga 14 20FY Hard Drive  Replacement: 4 단계, 이미지 1/1
    • Remove the plastic encasing holding down the hard drive after screws are removed.

    • This is the plastic encasing covering the SATA connection on the hard drive. There will be another plastic encasing that will be required to remove in a later step.

  5. Lenovo ThinkPad Yoga 14 20FY Hard Drive  Replacement: 5 단계, 이미지 1/2 Lenovo ThinkPad Yoga 14 20FY Hard Drive  Replacement: 5 단계, 이미지 2/2
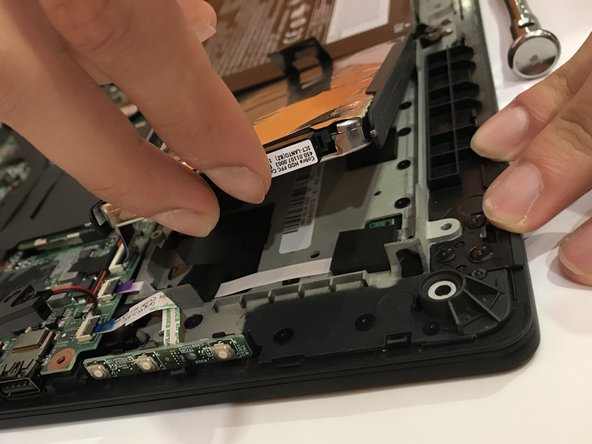
    • Using two fingers, carefully remove the hard drive.

  6. Lenovo ThinkPad Yoga 14 20FY Hard Drive  Replacement: 6 단계, 이미지 1/2 Lenovo ThinkPad Yoga 14 20FY Hard Drive  Replacement: 6 단계, 이미지 2/2
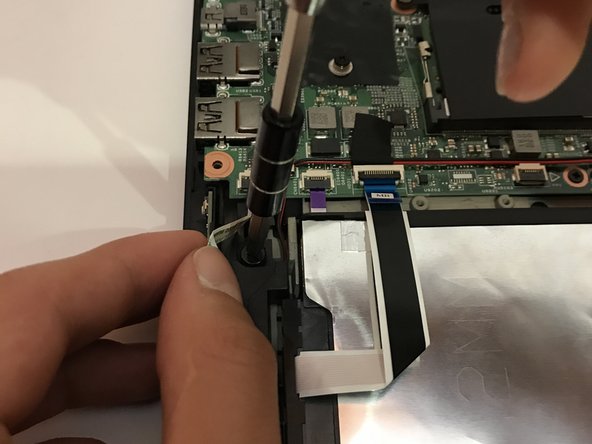
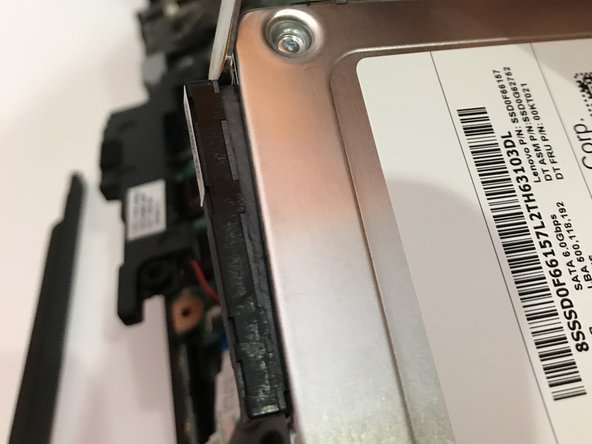
    • Carefully remove the plastic encasing surrounding the perimeter of the hard drive.

  7. Lenovo ThinkPad Yoga 14 20FY Hard Drive  Replacement: 7 단계, 이미지 1/3 Lenovo ThinkPad Yoga 14 20FY Hard Drive  Replacement: 7 단계, 이미지 2/3 Lenovo ThinkPad Yoga 14 20FY Hard Drive  Replacement: 7 단계, 이미지 3/3
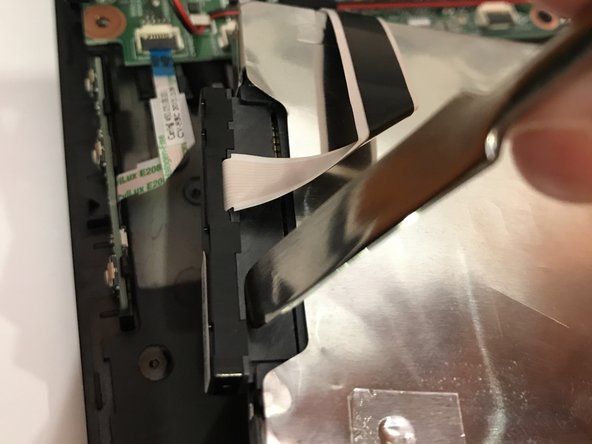
    • This step requires the most precision. Forcefully using the prying tool to remove the SATA connector may damage the hard drive and the connection. Remove the connection slowly to a point where you can safely finish removing the connection with your fingers.

    • Use a nylon spudger to remove the SATA connector from the hard drive.

  8. Lenovo ThinkPad Yoga 14 20FY Hard Drive  Replacement: 8 단계, 이미지 1/2 Lenovo ThinkPad Yoga 14 20FY Hard Drive  Replacement: 8 단계, 이미지 2/2
    • After the SATA connection is removed, gently pop off the hard drive from its socket.

결론

To reassemble your device, follow these instructions in reverse order.

다른 5명이 해당 안내서를 완성하였습니다.

Richard Terre

회원 가입일: 04/19/17

243 평판

안내서 1개 작성함

Cal Poly, Team S14-G2, Banghart Spring 2017 Cal Poly, Team S14-G2, Banghart Spring 2017 회원

CPSU-BANGHART-S17S14G2

5 회원들

안내서 6개 작성하였습니다

댓글 한 개

After the SATA connection is removed, gently pop off the hard drive from its socket.

jhonson - 답글

댓글 쓰기

조회 통계:

24 시간 전: 1

7일 전: 5

30일 전: 20

전체 시간: 5,235