주요 콘텐츠로 건너뛰기

Lenovo Thinkpad Twist s230u Battery Replacement

필요한 것

  1. Lenovo Thinkpad Twist s230u Battery Replacement, Hard Drive: 1 단계, 이미지 1/2 Lenovo Thinkpad Twist s230u Battery Replacement, Hard Drive: 1 단계, 이미지 2/2
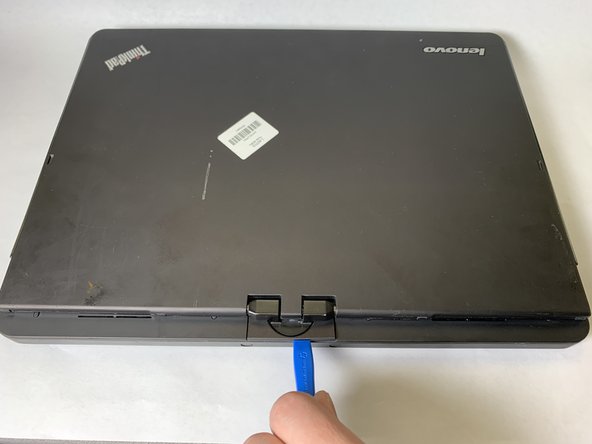
    • Flip the laptop over.

    • Using a Phillips #1 Screwdriver, unscrew the screw on the bottom left corner.

  2. Lenovo Thinkpad Twist s230u Battery Replacement: 2 단계, 이미지 1/1
    • Using the iFixit Opening tool, loosen the hard drive cover.

  3. Lenovo Thinkpad Twist s230u Battery Replacement: 3 단계, 이미지 1/1
    • Remove the hard drive cover.

  4. Lenovo Thinkpad Twist s230u Battery Replacement: 4 단계, 이미지 1/2 Lenovo Thinkpad Twist s230u Battery Replacement: 4 단계, 이미지 2/2
    • Remove the hard drive by sliding it out.

  5. Lenovo Thinkpad Twist s230u Battery Replacement, Keyboard: 5 단계, 이미지 1/1
    • Use a Philips #1 screwdriver to remove 2 screws on the bottom of the laptop.

  6. Lenovo Thinkpad Twist s230u Battery Replacement: 6 단계, 이미지 1/1
    • Use a spudger to loosen the keyboard around the edges.

    • Carefully push the keyboard towards the screen to unlatch it.

    • Do not push too hard, as there are ribbon cables attached to the keyboard.

  7. Lenovo Thinkpad Twist s230u Battery Replacement: 7 단계, 이미지 1/1
    • Carefully lift up the keyboard to access the wires underneath.

    • Be careful not to break the ribbon cables attached underneath.

  8. Lenovo Thinkpad Twist s230u Battery Replacement: 8 단계, 이미지 1/3 Lenovo Thinkpad Twist s230u Battery Replacement: 8 단계, 이미지 2/3 Lenovo Thinkpad Twist s230u Battery Replacement: 8 단계, 이미지 3/3
    • Open the small black flap on each of the ribbon cables. It should lift with a slight effort.

    • Pull out the ribbon cables and remove the keyboard from the device.

  9. Lenovo Thinkpad Twist s230u Battery Replacement, Upper Casing: 9 단계, 이미지 1/1
    • Flip your device over.

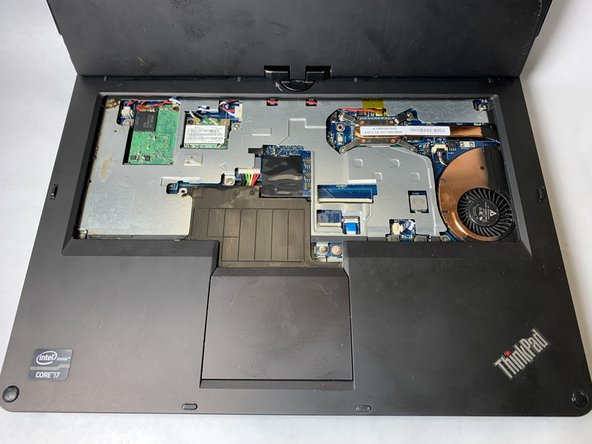
    • Use the Phillips #1 screwdriver to remove the nine screws.

  10. Lenovo Thinkpad Twist s230u Battery Replacement: 10 단계, 이미지 1/2 Lenovo Thinkpad Twist s230u Battery Replacement: 10 단계, 이미지 2/2
    • Flip the device back over and open the top.

    • Use the Phillips #1 screwdriver to remove the seven silver screws.

    • Disconnect the three cables inside the case.

    • Lift up the brown tab and disconnect the ribbon cable.

  11. Lenovo Thinkpad Twist s230u Battery Replacement: 11 단계, 이미지 1/2 Lenovo Thinkpad Twist s230u Battery Replacement: 11 단계, 이미지 2/2
    • Close the lid and turn the device around.

    • Use the iFixit Opening Tool to lift up and remove the tab on the back.

  12. Lenovo Thinkpad Twist s230u Battery Replacement: 12 단계, 이미지 1/2 Lenovo Thinkpad Twist s230u Battery Replacement: 12 단계, 이미지 2/2
    • Turn the device back around and reopen it.

    • Use the iFixit Opening Tool to disconnect the top of the case from the bottom.

    • Lift up the top of the case and slide it out from under the screen.

  13. Lenovo Thinkpad Twist s230u Battery Replacement, Battery: 13 단계, 이미지 1/2 Lenovo Thinkpad Twist s230u Battery Replacement, Battery: 13 단계, 이미지 2/2
    • Remove the single silver screw using the Phillips #1 screwdriver.

  14. Lenovo Thinkpad Twist s230u Battery Replacement: 14 단계, 이미지 1/1
    • Unplug the colored cables.

  15. Lenovo Thinkpad Twist s230u Battery Replacement: 15 단계, 이미지 1/1
    • Lift the battery out of the laptop.

결론

To reassemble your device, follow these instructions in reverse order.

다른 4명이 해당 안내서를 완성하였습니다.

Arthur McPeak

회원 가입일: 01/14/20

682 평판

안내서 6개 작성하였습니다

댓글 0개

댓글 쓰기

조회 통계:

24 시간 전: 2

7일 전: 14

30일 전: 61

전체 시간: 4,174