소개
If the cooling fan in your Lenovo ThinkPad X1 Carbon 4th Gen (20FB002LUS) is not working properly and causing the computer to make odd noises or overheat, look over this guide to learn how to fix these common issues.
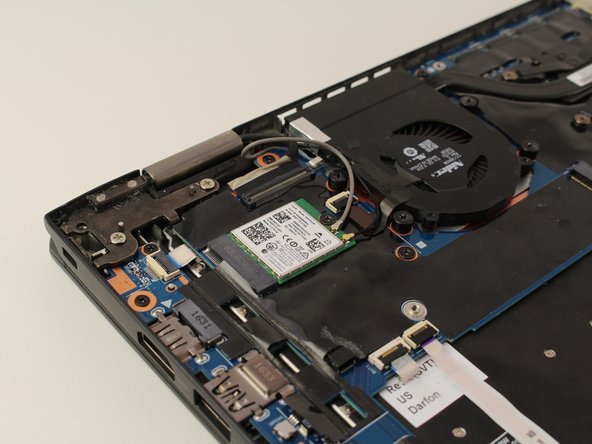
The cooling fan is the main reason why your laptop is able to run smoothly as it pushes outside cool air over the main components in the laptop like the CPU and GPU, which heat up while the laptop is in use.
Most laptop fans, however, are very susceptible to dust build-up, which can cause the fan to either malfunction or create undesirable noises.
This guide covers how to replace the fan. It is recommended that you use canned air to blow any dust that might have jammed the thermal fans before trying to replace the fan entirely.
Keep note that in this guide, you will be removing thermal paste that is under the fan assembly. It is good practice to replace the thermal paste after taking out the fan. For more information, click here.
Before starting this guide, make sure to power down the device fully and unplug any exterior sources of power from the laptop.
필요한 것
-
-
Unscrew the nine captive screws on the bottom cover of the laptop using a Phillips #1 screwdriver.
-
There are a few small clips around the edge that you may need to pry at to free them. An opening pick may be helpful for this process.
-
-


To reassemble your device, follow these instructions in reverse order.
To reassemble your device, follow these instructions in reverse order.
다른 2명이 해당 안내서를 완성하였습니다.
팀

Cal Poly, Team S1-G4, White Winter 2020 Cal Poly, Team S1-G4, White Winter 2020 회원
CPSU-WHITE-W20S1G4
3 회원들
안내서 19개 작성하였습니다
댓글 2개
I bought a refurbished Lenovo from Ebay and it purports to be a Carbon X1 4th Gen, but its guts do not look like the ones depicted in the photo. Instead, it looks like https://davidmintz.org/images/20210703_l.... Nevertheless I was able to remove the fan — the general idea is similar enough. After three or so years this machine has died with a simple “Fan error” message at boot time. I tried blowing out some dust and trying again, no luck. So I will be looking for the replacement part. Wish me luck. Thank you for the guide!
Very useful and allowed me to clean the fan on my 4th gen X1 Carbon. That fixed the immediate "fan error" message on boot failure. It is running rough so I will have to replace it soon I think.