주요 콘텐츠로 건너뛰기

Lenovo Yoga 3 11 Speaker Replacement

필요한 것

  1. Lenovo Yoga 3 11 Speaker Replacement, Lower Case: 1 단계, 이미지 1/1
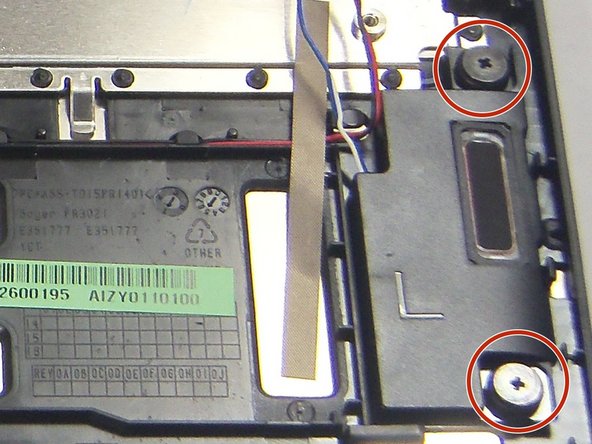
    • Remove the eleven 6 mm T5 Torx screws securing the lower case.

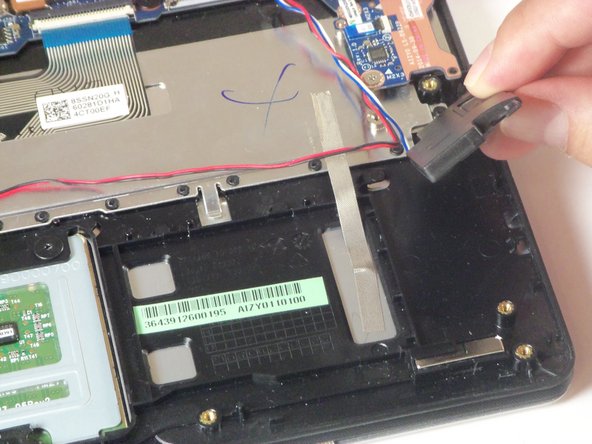
    • Gently lift the lower case up and away from the device.

  2. Lenovo Yoga 3 11 Speaker Replacement, Battery: 2 단계, 이미지 1/3 Lenovo Yoga 3 11 Speaker Replacement, Battery: 2 단계, 이미지 2/3 Lenovo Yoga 3 11 Speaker Replacement, Battery: 2 단계, 이미지 3/3
    • Remove the two 3 mm Phillips #00 screws securing the battery.

    • There are arrows on the battery indicating the location of the screws.

  3. Lenovo Yoga 3 11 Speaker Replacement: 3 단계, 이미지 1/1
    • Use a pair of tweezers to gently disconnect the battery connector.

  4. Lenovo Yoga 3 11 Speaker Replacement: 4 단계, 이미지 1/2 Lenovo Yoga 3 11 Speaker Replacement: 4 단계, 이미지 2/2
    • Use a pair of tweezers to gently disconnect the speaker cable.

    • Remove the wires from underneath the battery tabs using the tweezers.

  5. Lenovo Yoga 3 11 Speaker Replacement: 5 단계, 이미지 1/1
    • Carefully remove the battery from the device.

  6. Lenovo Yoga 3 11 Speaker Replacement, Speaker: 6 단계, 이미지 1/2 Lenovo Yoga 3 11 Speaker Replacement, Speaker: 6 단계, 이미지 2/2
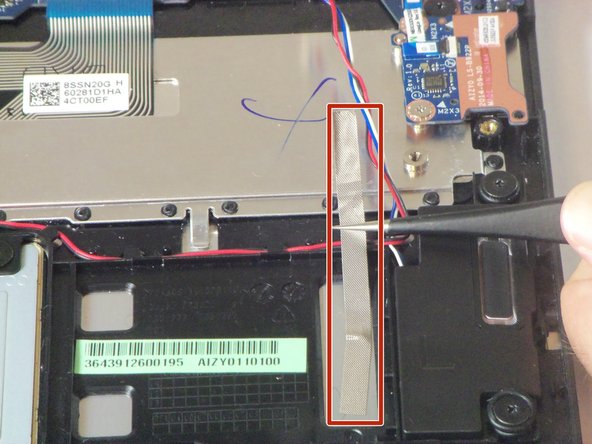
    • Use a pair of tweezers to peel up one side of each of the 3 pieces of tape that cover the speaker wires.

  7. Lenovo Yoga 3 11 Speaker Replacement: 7 단계, 이미지 1/2 Lenovo Yoga 3 11 Speaker Replacement: 7 단계, 이미지 2/2
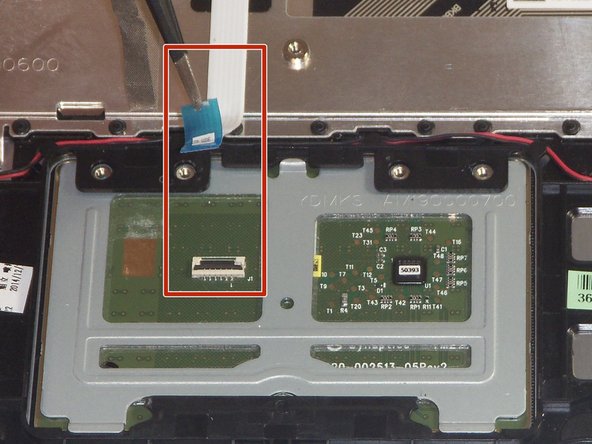
    • Use a pair of tweezers to disconnect the ZIF connector securing the trackpad ribbon cable. Gently lift the black tab up, and the cable should come free.

  8. Lenovo Yoga 3 11 Speaker Replacement: 8 단계, 이미지 1/3 Lenovo Yoga 3 11 Speaker Replacement: 8 단계, 이미지 2/3 Lenovo Yoga 3 11 Speaker Replacement: 8 단계, 이미지 3/3
    • Remove the two 2 mm Phillips #0 screws securing the left speaker.

    • Remove the two 2 mm Phillips #0 screws securing the right speaker.

  9. Lenovo Yoga 3 11 Speaker Replacement: 9 단계, 이미지 1/2 Lenovo Yoga 3 11 Speaker Replacement: 9 단계, 이미지 2/2
    • Use a pair of tweezers to disconnect the speaker connector.

    • Gently lift the speakers free of the device.

결론

To reassemble your device, follow these instructions in reverse order.

다른 한 분이 해당 안내서를 완성하였습니다.

Slade Fernandes

회원 가입일: 08/27/15

532 평판

안내서 3개 작성하였습니다

USF Tampa, Team 2-3, Blackwell Fall 2015 USF Tampa, Team 2-3, Blackwell Fall 2015 회원

USFT-BLACKWELL-F15S2G3

4 회원들

안내서 11개 작성하였습니다

댓글 0개

댓글 쓰기

조회 통계:

24 시간 전: 0

7일 전: 0

30일 전: 2

전체 시간: 1,192