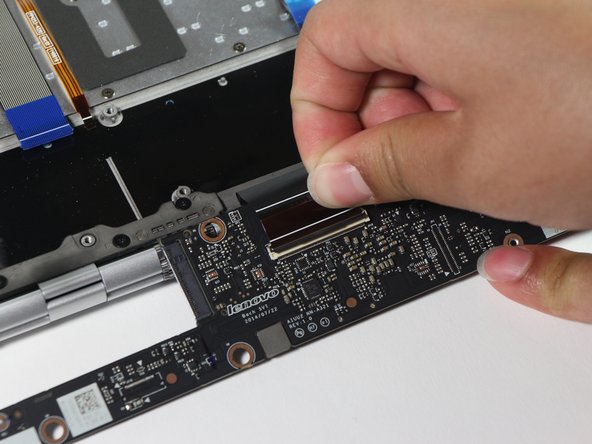
주요 콘텐츠로 건너뛰기

Lenovo Yoga 3 Pro Motherboard Replacement

보관된 가이드
해당 안내서는 단지 역사적인 목적으로 보관됩니다. 최신 버전 안내서를 사용하여 수리 하십시오.

필요한 것

  1. Lenovo Yoga 3 Pro Motherboard Replacement, Back Panel: 1 단계, 이미지 1/2 Lenovo Yoga 3 Pro Motherboard Replacement, Back Panel: 1 단계, 이미지 2/2
    • Flip the laptop so that the back panel is facing up.

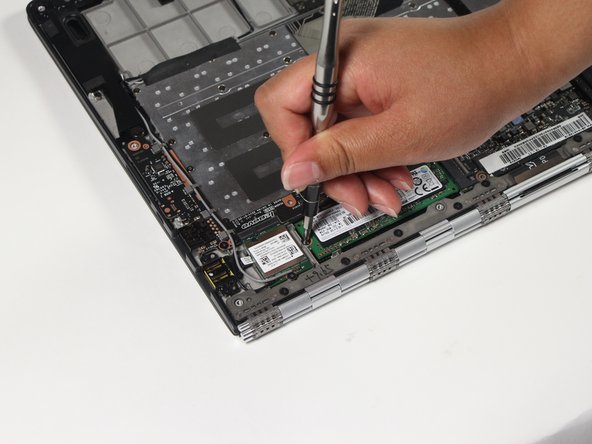
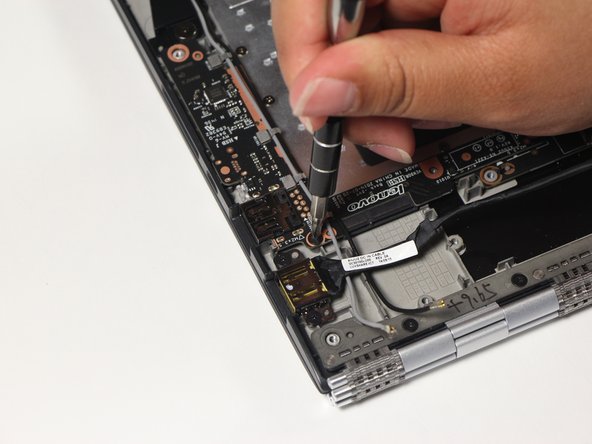
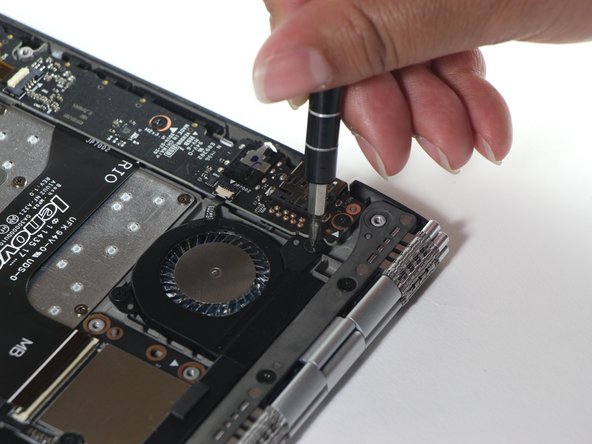
    • Remove the ten 4.0mm T6 Torx screws from the back of the laptop.

  2. Lenovo Yoga 3 Pro Motherboard Replacement: 2 단계, 이미지 1/1
    • Gently lift the back cover off of the laptop.

  3. Lenovo Yoga 3 Pro Motherboard Replacement, Battery: 3 단계, 이미지 1/2 Lenovo Yoga 3 Pro Motherboard Replacement, Battery: 3 단계, 이미지 2/2
    • Push the black battery cable towards the battery to disconnect it.

  4. Lenovo Yoga 3 Pro Motherboard Replacement: 4 단계, 이미지 1/2 Lenovo Yoga 3 Pro Motherboard Replacement: 4 단계, 이미지 2/2
    • Remove the six #0 3.8mm Phillips screws from the battery.

  5. Lenovo Yoga 3 Pro Motherboard Replacement: 5 단계, 이미지 1/1
    • Gently lift the battery out of the laptop chassis.

  6. Lenovo Yoga 3 Pro Motherboard Replacement, Wireless Card: 6 단계, 이미지 1/2 Lenovo Yoga 3 Pro Motherboard Replacement, Wireless Card: 6 단계, 이미지 2/2
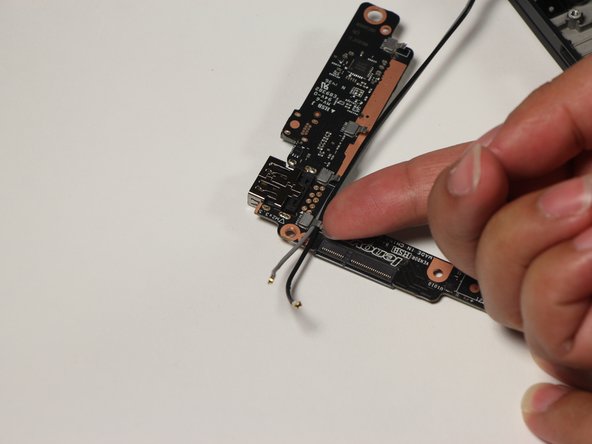
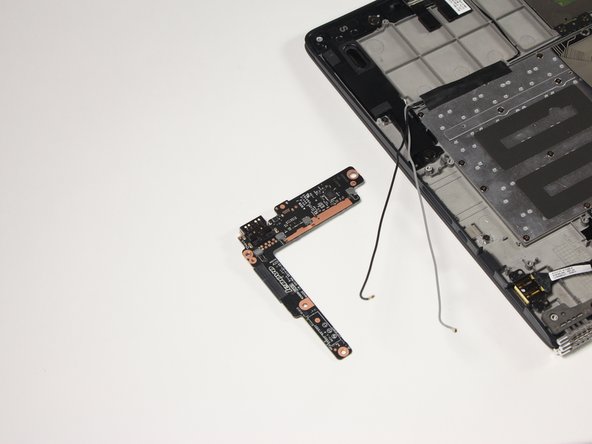
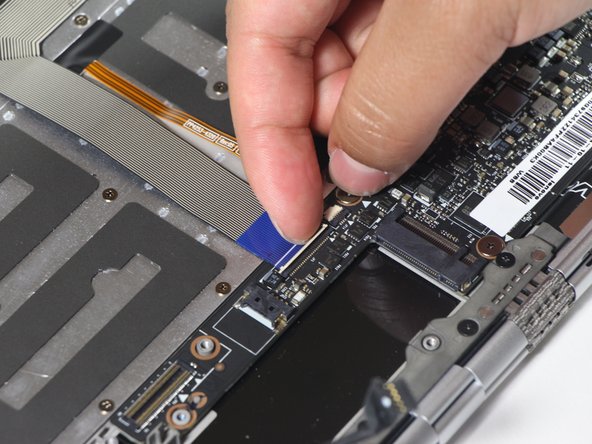
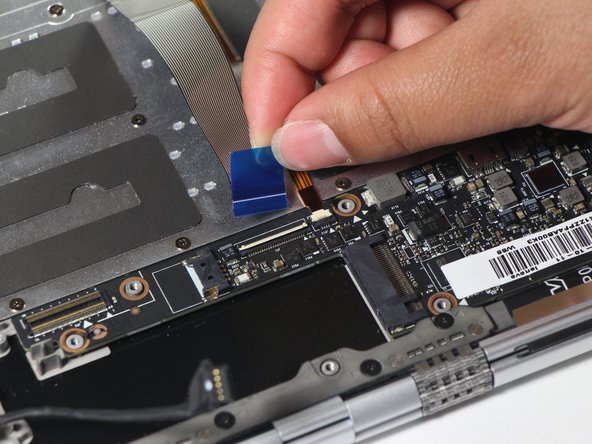
    • Using the plastic opening tool, gently pry the grey wire off the wifi card.

    • Pry the black wire off the wifi card.

  7. Lenovo Yoga 3 Pro Motherboard Replacement: 7 단계, 이미지 1/1
    • Remove the one #0 2.9mm Phillips screw from the base of the wifi card.

  8. Lenovo Yoga 3 Pro Motherboard Replacement: 8 단계, 이미지 1/2 Lenovo Yoga 3 Pro Motherboard Replacement: 8 단계, 이미지 2/2
    • Gently lift and pull the wifi card out.

  9. Lenovo Yoga 3 Pro Motherboard Replacement, SSD: 9 단계, 이미지 1/2 Lenovo Yoga 3 Pro Motherboard Replacement, SSD: 9 단계, 이미지 2/2
    • Remove the one #0 2.9mm Phillips screw from the SSD.

  10. Lenovo Yoga 3 Pro Motherboard Replacement: 10 단계, 이미지 1/1
    • Gently lift and wiggle the SSD side to side to remove it from the laptop chassis.

  11. Lenovo Yoga 3 Pro Motherboard Replacement, Motherboard: 11 단계, 이미지 1/3 Lenovo Yoga 3 Pro Motherboard Replacement, Motherboard: 11 단계, 이미지 2/3 Lenovo Yoga 3 Pro Motherboard Replacement, Motherboard: 11 단계, 이미지 3/3
    • Push the cable away from the motherboard.

  12. Lenovo Yoga 3 Pro Motherboard Replacement: 12 단계, 이미지 1/3 Lenovo Yoga 3 Pro Motherboard Replacement: 12 단계, 이미지 2/3 Lenovo Yoga 3 Pro Motherboard Replacement: 12 단계, 이미지 3/3
    • Remove the two #0 2.9mm Phillips screws from the daughter board.

  13. Lenovo Yoga 3 Pro Motherboard Replacement: 13 단계, 이미지 1/1
    • Lift the daughter board with the plastic opening tool.

    • You will hear two clicks when lifting the daughter board.

  14. Lenovo Yoga 3 Pro Motherboard Replacement: 14 단계, 이미지 1/3 Lenovo Yoga 3 Pro Motherboard Replacement: 14 단계, 이미지 2/3 Lenovo Yoga 3 Pro Motherboard Replacement: 14 단계, 이미지 3/3
    • Lift the daughter board, unrouting the wireless cables from their plastic holders, and place it to the side.

  15. Lenovo Yoga 3 Pro Motherboard Replacement: 15 단계, 이미지 1/3 Lenovo Yoga 3 Pro Motherboard Replacement: 15 단계, 이미지 2/3 Lenovo Yoga 3 Pro Motherboard Replacement: 15 단계, 이미지 3/3
    • Gently lift the metal tabs on the daughter board to free the wires.

  16. Lenovo Yoga 3 Pro Motherboard Replacement: 16 단계, 이미지 1/3 Lenovo Yoga 3 Pro Motherboard Replacement: 16 단계, 이미지 2/3 Lenovo Yoga 3 Pro Motherboard Replacement: 16 단계, 이미지 3/3
    • Detach the five flat flex cables attached to the motherboard as follows:

    • 1. Flip the cable holder up with a finger nail

    • 2. Pull on the tab to remove the cable.

    • The large black flat flex labeled 'MB' does not have a tab so gently tug the cable free from the end after flipping the cable holder.

  17. Lenovo Yoga 3 Pro Motherboard Replacement: 17 단계, 이미지 1/3 Lenovo Yoga 3 Pro Motherboard Replacement: 17 단계, 이미지 2/3 Lenovo Yoga 3 Pro Motherboard Replacement: 17 단계, 이미지 3/3
    • Remove the four #0 2.3mm Phillips screws holding down the motherboard.

    • Remove the two #0 2.9mm Phillips screws holding down the fan.

  18. Lenovo Yoga 3 Pro Motherboard Replacement: 18 단계, 이미지 1/3 Lenovo Yoga 3 Pro Motherboard Replacement: 18 단계, 이미지 2/3 Lenovo Yoga 3 Pro Motherboard Replacement: 18 단계, 이미지 3/3
    • Make sure the motherboard and fan are not caught on anything when flipping it over.

    • Gently lift and flip the motherboard over.

  19. Lenovo Yoga 3 Pro Motherboard Replacement: 19 단계, 이미지 1/3 Lenovo Yoga 3 Pro Motherboard Replacement: 19 단계, 이미지 2/3 Lenovo Yoga 3 Pro Motherboard Replacement: 19 단계, 이미지 3/3
    • Flip the cable lock holding down the monitor connector.

    • Remove the monitor connector by tugging on the tab.

결론

To reassemble your device, follow these instructions in reverse order.

다른 5명이 해당 안내서를 완성하였습니다.

Nathan Lui

회원 가입일: 04/10/17

839 평판

안내서 5개 작성하였습니다

Cal Poly, Team S13-G6, Forte Spring 2017 Cal Poly, Team S13-G6, Forte Spring 2017 회원

CPSU-FORTE-S17S13G6

4 회원들

안내서 12개 작성하였습니다

댓글 2개

There is a tremendous difference between this model and the lenovo yoga 4 900-13ISK.

These instructions do not apply, but some steps are similar

corey - 답글

Hi. Do you have any idea where I could by a replacement motherboard and how much that would cost? Please answer to martin.loffler@gmail.com. Thank you so much. Best, Martin

Martin Loffler - 답글

댓글 쓰기

조회 통계:

24 시간 전: 2

7일 전: 15

30일 전: 47

전체 시간: 7,622