주요 콘텐츠로 건너뛰기

Lenovo Yoga 720-12IKB Motherboard Replacement

필요한 것

  1. Lenovo Yoga 720-12IKB Motherboard Replacement, Battery: 1 단계, 이미지 1/1
    • Unscrew and remove the four 5.5 mm Phillips #00 screws on the back panel.

  2. Lenovo Yoga 720-12IKB Motherboard Replacement: 2 단계, 이미지 1/1
    • Pull down on the cover to remove it and you will see the battery after removing the cover.

  3. Lenovo Yoga 720-12IKB Motherboard Replacement: 3 단계, 이미지 1/2 Lenovo Yoga 720-12IKB Motherboard Replacement: 3 단계, 이미지 2/2
    • Unscrew and remove the 4.0 mm Phillips #00 screws on the battery to remove it from the motherboard.

  4. Lenovo Yoga 720-12IKB Motherboard Replacement: 4 단계, 이미지 1/2 Lenovo Yoga 720-12IKB Motherboard Replacement: 4 단계, 이미지 2/2
    • Remove the battery wires from the socket on the motherboard above the battery.

  5. Lenovo Yoga 720-12IKB Motherboard Replacement: 5 단계, 이미지 1/1
    • Finally remove the battery from the case.

  6. Lenovo Yoga 720-12IKB Motherboard Replacement, Motherboard: 6 단계, 이미지 1/1
    • The motherboard is located above the battery.

  7. Lenovo Yoga 720-12IKB Motherboard Replacement: 7 단계, 이미지 1/1
    • Unscrew and remove the 2.0 mm Phillips #00 screws.

  8. Lenovo Yoga 720-12IKB Motherboard Replacement: 8 단계, 이미지 1/2 Lenovo Yoga 720-12IKB Motherboard Replacement: 8 단계, 이미지 2/2
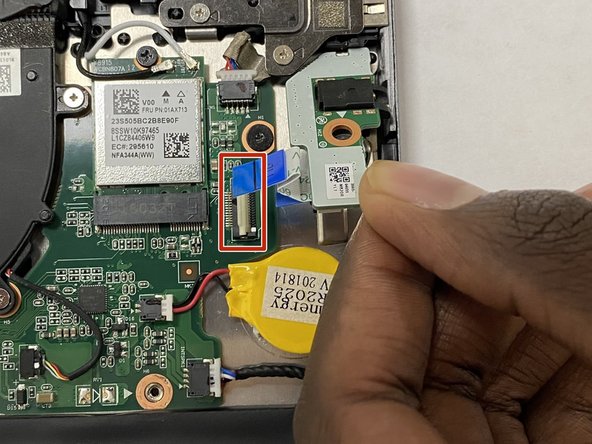
    • Disconnect the connectors by lifting up the clip and pulling them out.

  9. Lenovo Yoga 720-12IKB Motherboard Replacement: 9 단계, 이미지 1/1
    • Remove the 4.0 mm Phillips #00 screws from the fan.

    • Remove the 4.0 mm Phillips #00 screws from the heatsink.

  10. Lenovo Yoga 720-12IKB Motherboard Replacement: 10 단계, 이미지 1/2 Lenovo Yoga 720-12IKB Motherboard Replacement: 10 단계, 이미지 2/2
    • Remove the 5.5 mm Phillips #00 screws from the hinge.

    • Remove the 4.0 mm Phillips #00 screws froom the hinge.

    • Open the laptop a little to lift the hinge.

  11. Lenovo Yoga 720-12IKB Motherboard Replacement: 11 단계, 이미지 1/1
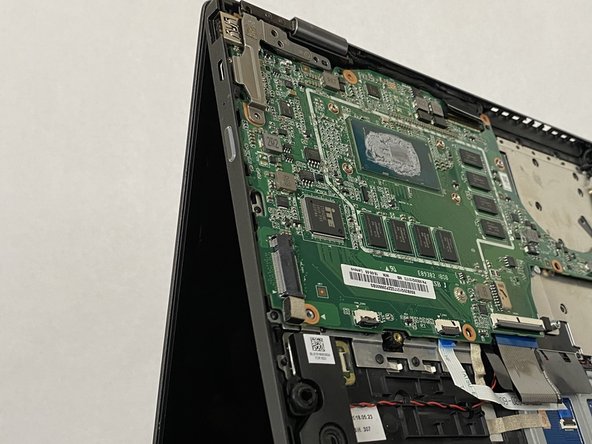
    • Remove the motherboard after all screws are out and connectors are disconnected.

결론

To reassemble your device, follow these instructions in reverse order.

Alex Escobar

회원 가입일: 02/10/22

778 평판

안내서 6개 작성하였습니다

Gateway, Team 1-4, Pee Spring 2022 Gateway, Team 1-4, Pee Spring 2022 회원

GCC-PEE-S22S1G4

3 회원들

안내서 6개 작성하였습니다

댓글 0개

댓글 쓰기

조회 통계:

24 시간 전: 0

7일 전: 7

30일 전: 22

전체 시간: 347