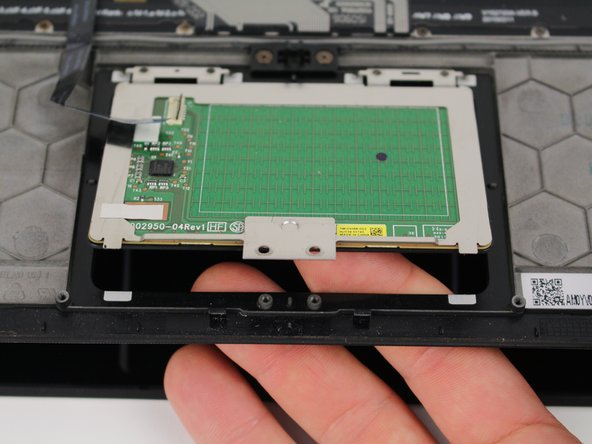
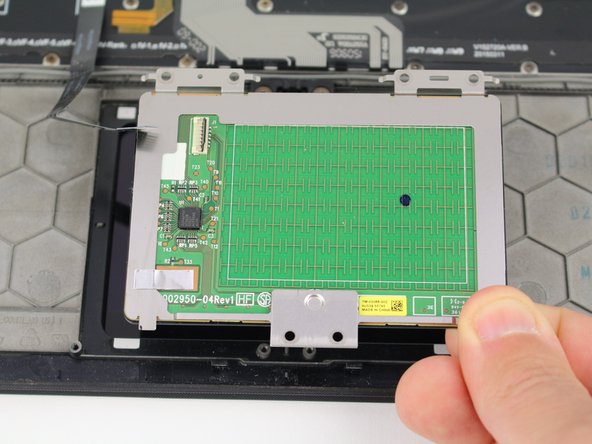
주요 콘텐츠로 건너뛰기

Lenovo Yoga 900-13ISK Trackpad Replacement

필요한 것

  1. Lenovo Yoga 900-13ISK Trackpad Replacement, Back Cover: 1 단계, 이미지 1/2 Lenovo Yoga 900-13ISK Trackpad Replacement, Back Cover: 1 단계, 이미지 2/2
    • Using a T5 Torx screwdriver, remove the ten 5.5 mm screws from the back case of the laptop.

  2. Lenovo Yoga 900-13ISK Trackpad Replacement: 2 단계, 이미지 1/3 Lenovo Yoga 900-13ISK Trackpad Replacement: 2 단계, 이미지 2/3 Lenovo Yoga 900-13ISK Trackpad Replacement: 2 단계, 이미지 3/3
    • Use a spudger to pry open the back case at the hinges of the laptop.

    • There are plastic clips around the perimeter of the case holding down the back cover. These will need to be popped off as the cover is removed.

    • Use your fingers to completely pop off the back cover.

  3. Lenovo Yoga 900-13ISK Trackpad Replacement, Battery: 3 단계, 이미지 1/3 Lenovo Yoga 900-13ISK Trackpad Replacement, Battery: 3 단계, 이미지 2/3 Lenovo Yoga 900-13ISK Trackpad Replacement, Battery: 3 단계, 이미지 3/3
    • Remove the five 3.6 mm screws from the battery with a Phillips #00 screwdriver.

  4. Lenovo Yoga 900-13ISK Trackpad Replacement: 4 단계, 이미지 1/3 Lenovo Yoga 900-13ISK Trackpad Replacement: 4 단계, 이미지 2/3 Lenovo Yoga 900-13ISK Trackpad Replacement: 4 단계, 이미지 3/3
    • Grab the bottom corners of the battery and gently pull the battery until the cable disconnects from the connector on the motherboard.

    • While reassembling, use a plastic spudger to push the battery cable into the connector on the underside of the motherboard. This will be easier to do before the screws are replaced.

  5. Lenovo Yoga 900-13ISK Trackpad Replacement, Trackpad: 5 단계, 이미지 1/3 Lenovo Yoga 900-13ISK Trackpad Replacement, Trackpad: 5 단계, 이미지 2/3 Lenovo Yoga 900-13ISK Trackpad Replacement, Trackpad: 5 단계, 이미지 3/3
    • Use a spudger to lift the hinged black tab of the ZIF connector on the trackpad.

  6. Lenovo Yoga 900-13ISK Trackpad Replacement: 6 단계, 이미지 1/2 Lenovo Yoga 900-13ISK Trackpad Replacement: 6 단계, 이미지 2/2
    • Pull the cable out from the connector with your fingers.

  7. Lenovo Yoga 900-13ISK Trackpad Replacement: 7 단계, 이미지 1/3 Lenovo Yoga 900-13ISK Trackpad Replacement: 7 단계, 이미지 2/3 Lenovo Yoga 900-13ISK Trackpad Replacement: 7 단계, 이미지 3/3
    • Remove the six 2.2 mm screws from the trackpad with a Phillips #00 screwdriver.

  8. Lenovo Yoga 900-13ISK Trackpad Replacement: 8 단계, 이미지 1/3 Lenovo Yoga 900-13ISK Trackpad Replacement: 8 단계, 이미지 2/3 Lenovo Yoga 900-13ISK Trackpad Replacement: 8 단계, 이미지 3/3
    • Press the trackpad up from the bottom by opening the laptop slightly and applying pressure from the keyboard side.

    • Remove the trackpad.

결론

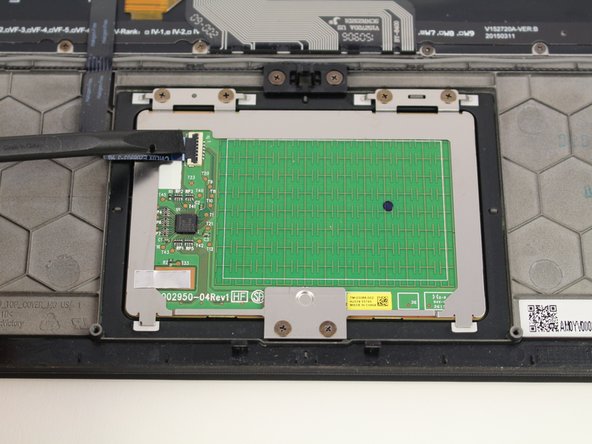
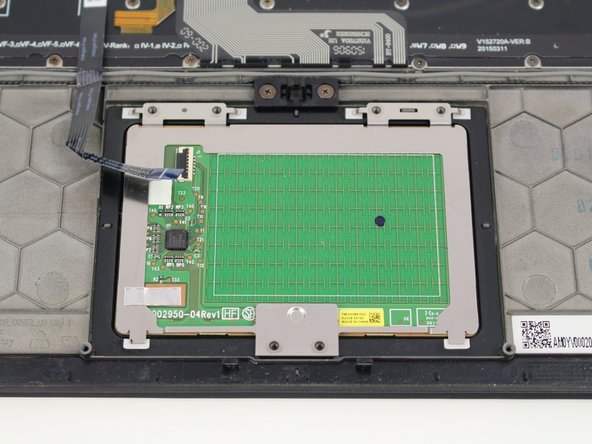
To reassemble your device, follow these instructions in reverse order.

Austin Blakely

회원 가입일: 03/11/19

19,536 평판

안내서 53개 작성하였습니다

iFixit iFixit 회원

Staff

135 회원들

안내서 17,198개 작성하였습니다

댓글 0개

댓글 쓰기

조회 통계:

24 시간 전: 0

7일 전: 2

30일 전: 5

전체 시간: 319