주요 콘텐츠로 건너뛰기

Lenovo Yoga 920-13IKB Screen Replacement

필요한 것

  1. Lenovo Yoga 920-13IKB Screen Replacement, Screen: 1 단계, 이미지 1/3 Lenovo Yoga 920-13IKB Screen Replacement, Screen: 1 단계, 이미지 2/3 Lenovo Yoga 920-13IKB Screen Replacement, Screen: 1 단계, 이미지 3/3
    • Rotate the device into tablet mode so the device’s screen is facing up.

  2. Lenovo Yoga 920-13IKB Screen Replacement: 2 단계, 이미지 1/3 Lenovo Yoga 920-13IKB Screen Replacement: 2 단계, 이미지 2/3 Lenovo Yoga 920-13IKB Screen Replacement: 2 단계, 이미지 3/3
    • Pry the metal cover up from the bottom of the screen with the iFixit Opening Tool to reveal the corners of the white adhesive strip.

    • Pull the metal cover off the device until it's completely free.

    • Clean off the old adhesive and straighten the metal cover when reassembling.

    • Use a new adhesive when reassembling.

    • Avoid bending the metal cover to prevent damage to the device.

    • If you’re really struggling, you may pry from the opposite side, but be careful not to damage the screen or metal cover.

  3. Lenovo Yoga 920-13IKB Screen Replacement: 3 단계, 이미지 1/2 Lenovo Yoga 920-13IKB Screen Replacement: 3 단계, 이미지 2/2
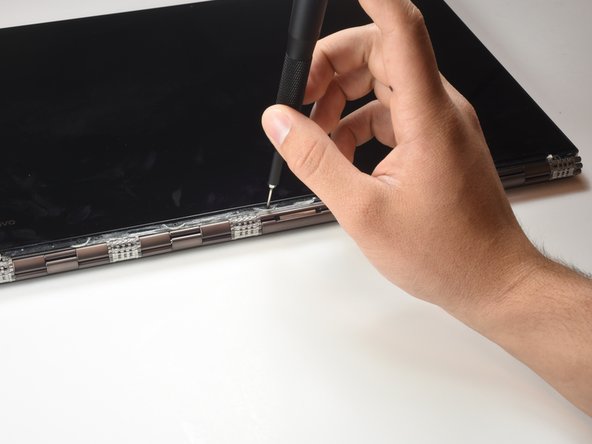
    • Remove the eight 3mm Phillips #000 screws that were below the metal cover to loosen the screen.

  4. Lenovo Yoga 920-13IKB Screen Replacement: 4 단계, 이미지 1/3 Lenovo Yoga 920-13IKB Screen Replacement: 4 단계, 이미지 2/3 Lenovo Yoga 920-13IKB Screen Replacement: 4 단계, 이미지 3/3
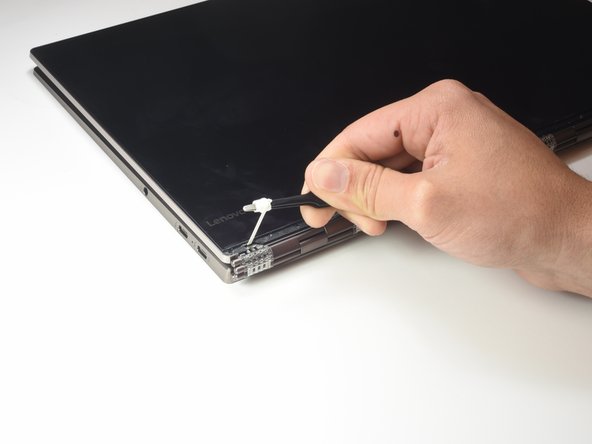
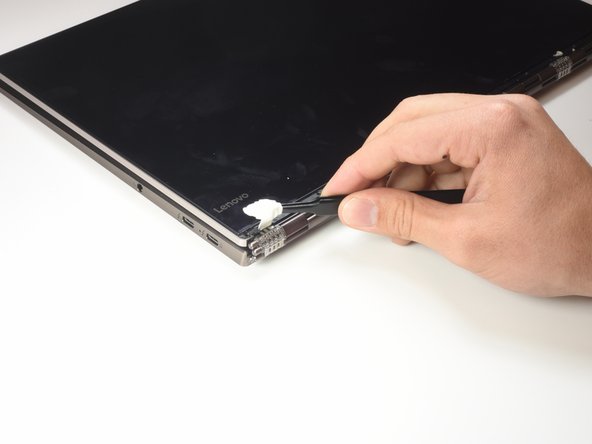
    • Pull out the white adhesives using the iFixit Tweezers.

    • Roll the tape around the iFixit Tweezers to remove successfully.

  5. Lenovo Yoga 920-13IKB Screen Replacement: 5 단계, 이미지 1/1
    • Pry up the screen with the iFixit Opening Tool.

  6. Lenovo Yoga 920-13IKB Screen Replacement: 6 단계, 이미지 1/2 Lenovo Yoga 920-13IKB Screen Replacement: 6 단계, 이미지 2/2
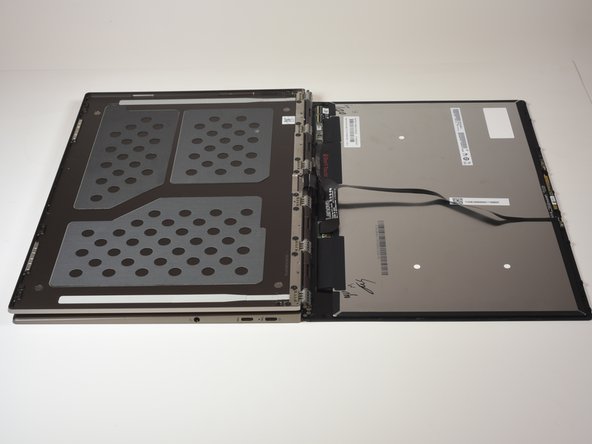
    • Lift the screen with your hands and place the the screen face down, keeping the device in the same location.

  7. Lenovo Yoga 920-13IKB Screen Replacement: 7 단계, 이미지 1/1
    • Flip up the black tab on the connector at the top of the screen with the iFixit Opening Tool.

  8. Lenovo Yoga 920-13IKB Screen Replacement: 8 단계, 이미지 1/1
    • Use the iFixit Tweezers to remove the ribbon cable from the connector.

  9. Lenovo Yoga 920-13IKB Screen Replacement: 9 단계, 이미지 1/1
    • Flip up the black tab on the smallest connector at the bottom of the screen with the iFixit Opening Tool.

  10. Lenovo Yoga 920-13IKB Screen Replacement: 10 단계, 이미지 1/1
    • Use the iFixit Tweezers to remove the ribbon cable from the connector.

  11. Lenovo Yoga 920-13IKB Screen Replacement: 11 단계, 이미지 1/1
    • Flip up the thick black cable at the bottom of the screen with your thumb.

    • Use the iFixit Opening Tool to lift up the brass tab to free up the cable.

  12. Lenovo Yoga 920-13IKB Screen Replacement: 12 단계, 이미지 1/1
    • Remove the ribbon cable from the connector to detach the screen from the device.

결론

To reassemble your device, follow these instructions in reverse order.

다른 한 분이 해당 안내서를 완성하였습니다.

Alyssa McCulloch

회원 가입일: 01/24/19

1,906 평판

안내서 9개 작성하였습니다

Cal Poly, Team S2-G3, White Winter 2019 Cal Poly, Team S2-G3, White Winter 2019 회원

CPSU-WHITE-W19S2G3

4 회원들

안내서 29개 작성하였습니다

댓글 5개

Does this also appy to the Yoga 910-13IBK?

Tony Salazar - 답글

Alyssa, I am about to tackle this job to replace a cracked screen - I greatly appreciate your guide. In step 2 you recommend using new adhesive. What adhesive is recommended exactly?

Bradley Buege - 답글

See this youtube video from Lenovo on LCD tape, how to find what kind, how to remove it, and how to reapply it.

https://www.youtube.com/watch?v=EeUM312_...

Robert -

You missed the camera transfer step. I completed the screen replacement only to find no camera for Zoom. Then realized the this procedure didn’t cover the camera transfer.

ddurbin1 - 답글

Ok, 15 minutes to complete this is ridiculous. A seasoned person couldn't do this in 15 minutes, especially when removing and replacing adhesive, etc. That must be a typo.

Syber Geek - 답글

댓글 쓰기

조회 통계:

24 시간 전: 0

7일 전: 7

30일 전: 34

전체 시간: 5,545