주요 콘텐츠로 건너뛰기

Lenovo Yoga Tab 3 8 Back Cover Replacement

필요한 것

  1. Lenovo Yoga Tab 3 8 Back Cover Replacement, Back Cover: 1 단계, 이미지 1/3 Lenovo Yoga Tab 3 8 Back Cover Replacement, Back Cover: 1 단계, 이미지 2/3 Lenovo Yoga Tab 3 8 Back Cover Replacement, Back Cover: 1 단계, 이미지 3/3
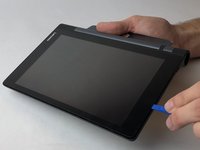
    • Open the kickstand by pressing the release button in the center.

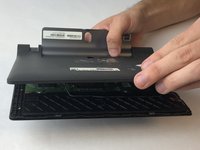
    • Remove the identification sticker with a pair of tweezers to allow access to the two 2mm screws underneath.

  2. Lenovo Yoga Tab 3 8 Back Cover Replacement: 2 단계, 이미지 1/1
    • Remove the three 2mm screws under the kickstand with a PH00 screwdriver.

    • The third 2mm screw to the right may have an S sticker covering it which you can scrape off.

  3. Lenovo Yoga Tab 3 8 Back Cover Replacement: 3 단계, 이미지 1/3 Lenovo Yoga Tab 3 8 Back Cover Replacement: 3 단계, 이미지 2/3 Lenovo Yoga Tab 3 8 Back Cover Replacement: 3 단계, 이미지 3/3
    • Starting along the edge opposite of the hinge, insert a plastic opening tool between the screen and the backing to begin separating the small clips holding the backing on.

    • Work along the edge and then up the sides, separating the clips with the plastic opening tool.

    • There is adhesive underneath the slot for the SD card so you will need to slowly apply some force to break the adhesive.

    • As the back is separated from the device, be careful to not lose the power button. It may come loose and fall out.

결론

To reassemble your device, follow these instructions in reverse order.

다른 3명이 해당 안내서를 완성하였습니다.

Nicklaus Krems

회원 가입일: 09/25/17

1,049 평판

안내서 8개 작성하였습니다

USF Tampa, Team S16-G2, Eyestone Fall 2017 USF Tampa, Team S16-G2, Eyestone Fall 2017 회원

USFT-EYESTONE-F17S16G2

4 회원들

안내서 16개 작성하였습니다

댓글 한 개

Had put the SIM in the Memory card slot, instructions came in handy.

Brijesh Rajashekara - 답글

댓글 쓰기

조회 통계:

24 시간 전: 0

7일 전: 4

30일 전: 9

전체 시간: 2,838