주요 콘텐츠로 건너뛰기

Lenovo Yoga Tab 3 8 Battery Replacement

필요한 것

  1. Lenovo Yoga Tab 3 8 Battery Replacement, Back Cover: 1 단계, 이미지 1/3 Lenovo Yoga Tab 3 8 Battery Replacement, Back Cover: 1 단계, 이미지 2/3 Lenovo Yoga Tab 3 8 Battery Replacement, Back Cover: 1 단계, 이미지 3/3
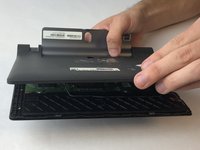
    • Open the kickstand by pressing the release button in the center.

    • Remove the identification sticker with a pair of tweezers to allow access to the two 2mm screws underneath.

  2. Lenovo Yoga Tab 3 8 Battery Replacement: 2 단계, 이미지 1/1
    • Remove the three 2mm screws under the kickstand with a PH00 screwdriver.

    • The third 2mm screw to the right may have an S sticker covering it which you can scrape off.

  3. Lenovo Yoga Tab 3 8 Battery Replacement: 3 단계, 이미지 1/3 Lenovo Yoga Tab 3 8 Battery Replacement: 3 단계, 이미지 2/3 Lenovo Yoga Tab 3 8 Battery Replacement: 3 단계, 이미지 3/3
    • Starting along the edge opposite of the hinge, insert a plastic opening tool between the screen and the backing to begin separating the small clips holding the backing on.

    • Work along the edge and then up the sides, separating the clips with the plastic opening tool.

    • There is adhesive underneath the slot for the SD card so you will need to slowly apply some force to break the adhesive.

    • As the back is separated from the device, be careful to not lose the power button. It may come loose and fall out.

  4. Lenovo Yoga Tab 3 8 Battery Replacement, Hinge: 4 단계, 이미지 1/3 Lenovo Yoga Tab 3 8 Battery Replacement, Hinge: 4 단계, 이미지 2/3 Lenovo Yoga Tab 3 8 Battery Replacement, Hinge: 4 단계, 이미지 3/3
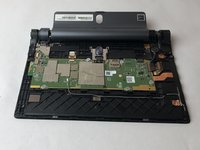
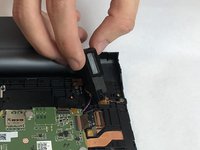
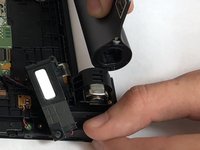
    • With the tablet oriented screen side down and hinge opposite of you, locate the black plastic piece on the top right.

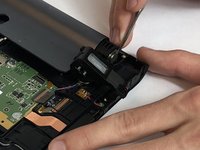
    • Remove the upper 4mm and lower 3mm screws with a PH00 screwdriver.

  5. Lenovo Yoga Tab 3 8 Battery Replacement: 5 단계, 이미지 1/2 Lenovo Yoga Tab 3 8 Battery Replacement: 5 단계, 이미지 2/2
    • Position the kickstand to an almost closed position. Carefully move the plastic block aside and pry the metal lock out with a metal spudger.

    • Be careful not to pull off the wires connecting the plastic block.

    • The lock may be difficult to remove so you may need to apply more pressure to release the lock.

  6. Lenovo Yoga Tab 3 8 Battery Replacement: 6 단계, 이미지 1/3 Lenovo Yoga Tab 3 8 Battery Replacement: 6 단계, 이미지 2/3 Lenovo Yoga Tab 3 8 Battery Replacement: 6 단계, 이미지 3/3
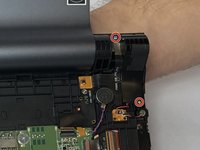
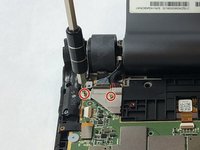
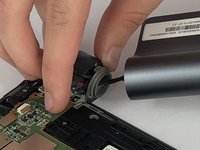
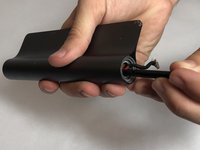
    • At the opposite end of the hinge, locate the silver metal bracket over the wires coming from the end of the hinge. Remove the two 3mm screws with a PH00 screwdriver. Lift the bracket off with your fingers.

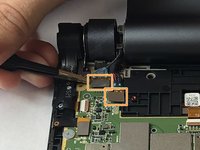
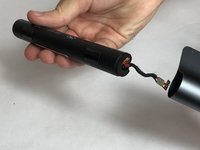
    • Removing the bracket will expose two silver connectors at the ends of the wires coming from the end of the hinge. Use tweezers to carefully lift off the two silver connectors.

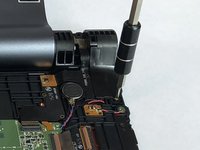
    • Locate the smaller metal wire bracket guiding the wires coming from the end of the hinge. Remove the single black 2mm screw with a PH00 screwdriver. Lift the bracket off with your fingers.

  7. Lenovo Yoga Tab 3 8 Battery Replacement: 7 단계, 이미지 1/2 Lenovo Yoga Tab 3 8 Battery Replacement: 7 단계, 이미지 2/2
    • Begin removing the entire hinge assembly by lifting it out, starting at the end where the lock is located. Carefully feed the wires through the hinge mount with your fingers as you pull the hinge assembly free.

  8. Lenovo Yoga Tab 3 8 Battery Replacement, Battery: 8 단계, 이미지 1/1
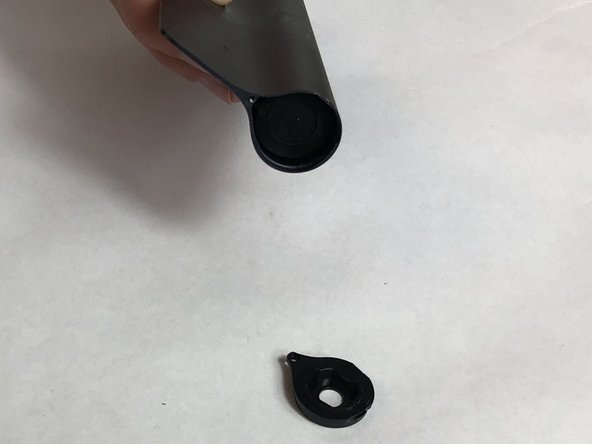
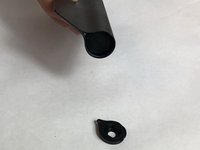
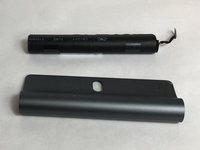
    • With the hinge removed, locate the end with no wires coming out. Peel back the black screw cover with a pair of tweezers and remove the 3mm screw with a PH00 screwdriver.

  9. Lenovo Yoga Tab 3 8 Battery Replacement: 9 단계, 이미지 1/2 Lenovo Yoga Tab 3 8 Battery Replacement: 9 단계, 이미지 2/2
    • Pry out the end cap with a plastic spudger.

  10. Lenovo Yoga Tab 3 8 Battery Replacement: 10 단계, 이미지 1/3 Lenovo Yoga Tab 3 8 Battery Replacement: 10 단계, 이미지 2/3 Lenovo Yoga Tab 3 8 Battery Replacement: 10 단계, 이미지 3/3
    • Begin pushing the battery out using a plastic spudger at the wired end.

    • Be careful not to puncture the battery.

    • Pull the battery the rest of the way free from the hinge assembly with your hands.

    • Be careful not to snag the wire and connector on the hinge assembly as you are pulling the battery out.

결론

To reassemble your device, follow these instructions in reverse order.

다른 10명이 해당 안내서를 완성하였습니다.

Nicklaus Krems

회원 가입일: 09/25/17

1,049 평판

안내서 8개 작성하였습니다

USF Tampa, Team S16-G2, Eyestone Fall 2017 USF Tampa, Team S16-G2, Eyestone Fall 2017 회원

USFT-EYESTONE-F17S16G2

4 회원들

안내서 16개 작성하였습니다

댓글 4개

I’ve read that battery can just be unplugged, then plugged back in for a hard reset. Looks easier than replacing the whole thing?

Ads - 답글

In case please make a vedio and upload in YouTube that I can replaced my lenovo battery easily without any problem.

Ajay Meetei - 답글

My yoga tablet battery appears to be dead. Is it ok to leave it in the tab for a few weeks?

shobha rani - 답글

Please where i can buy this battery…

syed ahtesham ulla - 답글

댓글 쓰기

조회 통계:

24 시간 전: 2

7일 전: 16

30일 전: 70

전체 시간: 15,173