주요 콘텐츠로 건너뛰기

Lenovo Yoga 3 Pro SSD Replacement

보관된 가이드
해당 안내서는 단지 역사적인 목적으로 보관됩니다. 최신 버전 안내서를 사용하여 수리 하십시오.

필요한 것

  1. Lenovo Yoga 3 Pro SSD Replacement, Back Panel: 1 단계, 이미지 1/2 Lenovo Yoga 3 Pro SSD Replacement, Back Panel: 1 단계, 이미지 2/2
    • Flip the laptop so that the back panel is facing up.

    • Remove the ten 4.0mm T6 Torx screws from the back of the laptop.

  2. Lenovo Yoga 3 Pro SSD Replacement: 2 단계, 이미지 1/1
    • Gently lift the back cover off of the laptop.

  3. Lenovo Yoga 3 Pro SSD Replacement, Battery: 3 단계, 이미지 1/2 Lenovo Yoga 3 Pro SSD Replacement, Battery: 3 단계, 이미지 2/2
    • Push the black battery cable towards the battery to disconnect it.

  4. Lenovo Yoga 3 Pro SSD Replacement: 4 단계, 이미지 1/2 Lenovo Yoga 3 Pro SSD Replacement: 4 단계, 이미지 2/2
    • Remove the six #0 3.8mm Phillips screws from the battery.

  5. Lenovo Yoga 3 Pro SSD Replacement: 5 단계, 이미지 1/1
    • Gently lift the battery out of the laptop chassis.

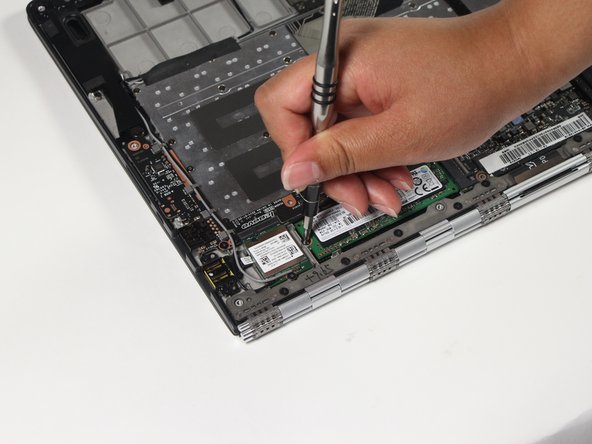
  6. Lenovo Yoga 3 Pro SSD Replacement, SSD: 6 단계, 이미지 1/2 Lenovo Yoga 3 Pro SSD Replacement, SSD: 6 단계, 이미지 2/2
    • Remove the one #0 2.9mm Phillips screw from the SSD.

  7. Lenovo Yoga 3 Pro SSD Replacement: 7 단계, 이미지 1/1
    • Gently lift and wiggle the SSD side to side to remove it from the laptop chassis.

결론

To reassemble your device, follow these instructions in reverse order.

다른 3명이 해당 안내서를 완성하였습니다.

Nathan Lui

회원 가입일: 04/10/17

839 평판

안내서 5개 작성하였습니다

Cal Poly, Team S13-G6, Forte Spring 2017 Cal Poly, Team S13-G6, Forte Spring 2017 회원

CPSU-FORTE-S17S13G6

4 회원들

안내서 12개 작성하였습니다

댓글 3개

For my Yoga 900 I needed a T5 Torx screw driver. Otherwise spot on.

Dan Benze - 답글

thanks for the info, what about the data from the original drive??

Jos Chan - 답글

Why did you remove the battery? Was it necessary?

Chris Horsfall - 답글

댓글 쓰기

조회 통계:

24 시간 전: 0

7일 전: 0

30일 전: 1

전체 시간: 4,881