주요 콘텐츠로 건너뛰기

Linksys EA6900 Power Port Replacement

필요한 것

  1. Linksys EA6900 Power Port Replacement, Linksys EA6900 Disassembly: 1 단계, 이미지 1/3 Linksys EA6900 Power Port Replacement, Linksys EA6900 Disassembly: 1 단계, 이미지 2/3 Linksys EA6900 Power Port Replacement, Linksys EA6900 Disassembly: 1 단계, 이미지 3/3
    • Remove the antennas by unscrewing them from the base.

    • Flip over the device and locate the four rubber feet on the bottom.

    • Remove the rubber feet with tweezers

  2. Linksys EA6900 Power Port Replacement: 2 단계, 이미지 1/1
    • Remove the 0.4cm head screws from each slot with the #1 Phillips head Screwdriver.

  3. Linksys EA6900 Power Port Replacement: 3 단계, 이미지 1/1
    • Use a blue plastic opening tool to remove the top cover.

    • Move the blue plastic opening tool gently underneath the top cover from side to side.

  4. Linksys EA6900 Power Port Replacement: 4 단계, 이미지 1/3 Linksys EA6900 Power Port Replacement: 4 단계, 이미지 2/3 Linksys EA6900 Power Port Replacement: 4 단계, 이미지 3/3
    • Gently lift the motherboard and remove it from the case

    • Put the motherboard over a (preferably white) surface.

  5. Linksys EA6900 Power Port Replacement, Power Port: 5 단계, 이미지 1/2 Linksys EA6900 Power Port Replacement, Power Port: 5 단계, 이미지 2/2
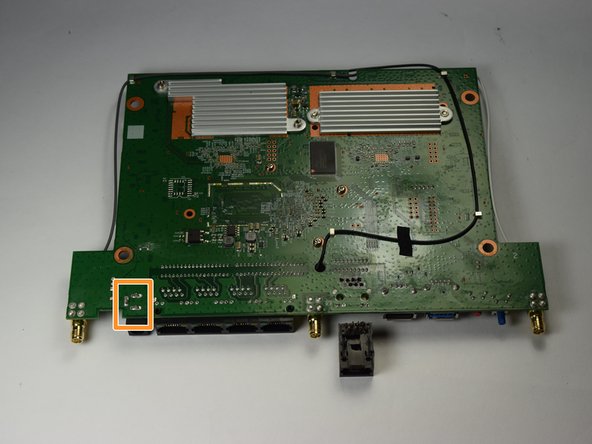
    • Locate the power port on both sides of the motherboard.

    • The power port on the top side is in a rectangular black casing.

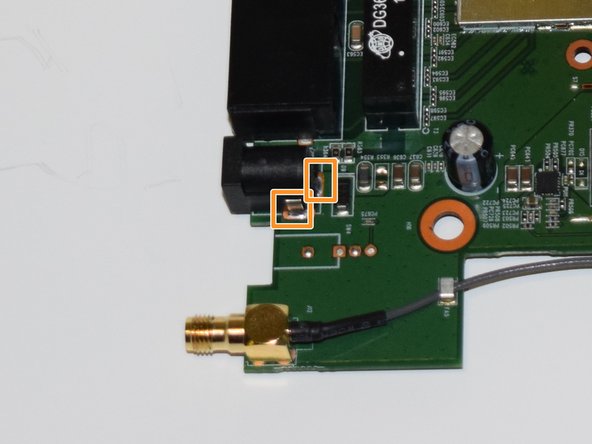
    • Identify the three prongs where the power port is soldered to on the reverse side.

  6. Linksys EA6900 Power Port Replacement: 6 단계, 이미지 1/3 Linksys EA6900 Power Port Replacement: 6 단계, 이미지 2/3 Linksys EA6900 Power Port Replacement: 6 단계, 이미지 3/3
    • Carefully apply the soldering iron on each of the three points on the bottom side of the motherboard to melt them.

    • Be careful to not touch the motherboard with the soldering iron, you can damage the circuits.

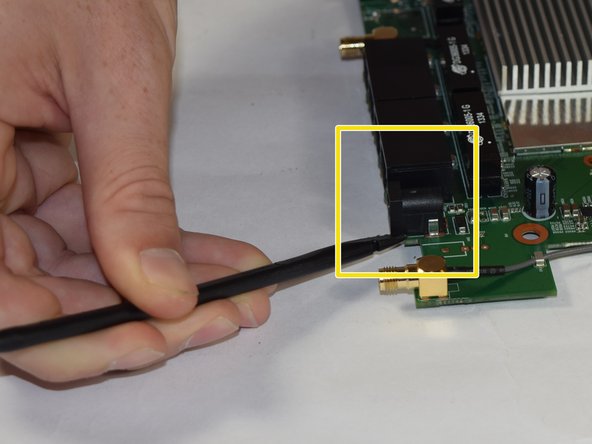
    • After you have melted and removed the solder, flip the mother board around and identify the connecting points of the power port.

    • Use a black spudger to gently separate the power port from the motherboard

결론

To reassemble your device, follow these instructions in reverse order.

다른 2명이 해당 안내서를 완성하였습니다.

Tyler Markiewicz

회원 가입일: 09/15/16

267 평판

안내서 1개 작성함

USF Tampa, Team 11-1, Blackwell Fall 2016 USF Tampa, Team 11-1, Blackwell Fall 2016 회원

USFT-BLACKWELL-F16S11G1

4 회원들

안내서 12개 작성하였습니다

댓글 0개

댓글 쓰기

조회 통계:

24 시간 전: 0

7일 전: 3

30일 전: 10

전체 시간: 793