소개
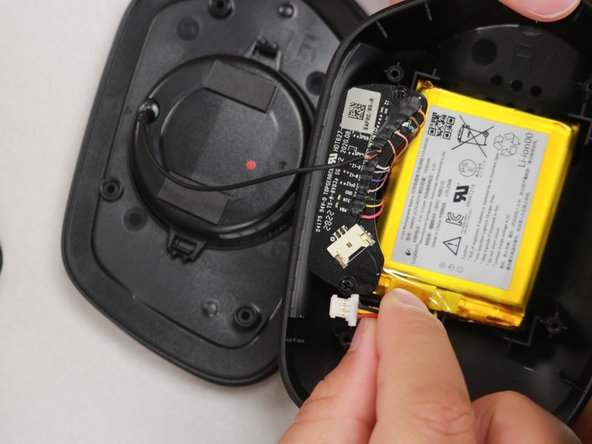
If your battery will no longer accept a charge and you need to replace the battery, you can do so with this guide. For this guide, you will need a T4 Torx screwdriver and a spudger. This is a popular repair and it is very easy to do!
필요한 것
-
-
Gently pull the right ear pad off, starting from the top.
-
Slide your finger around the edges until it releases completely.
-
Remove the ear pad.
-
-


To reassemble your device, please follow these instructions in reverse order.
To reassemble your device, please follow these instructions in reverse order.
다른 3명이 해당 안내서를 완성하였습니다.

팀

Western Carolina University, Team 1-5, Virtue Spring 2023 Western Carolina University, Team 1-5, Virtue Spring 2023 회원
WCU-VIRTUE-S23S1G5
4 회원들
안내서 9개 작성하였습니다
댓글 4개
This guide is great, but mentioning what kind of battery to purchase for the headset would make it infinitely better...
Darbii Rue - 답글
I fully agree
Its a 1.5 phillips on the right side. On the left side its a T5 screw not a T4. And you can easily remove the battery without a spudger. It came out with my bare hands.
took 2 mins to find battery info ..........................
Logi 533-000181