주요 콘텐츠로 건너뛰기

Logitech Harmony Ultimate Charging Station Motherboard Replacement

필요한 것

  1. Logitech Harmony Ultimate Charging Station Motherboard Replacement, Charging Station Motherboard: 1 단계, 이미지 1/3 Logitech Harmony Ultimate Charging Station Motherboard Replacement, Charging Station Motherboard: 1 단계, 이미지 2/3 Logitech Harmony Ultimate Charging Station Motherboard Replacement, Charging Station Motherboard: 1 단계, 이미지 3/3
    • Screws are hidden beneath rubber pads.

    • Peel off the rubber pads.

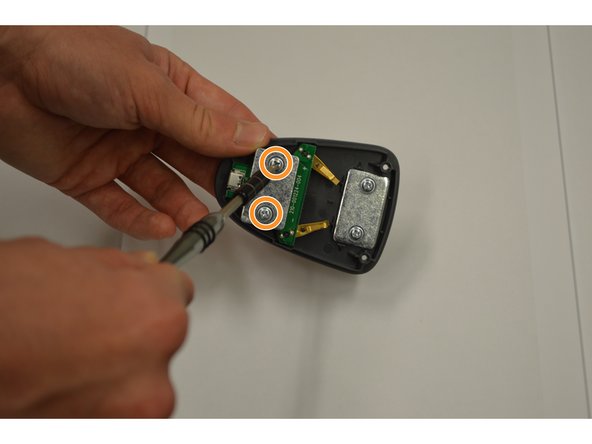
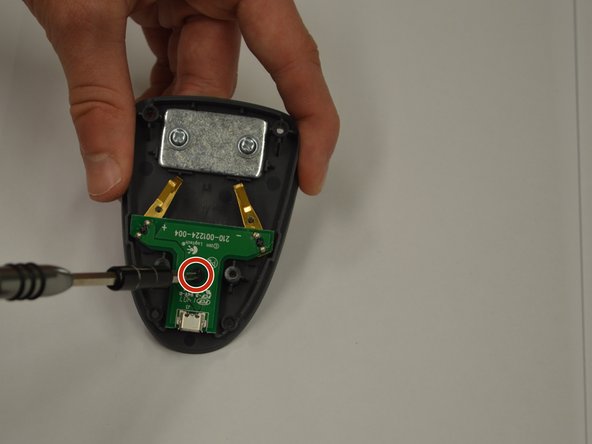
    • Remove four 6mm screws Phillips #0 screws from the bottom of the device.

  2. Logitech Harmony Ultimate Charging Station Motherboard Replacement: 2 단계, 이미지 1/2 Logitech Harmony Ultimate Charging Station Motherboard Replacement: 2 단계, 이미지 2/2
    • Use the plastic opening tool to remove top shell from device.

  3. Logitech Harmony Ultimate Charging Station Motherboard Replacement: 3 단계, 이미지 1/3 Logitech Harmony Ultimate Charging Station Motherboard Replacement: 3 단계, 이미지 2/3 Logitech Harmony Ultimate Charging Station Motherboard Replacement: 3 단계, 이미지 3/3
    • Remove the two (4mm) screws using Phillips 1 screwdriver.

  4. Logitech Harmony Ultimate Charging Station Motherboard Replacement: 4 단계, 이미지 1/3 Logitech Harmony Ultimate Charging Station Motherboard Replacement: 4 단계, 이미지 2/3 Logitech Harmony Ultimate Charging Station Motherboard Replacement: 4 단계, 이미지 3/3
    • Use the Phillips #0 screwdriver to remove the last (4mm) screw. The motherboard can now be removed.

결론

To reassemble your device, follow these instructions in reverse order.

Lucas Reynolds

회원 가입일: 09/01/15

333 평판

안내서 2개 작성하였습니다

USF Tampa, Team 8-1, Eyestone Fall 2015 USF Tampa, Team 8-1, Eyestone Fall 2015 회원

USFT-EYESTONE-F15S8G1

5 회원들

안내서 6개 작성하였습니다

댓글 0개

댓글 쓰기

조회 통계:

24 시간 전: 0

7일 전: 5

30일 전: 14

전체 시간: 2,854