주요 콘텐츠로 건너뛰기

Logitech K400r Wireless Keyboard Disassembly & Cleaning

필요한 것

  1. Logitech K400r Wireless Keyboard Disassembly & Cleaning, Keyboard: 1 단계, 이미지 1/1
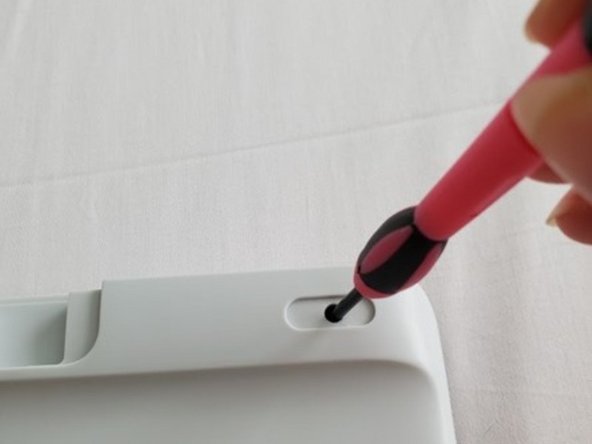
    • Use a small Phillips head screwdriver to unscrew all visible screws on the back of the keyboard.

    • Keep all screws in a safe place for easy reassembly.

    • Ensure the keyboard is shut off before disassembly.

  2. Logitech K400r Wireless Keyboard Disassembly & Cleaning: 2 단계, 이미지 1/2 Logitech K400r Wireless Keyboard Disassembly & Cleaning: 2 단계, 이미지 2/2
    • Remove the battery port so that the batteries are exposed and take them out.

    • Unscrew the screw that is located in the battery port.

  3. Logitech K400r Wireless Keyboard Disassembly & Cleaning: 3 단계, 이미지 1/2 Logitech K400r Wireless Keyboard Disassembly & Cleaning: 3 단계, 이미지 2/2
    • Remove the two rubber pieces off the top of the keyboard.

    • Unscrew screws located under the rubber pieces.

  4. Logitech K400r Wireless Keyboard Disassembly & Cleaning: 4 단계, 이미지 1/1
    • Unscrew the screws located under the label in the center of the back of the keyboard.

  5. Logitech K400r Wireless Keyboard Disassembly & Cleaning: 5 단계, 이미지 1/2 Logitech K400r Wireless Keyboard Disassembly & Cleaning: 5 단계, 이미지 2/2
    • Once you have removed all screws from the exterior, the keyboard should be able to split open and come apart.

    • Carefully pry open the keyboard. You can use your screwdriver or any prying tool.

  6. Logitech K400r Wireless Keyboard Disassembly & Cleaning: 6 단계, 이미지 1/2 Logitech K400r Wireless Keyboard Disassembly & Cleaning: 6 단계, 이미지 2/2
    • Remove the key matrix, which is soft and should be clear or white.

    • Using a dry cloth, lightly wipe off the key matrix.

  7. Logitech K400r Wireless Keyboard Disassembly & Cleaning: 7 단계, 이미지 1/1
    • Using a dry cotton swab, lightly dust off the mousepad and area around the keys on the outside of the board.

  8. Logitech K400r Wireless Keyboard Disassembly & Cleaning: 8 단계, 이미지 1/2 Logitech K400r Wireless Keyboard Disassembly & Cleaning: 8 단계, 이미지 2/2
    • Using compressed air, dust in between the key switches and inside the circuit grid.

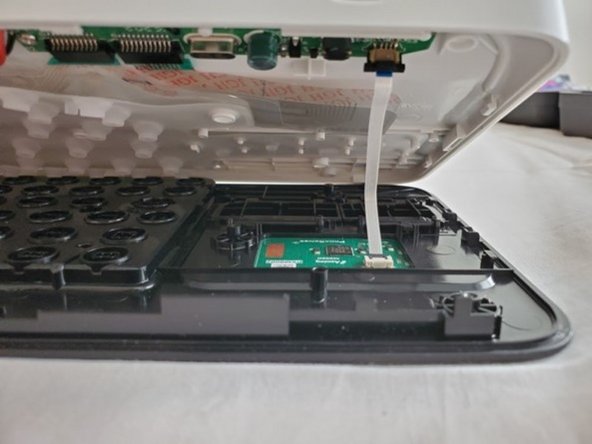
    • After you have cleaned all components of your keyboard, place the key matrix, key switchboard, and circuit grid back inside the keyboard.

    • Place all screws back into the exterior of the keyboard and screw them in tightly.

    • Place batteries back in battery compartment and close the battery port.

    • Keyboard is reassembled!

결승점

다른 3명이 해당 안내서를 완성하였습니다.

Dustie Flowers

회원 가입일: 11/19/21

229 평판

안내서 1개 작성함

댓글 0개

댓글 쓰기

조회 통계:

24 시간 전: 1

7일 전: 9

30일 전: 56

전체 시간: 1,951