주요 콘텐츠로 건너뛰기

MAGNAVOX MDV2300 Power Cord Replacement

필요한 것

  1. MAGNAVOX MDV2300 Power Cord Replacement, Power Cord: 1 단계, 이미지 1/1
    • Make sure the device is unplugged from the wall.

  2. MAGNAVOX MDV2300 Power Cord Replacement: 2 단계, 이미지 1/1
    • Unscrew the two screws that hold together the top panel.

  3. MAGNAVOX MDV2300 Power Cord Replacement: 3 단계, 이미지 1/1
    • Remove the top panel.

  4. MAGNAVOX MDV2300 Power Cord Replacement: 4 단계, 이미지 1/1
  5. MAGNAVOX MDV2300 Power Cord Replacement: 5 단계, 이미지 1/2 MAGNAVOX MDV2300 Power Cord Replacement: 5 단계, 이미지 2/2
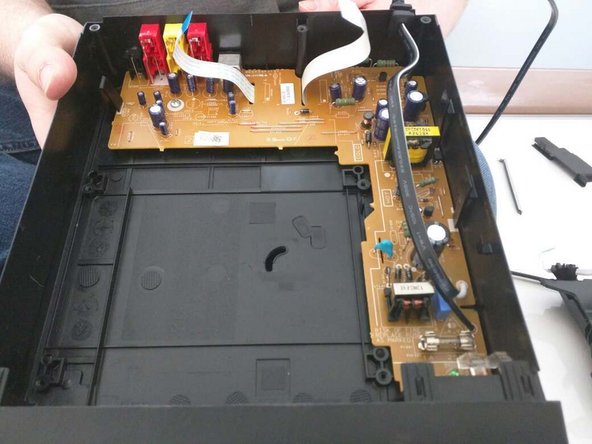
    • Remove disc drive by unscrewing the 2 screws that hold the drive in place.

  6. MAGNAVOX MDV2300 Power Cord Replacement: 6 단계, 이미지 1/1
    • Identify the power cord.

    • The cord must either be too short or torn to warrant replacement.

  7. MAGNAVOX MDV2300 Power Cord Replacement: 7 단계, 이미지 1/1
    • Cut the old wire out from the chip.

    • Attach the new wire into the housing.

    • Line up new wire with the appropriate holes and solder to board.

    • The white wire will be your neutral and the black wire will be your negative. View link of how to solder in order to replace the power cord. http://www.instructables.com/id/How-to-s...

결론

After soldering, let cool and then reassemble your device, follow these instructions in reverse order.

다른 한 분이 해당 안내서를 완성하였습니다.

Justin

회원 가입일: 01/21/15

298 평판

안내서 2개 작성하였습니다

Penn State, Team 1-41, Kaschak Winter 2015 Penn State, Team 1-41, Kaschak Winter 2015 회원

PSU-KASCHAK-W15S1G41

4 회원들

안내서 2개 작성하였습니다

댓글 0개

댓글 쓰기

조회 통계:

24 시간 전: 4

7일 전: 6

30일 전: 9

전체 시간: 514