이 버전에는 잘못된 편집 사항이 있을 수 있습니다. 최신 확인된 스냅샷으로 전환하십시오.
필요한 것
-
이 단계는 번역되지 않았습니다. 번역을 도와주십시오
-
Find the unlock tab located on the upper right side of the device, then slide it to the right.
-
-
이 단계는 번역되지 않았습니다. 번역을 도와주십시오
-
Slide and hold the release tab on the left side of the battery, so that you can remove the battery.
-
-
-
이 단계는 번역되지 않았습니다. 번역을 도와주십시오
-
Remove the four 5mm screws from the back of the device using a Phillips #00 screwdriver.
-
-
이 단계는 번역되지 않았습니다. 번역을 도와주십시오
-
Remove the two 5 mm black screws on the right hand side with a Phillips #0 screwdriver.
-
-
이 단계는 번역되지 않았습니다. 번역을 도와주십시오
-
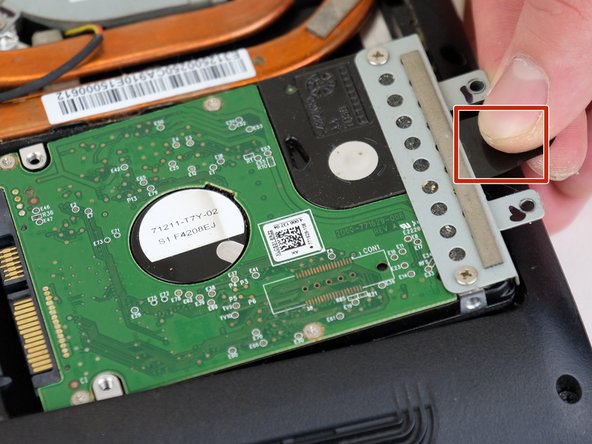
Lift the hard drive, then remove from the device. There is a black strip of plastic attached to make the process easier.
-


다른 3명이 해당 안내서를 완성하였습니다.

팀

Linn Benton Community College, Team S1-G4, Karnes Fall 2018 Linn Benton Community College, Team S1-G4, Karnes Fall 2018 회원
LBCC-KARNES-F18S1G4
4 회원들
안내서 6개 작성하였습니다