소개
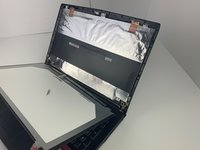
This guide demonstrates how to replace the LCD screen in the MSI GP62MVR 6RF Leopard Pro laptop. It is a moderately difficult process with no special skills required. Avoid touching the circuitry when the screen is off to avoid short-circuiting components or shocking yourself. If the screen has odd pixels, discolored or incorrect textures, or fails to display anything at all, then the LCD screen will need to be replaced. Follow this guide to change the LCD screen in a MSI GP62MVR 6RF Leopard Pro.
필요한 것


To reassemble your device, follow these instructions in reverse order.
다른 한 분이 해당 안내서를 완성하였습니다.

팀

Embry-Riddle Aeronautical University, Team S7-G6, Rauch Spring 2020 Embry-Riddle Aeronautical University, Team S7-G6, Rauch Spring 2020 회원
ERAU-RAUCH-S20S7G6
4 회원들
안내서 6개를 작성함
3가이드 댓글
Hey Jordan, when reassembling the front cover (which in my case, a GP63 Leopard 8RE, is glued at the bottom) what type of glue should be used? Thanks
Hi Jaime, two part expoxy (Alraldite) glue should work, otherwise 3M double-sided adhesive tape would work as well.