주요 콘텐츠로 건너뛰기

MSI GS60 6QE GHOST PRO 4K Motherboard Replacement

필요한 것

  1. MSI GS60 6QE GHOST PRO 4K Motherboard Replacement, Battery: 1 단계, 이미지 1/2 MSI GS60 6QE GHOST PRO 4K Motherboard Replacement, Battery: 1 단계, 이미지 2/2
    • Remove the eleven 5mm screws with a Phillips #0 bit.

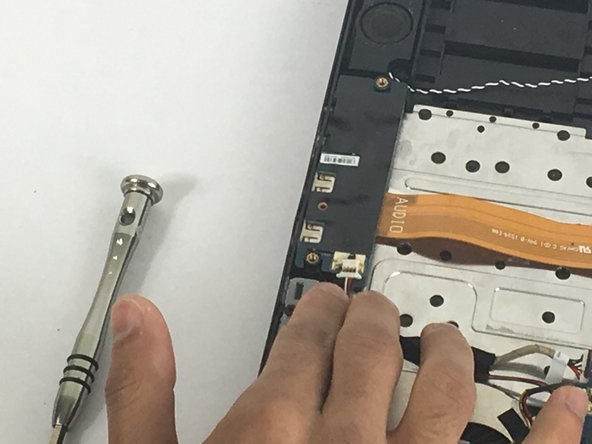
    • Remove the four 2.5mm screws with a Phillips #0 bit.

  2. MSI GS60 6QE GHOST PRO 4K Motherboard Replacement: 2 단계, 이미지 1/2 MSI GS60 6QE GHOST PRO 4K Motherboard Replacement: 2 단계, 이미지 2/2
    • After opening the bottom plate, locate the battery and the battery connection.

  3. MSI GS60 6QE GHOST PRO 4K Motherboard Replacement: 3 단계, 이미지 1/2 MSI GS60 6QE GHOST PRO 4K Motherboard Replacement: 3 단계, 이미지 2/2
    • Unplug the battery connection carefully from the motherboard, and remove the old battery.

  4. MSI GS60 6QE GHOST PRO 4K Motherboard Replacement, Motherboard: 4 단계, 이미지 1/1
    • Remove the four 2.5 mm screws from the motherboard.

  5. MSI GS60 6QE GHOST PRO 4K Motherboard Replacement: 5 단계, 이미지 1/1
    • Unplug the speaker wire.

  6. MSI GS60 6QE GHOST PRO 4K Motherboard Replacement: 6 단계, 이미지 1/2 MSI GS60 6QE GHOST PRO 4K Motherboard Replacement: 6 단계, 이미지 2/2
    • Gently lift the selected black tab that connects the cable onto the board and then slide out the cable.

    • Be careful not to break the black cover.

  7. MSI GS60 6QE GHOST PRO 4K Motherboard Replacement: 7 단계, 이미지 1/2 MSI GS60 6QE GHOST PRO 4K Motherboard Replacement: 7 단계, 이미지 2/2
    • Gently lift the selected black tab that connects the cable onto the board and then slide out the cable.

    • Be careful not to break the black cover because it can be broken easily

  8. MSI GS60 6QE GHOST PRO 4K Motherboard Replacement: 8 단계, 이미지 1/1
    • Gently lift the selected black tab that connects the cable onto the board and then slide out the cable.

    • Be careful not to break the black cover. lift it up gently

  9. MSI GS60 6QE GHOST PRO 4K Motherboard Replacement: 9 단계, 이미지 1/2 MSI GS60 6QE GHOST PRO 4K Motherboard Replacement: 9 단계, 이미지 2/2
    • Gently lift the selected black tab that connects the cable onto the board and then slide out the cable.

  10. MSI GS60 6QE GHOST PRO 4K Motherboard Replacement: 10 단계, 이미지 1/2 MSI GS60 6QE GHOST PRO 4K Motherboard Replacement: 10 단계, 이미지 2/2
    • Gently lift the selected black tab that connects the cable onto the board and then slide out the cable.

  11. MSI GS60 6QE GHOST PRO 4K Motherboard Replacement: 11 단계, 이미지 1/2 MSI GS60 6QE GHOST PRO 4K Motherboard Replacement: 11 단계, 이미지 2/2
    • Unplug the selected cable

  12. MSI GS60 6QE GHOST PRO 4K Motherboard Replacement: 12 단계, 이미지 1/3 MSI GS60 6QE GHOST PRO 4K Motherboard Replacement: 12 단계, 이미지 2/3 MSI GS60 6QE GHOST PRO 4K Motherboard Replacement: 12 단계, 이미지 3/3
    • Locate and unplug the selected cables.

  13. MSI GS60 6QE GHOST PRO 4K Motherboard Replacement: 13 단계, 이미지 1/2 MSI GS60 6QE GHOST PRO 4K Motherboard Replacement: 13 단계, 이미지 2/2
    • Gently lift the selected black tab that connects the cable onto the board and then slide out the cable.

    • Unplug it carefully without breaking the black cover.

  14. MSI GS60 6QE GHOST PRO 4K Motherboard Replacement: 14 단계, 이미지 1/2 MSI GS60 6QE GHOST PRO 4K Motherboard Replacement: 14 단계, 이미지 2/2
    • Gently unplug the selected cable

  15. MSI GS60 6QE GHOST PRO 4K Motherboard Replacement: 15 단계, 이미지 1/2 MSI GS60 6QE GHOST PRO 4K Motherboard Replacement: 15 단계, 이미지 2/2
    • Gently remove the electronic component by sliding it out and lifting it up after unscrewing the 2.5 mm screw

    • Make sure your unscrew the screw first and unplug the chip from the motherboard. Do not disconnect the wires connected to the chip

  16. MSI GS60 6QE GHOST PRO 4K Motherboard Replacement: 16 단계, 이미지 1/1
    • After unplugging all of the cables and unscrewing all of the screws, gently remove the motherboard out of the computer chassis

    • This part will take some effort but remember not to apply to much pressure on the motherboard as to not damage any of the small electrical components on the board

결론

To reassemble your device, follow these instructions in reverse order.

다른 2명이 해당 안내서를 완성하였습니다.

Azher Hamid

회원 가입일: 09/28/17

378 평판

안내서 2개 작성하였습니다

USF Tampa, Team S1-G4, Nance Fall 2017 USF Tampa, Team S1-G4, Nance Fall 2017 회원

USFT-NANCE-F17S1G4

3 회원들

안내서 5개 작성하였습니다

댓글 2개

Hello,

can you please submit us the mainboard version (V1.1 or V1.2) for the MSI GS60 Ghost Pro 4K Laptop?

i need a replacement but i dont know which version is the right one for my GS60 4K (MS-16H71)

thanks in advance

best regards

Sebastian U. - 답글

Hi,

Hi,

I was wondering if you could help me? I need to find a complete bottom section for my MSI GS60 2QEAs it has completely melted. If you could let me know of any possible suppliers I’ll be very grateful.

Stephen Donnelly - 답글

댓글 쓰기

조회 통계:

24 시간 전: 0

7일 전: 3

30일 전: 19

전체 시간: 4,446