주요 콘텐츠로 건너뛰기

MSI GS63VR 7RF Stealth Pro Speakers Replacement

필요한 것

  1. MSI GS63VR 7RF Stealth Pro Speakers Replacement, Battery: 1 단계, 이미지 1/1
    • Use the spudger to separate the back plate from the rest of the computer with the screen up like in the picture.

    • Once the back plate is loose, close the screen for an easier time properly removing it.

  2. MSI GS63VR 7RF Stealth Pro Speakers Replacement: 2 단계, 이미지 1/1
    • Using a Phillips Head #1 screwdriver, unscrew the 15 screws on the bottom of the device

    • After all the screws are unscrewed, remove the bottom plate. If this is the first time that you are removing this back cover, the last screw is hidden under the "factory seal" label. You will need to break that label to reach that screw.

    • Keep track of all the screws and which slot they came from, as they slightly differ. We recommend this system: lay out on a piece of paper and pretending the paper is the device. Place the screws on the paper approximately where they would go.

    • Another method for keeping track of all the screws would be to secure each removed screw near the hole that it was removed from with a piece of painters or masking tape. This type of tape is easy to remove from the fuzzy surface but strong enough to secure the screw to the back cover.

  3. MSI GS63VR 7RF Stealth Pro Speakers Replacement: 3 단계, 이미지 1/3 MSI GS63VR 7RF Stealth Pro Speakers Replacement: 3 단계, 이미지 2/3 MSI GS63VR 7RF Stealth Pro Speakers Replacement: 3 단계, 이미지 3/3
    • Locate the battery.

    • Wedge the spudger underneath the battery, and apply pressure to lift it away from the rest of the device.

    • Gently pull and wiggle the multiple colored wired connector out from the socket.

    • If you are removing the original battery, the back has a couple foam strips that were installed for cushioning. Those can be carefully removed and placed on the new replacement battery, but it is not necessary.

  4. MSI GS63VR 7RF Stealth Pro Speakers Replacement, Hard Drive: 4 단계, 이미지 1/2 MSI GS63VR 7RF Stealth Pro Speakers Replacement, Hard Drive: 4 단계, 이미지 2/2
    • Locate the hard drive.

    • Using a spudger lift the ribbon cable connector.

  5. MSI GS63VR 7RF Stealth Pro Speakers Replacement: 5 단계, 이미지 1/2 MSI GS63VR 7RF Stealth Pro Speakers Replacement: 5 단계, 이미지 2/2
    • Use the tweezers to lift the back tab and pull it back until the ribbon cable disconnects.

    • Wedge the spudger between the hard drive and the device and apply pressure to pry the two apart, and then remove the hard drive.

  6. MSI GS63VR 7RF Stealth Pro Speakers Replacement, Speakers: 6 단계, 이미지 1/3 MSI GS63VR 7RF Stealth Pro Speakers Replacement, Speakers: 6 단계, 이미지 2/3 MSI GS63VR 7RF Stealth Pro Speakers Replacement, Speakers: 6 단계, 이미지 3/3
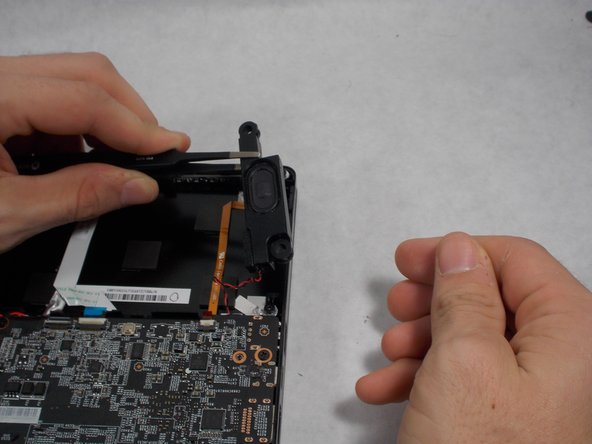
    • First locate the speaker(s).

    • Use the tweezers to lift the speaker from its position.

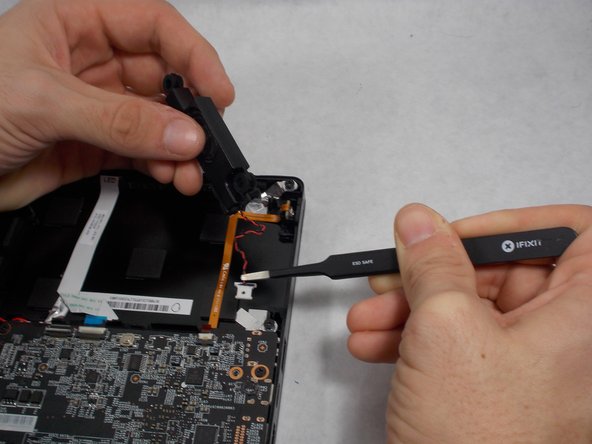
    • Grab the multi-colored wire with the tweezers and gently pull back until the speakers releases from its socket.

    • Applies for both speakers.

    • Keep track of which speaker went where. The connectors for the speakers are unique; you cannot use a speaker that should go on the right side on the left side and vice versa.

결론

To reassemble your device, follow these instructions in reverse order.

다른 한 분이 해당 안내서를 완성하였습니다.

Nicholas Perry

회원 가입일: 10/20/17

543 평판

안내서 2개 작성하였습니다

UMass Dartmouth, Team S2-G1, Julie Fall 2017 UMass Dartmouth, Team S2-G1, Julie Fall 2017 회원

UMASSD-JULIE-F17S2G1

3 회원들

안내서 5개 작성하였습니다

댓글 2개

Where do you buy replacement speakers?

James - 답글

Wondering the same.

Drew Williams - 답글

댓글 쓰기

조회 통계:

24 시간 전: 0

7일 전: 5

30일 전: 15

전체 시간: 4,438